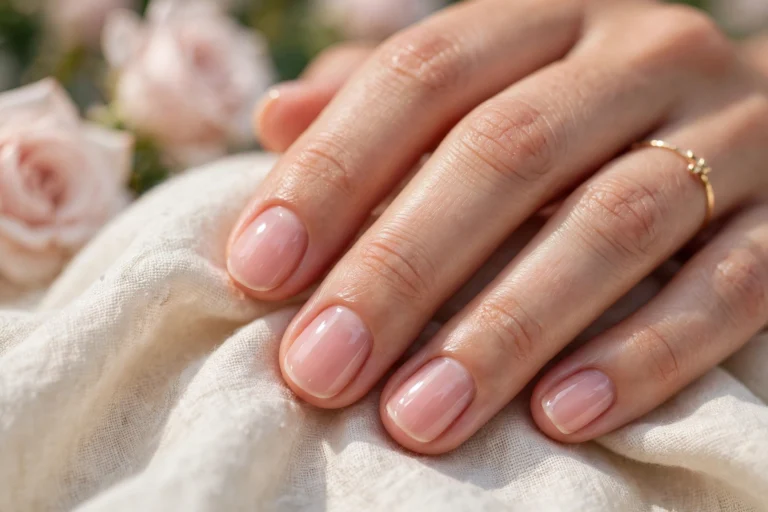
December lights, warm mugs, and a tree dressed in gold all call for nails that feel just as joyful, and christmas tree nails bring that festive magic to your fingertips in the prettiest way. If you love a classic tree design but want it to feel fresh, this collection is made for you. It gathers 25 timeless ideas that keep the tree shape neat and charming, from classic green tips and gold stars to snowy pines, pearl whites, and regal crowns. Each idea works on natural nails, uses simple tools, and suits beginners as well as confident home painters. Pick a favourite to try first, save the rest for later, and enjoy hands that look polished from quiet winter evenings to lively holiday parties and family photos.
Classic Green Tree Tips
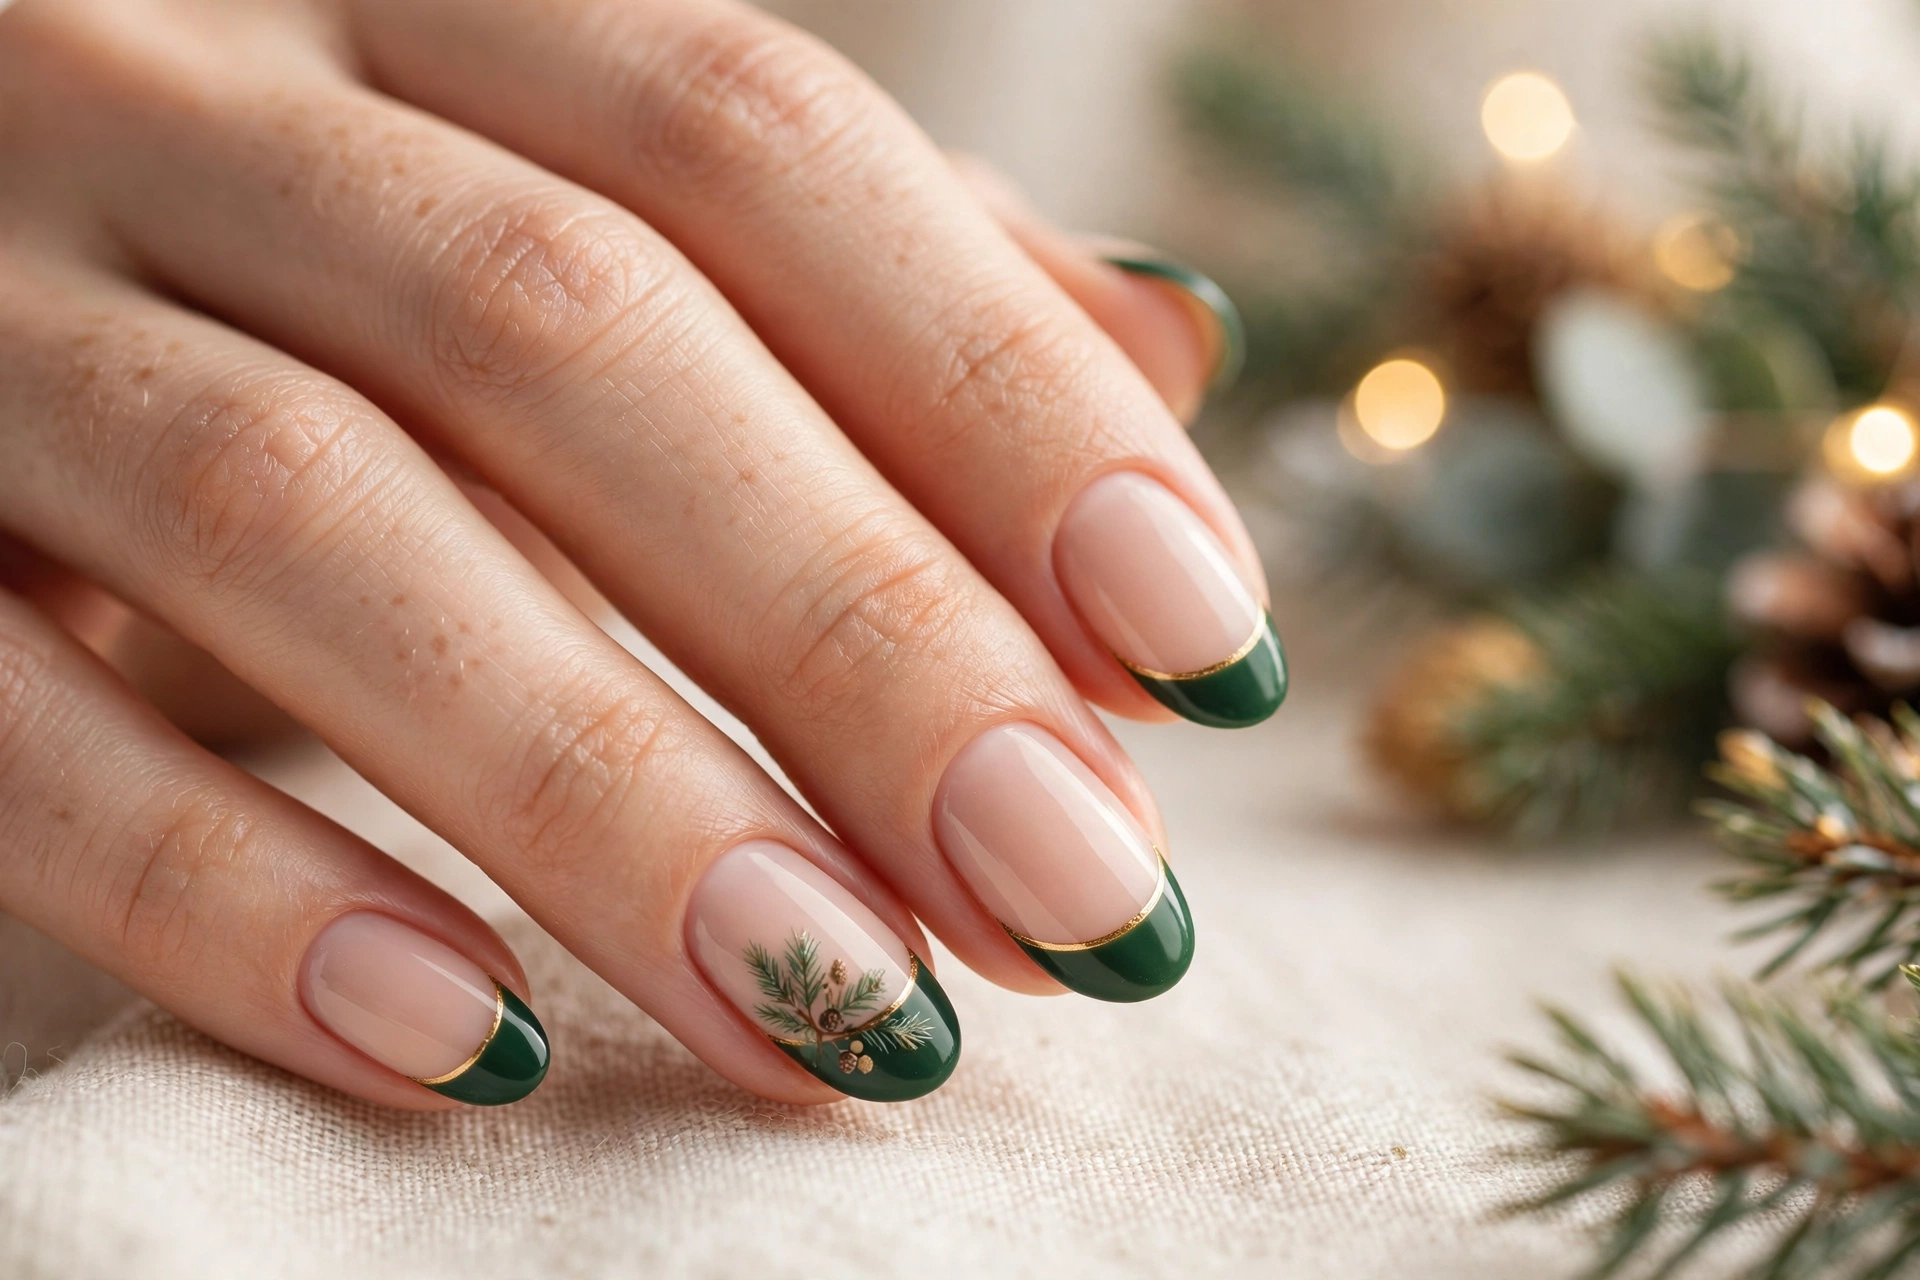
Classic green tips bring a woodland feel to a festive manicure without feeling busy. Paint a deep forest green tip over a soft nude base, then keep the smile line crisp and neat. A thin gold line under the tip adds a quiet sparkle that reads polished in daylight and candlelight alike.
Add one tiny hand painted pine branch on each ring finger for a focal point. Use a fine brush, short strokes, and a dot of gold for a mini ornament. Finish with a glossy top coat to seal the art and keep the green looking rich for days.
Gold Star Tree Accents
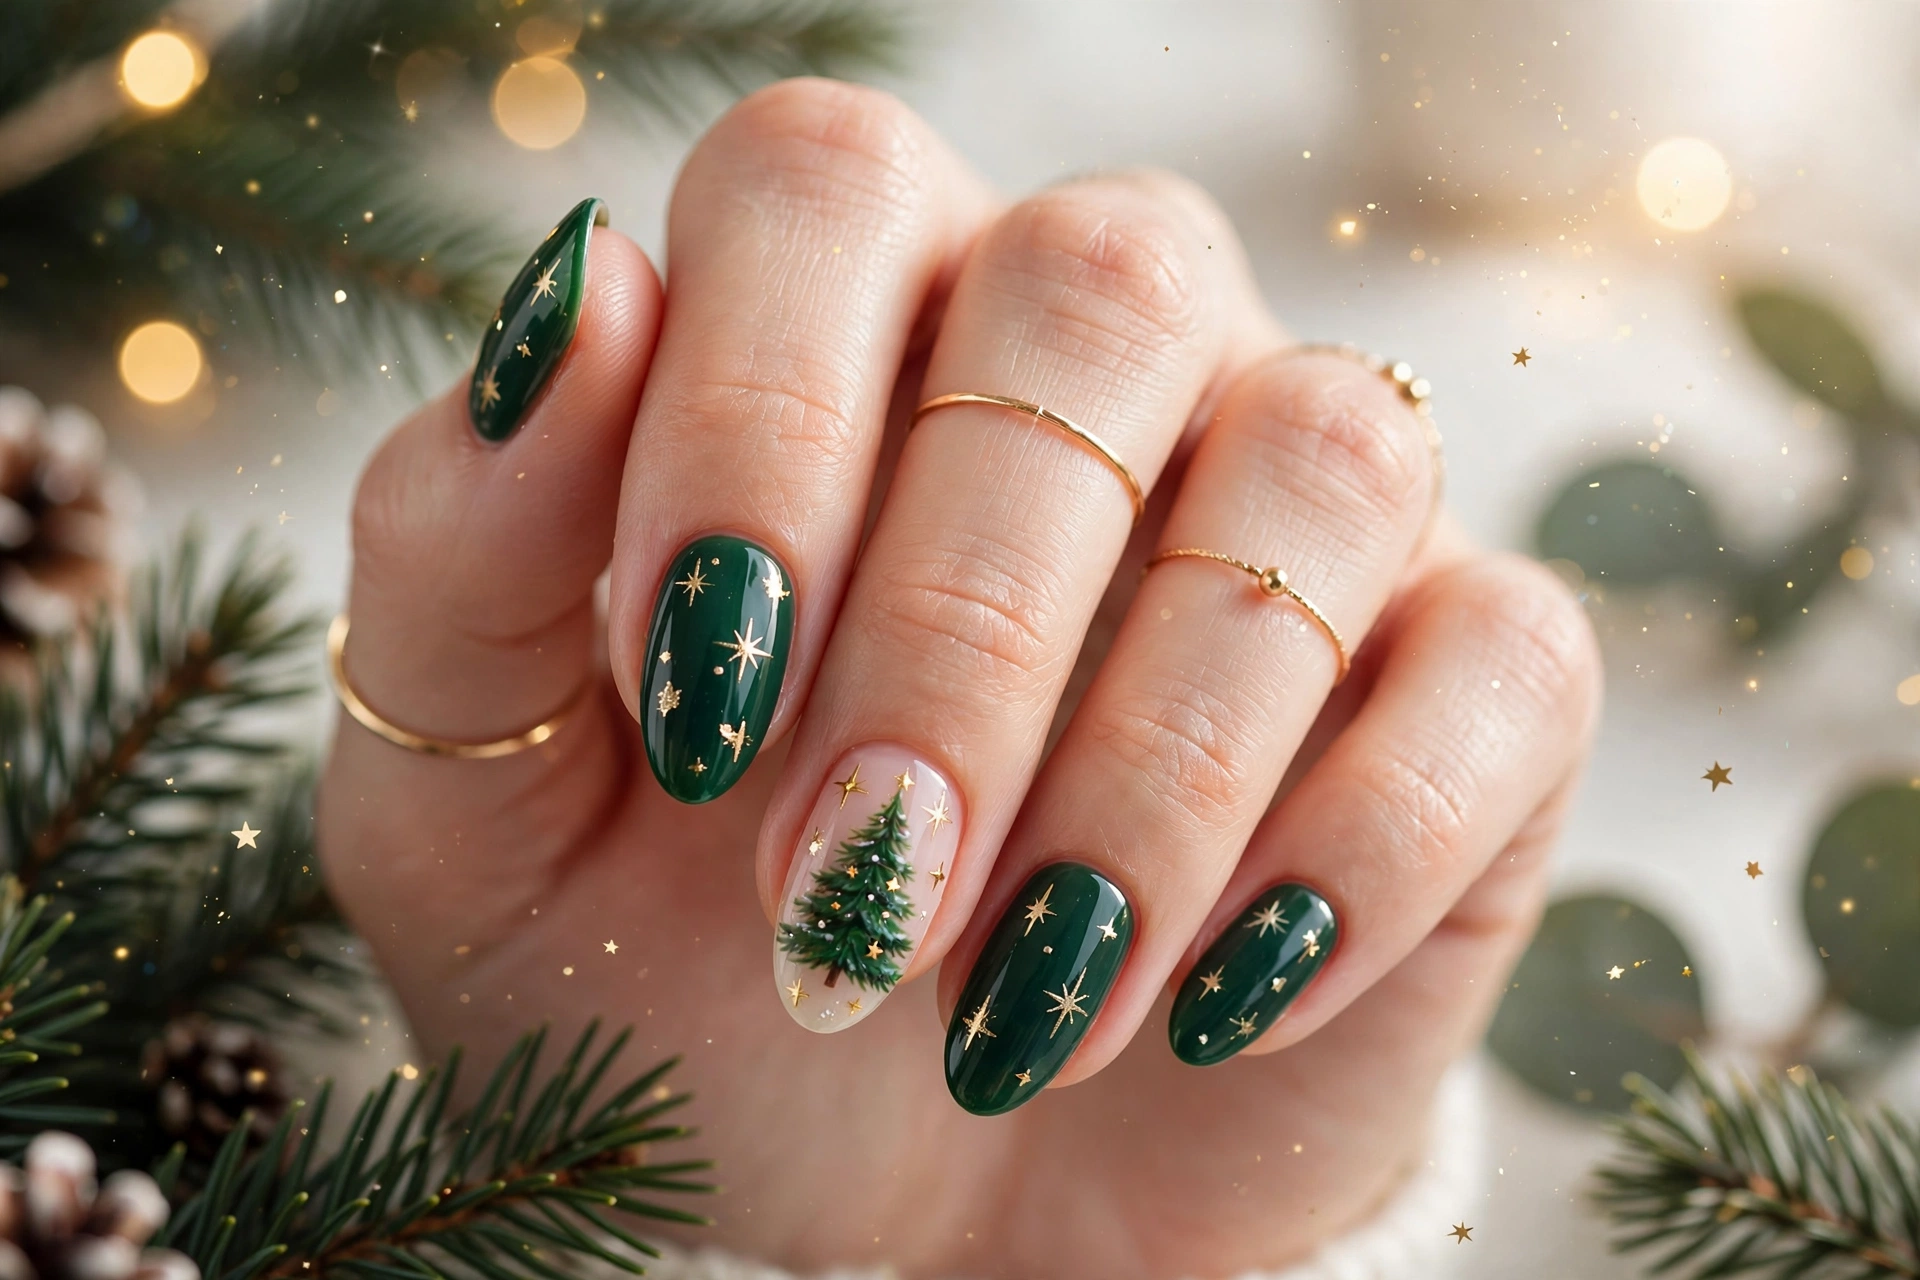
- Choose a deep green base so the gold stars stand out clearly.
- Keep stars small and place them near the tip or cuticle, not the centre.
- Add stars to two accent nails only for a balanced look.
- Seal with a glossy top coat to protect the stars and boost shine.
Gold star accents work best when they stay small and balanced across the hand. Place one star on each accent nail, keep the rest simple, and let the shine do the talking. This look suits parties, family dinners, and photos, and it pairs well with gold rings and a simple black dress.
Red Ornament Tree Nails
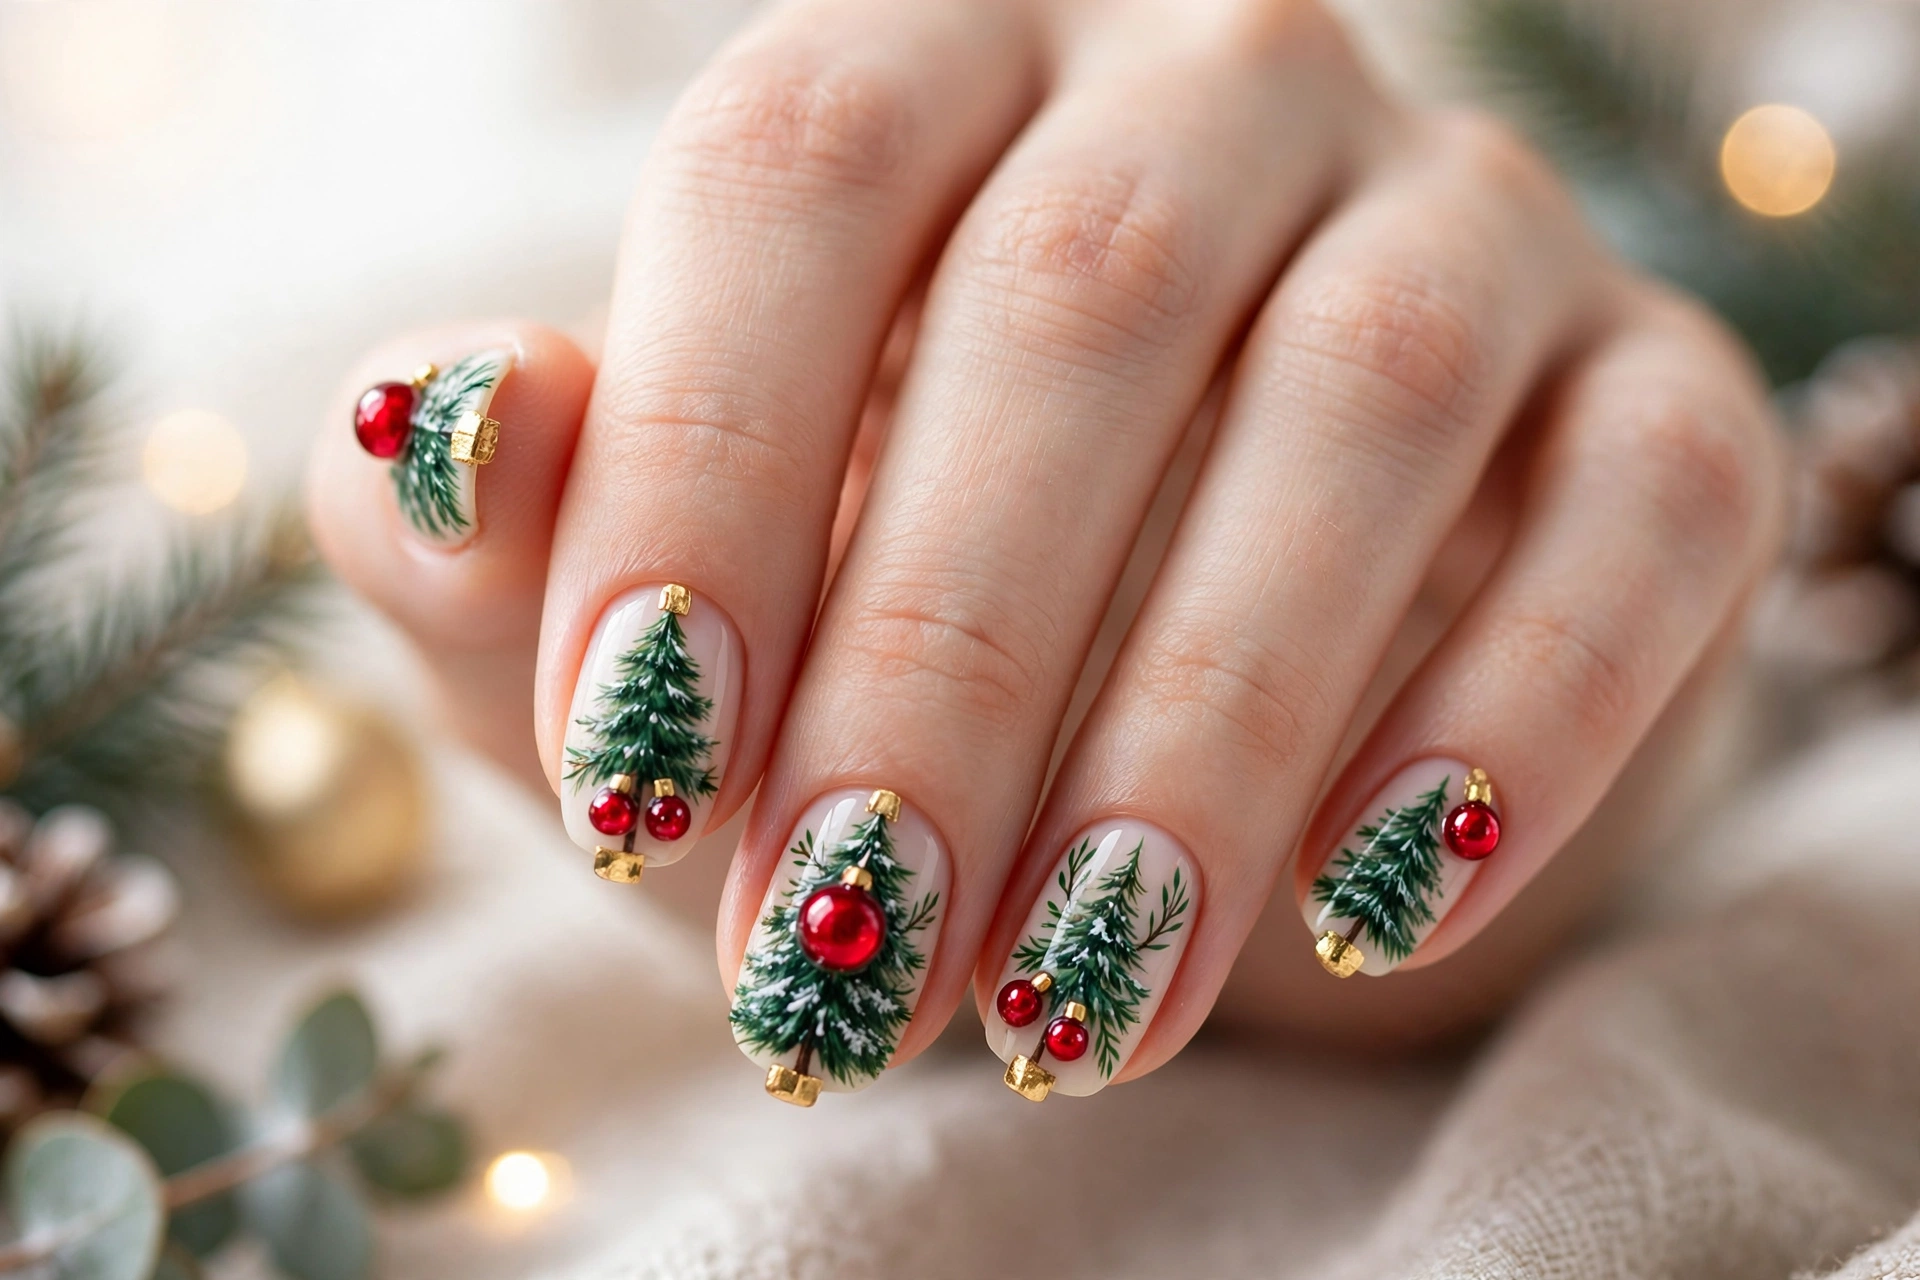
Quick Tip: Let each green layer dry fully before adding red baubles, or the colours may smudge.
Paint the red ornaments last so they sit cleanly over the green branches. Use a dotting tool for round baubles, add a tiny gold dot on top for the cap, and leave breathing space between each ornament. The result looks playful, neat, and ready for every holiday photo.
Snowy Pine Tree Tips
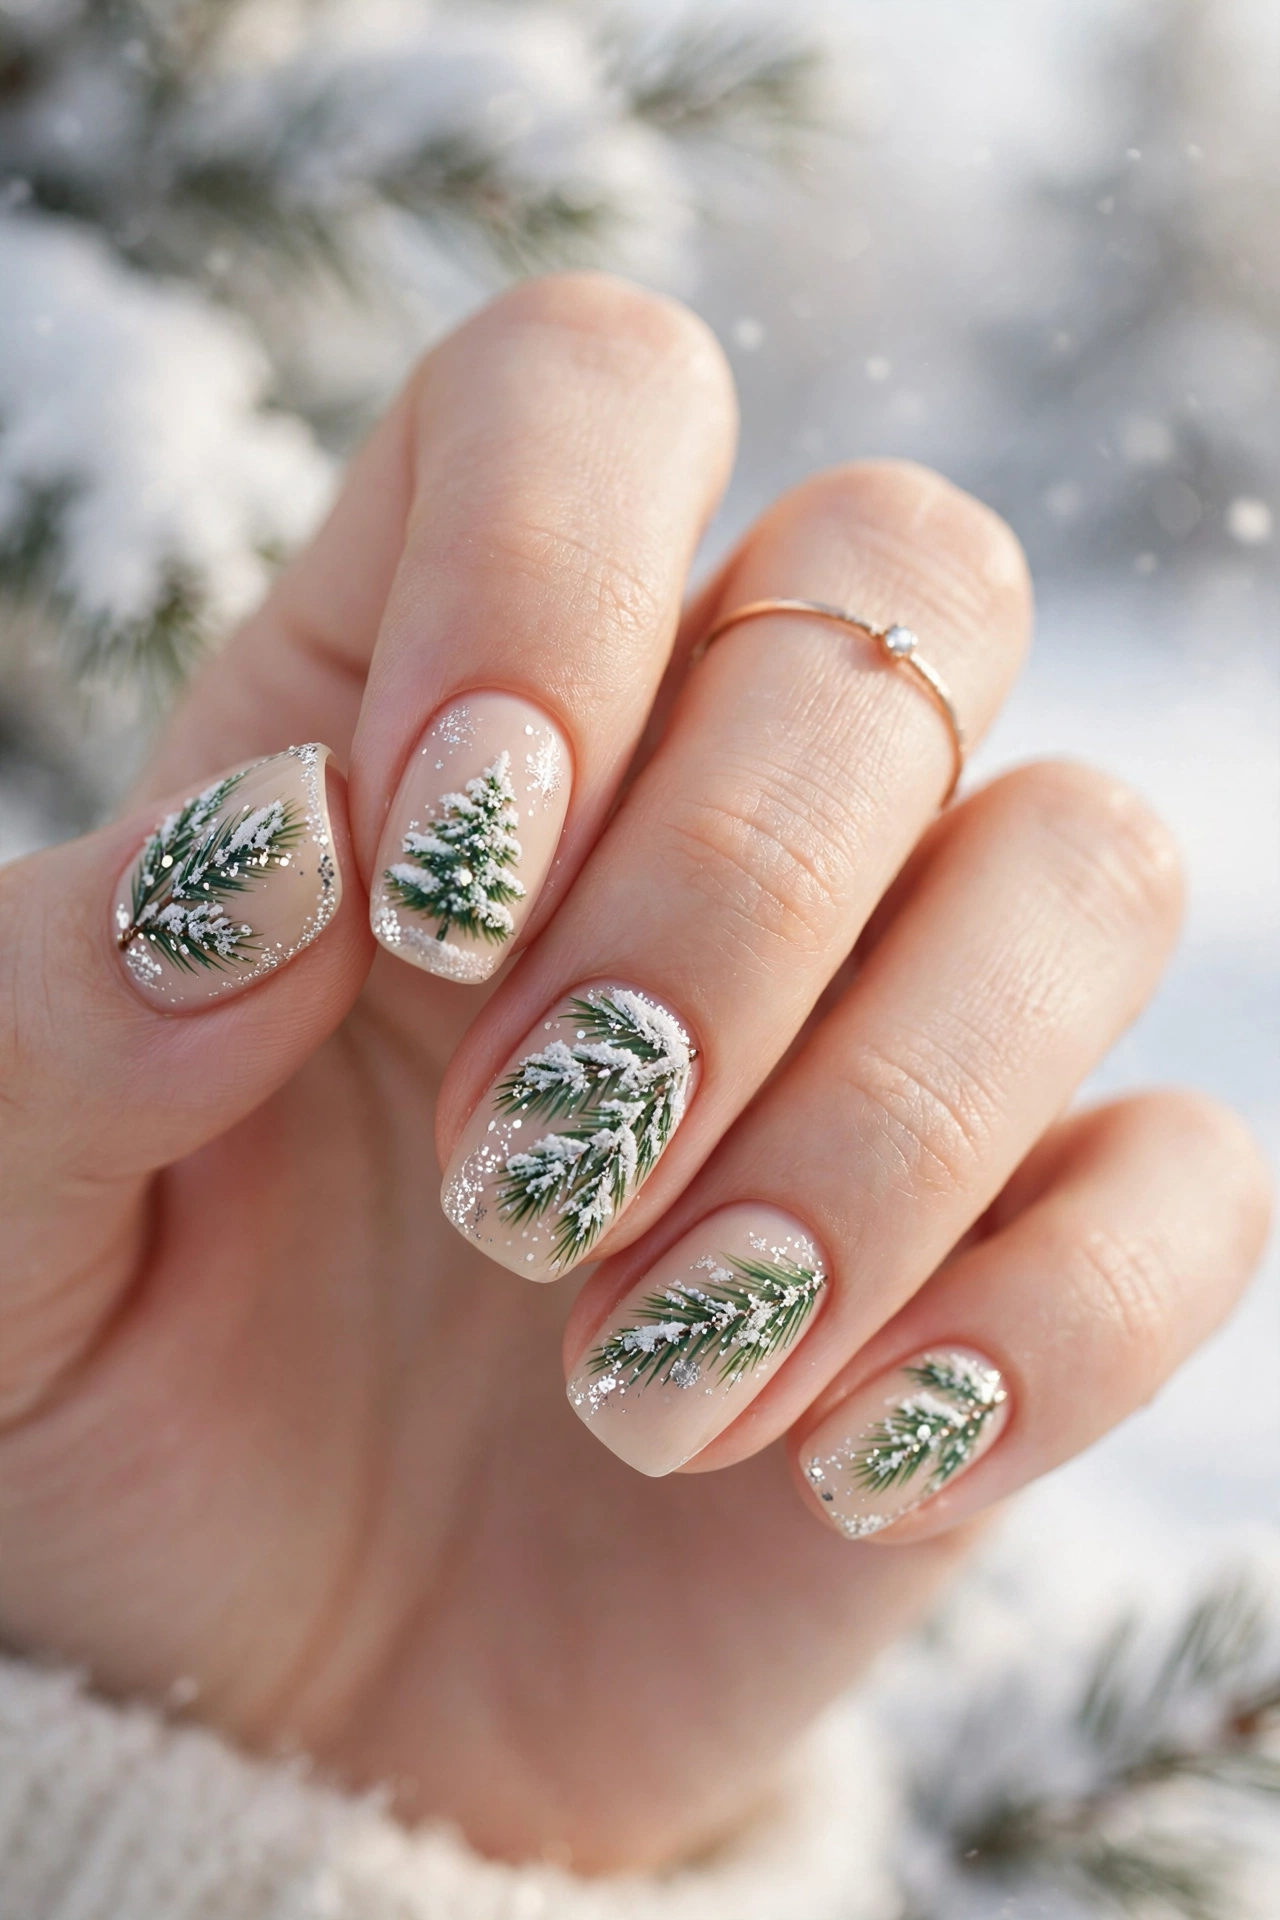
Before: Green pine art without snow can look flat and very bold.
After: A light white dusting adds depth, softness, and a wintry finish.
A snowy finish softens bright green and makes the pine detail easy to read. Sponge white polish lightly over the tips, add a dusting of fine glitter, and keep the base nude for contrast. Seal with a matte top coat if you prefer a frosted look, or choose gloss for fresh fallen snow shine.
Champagne Gold Tree Glow
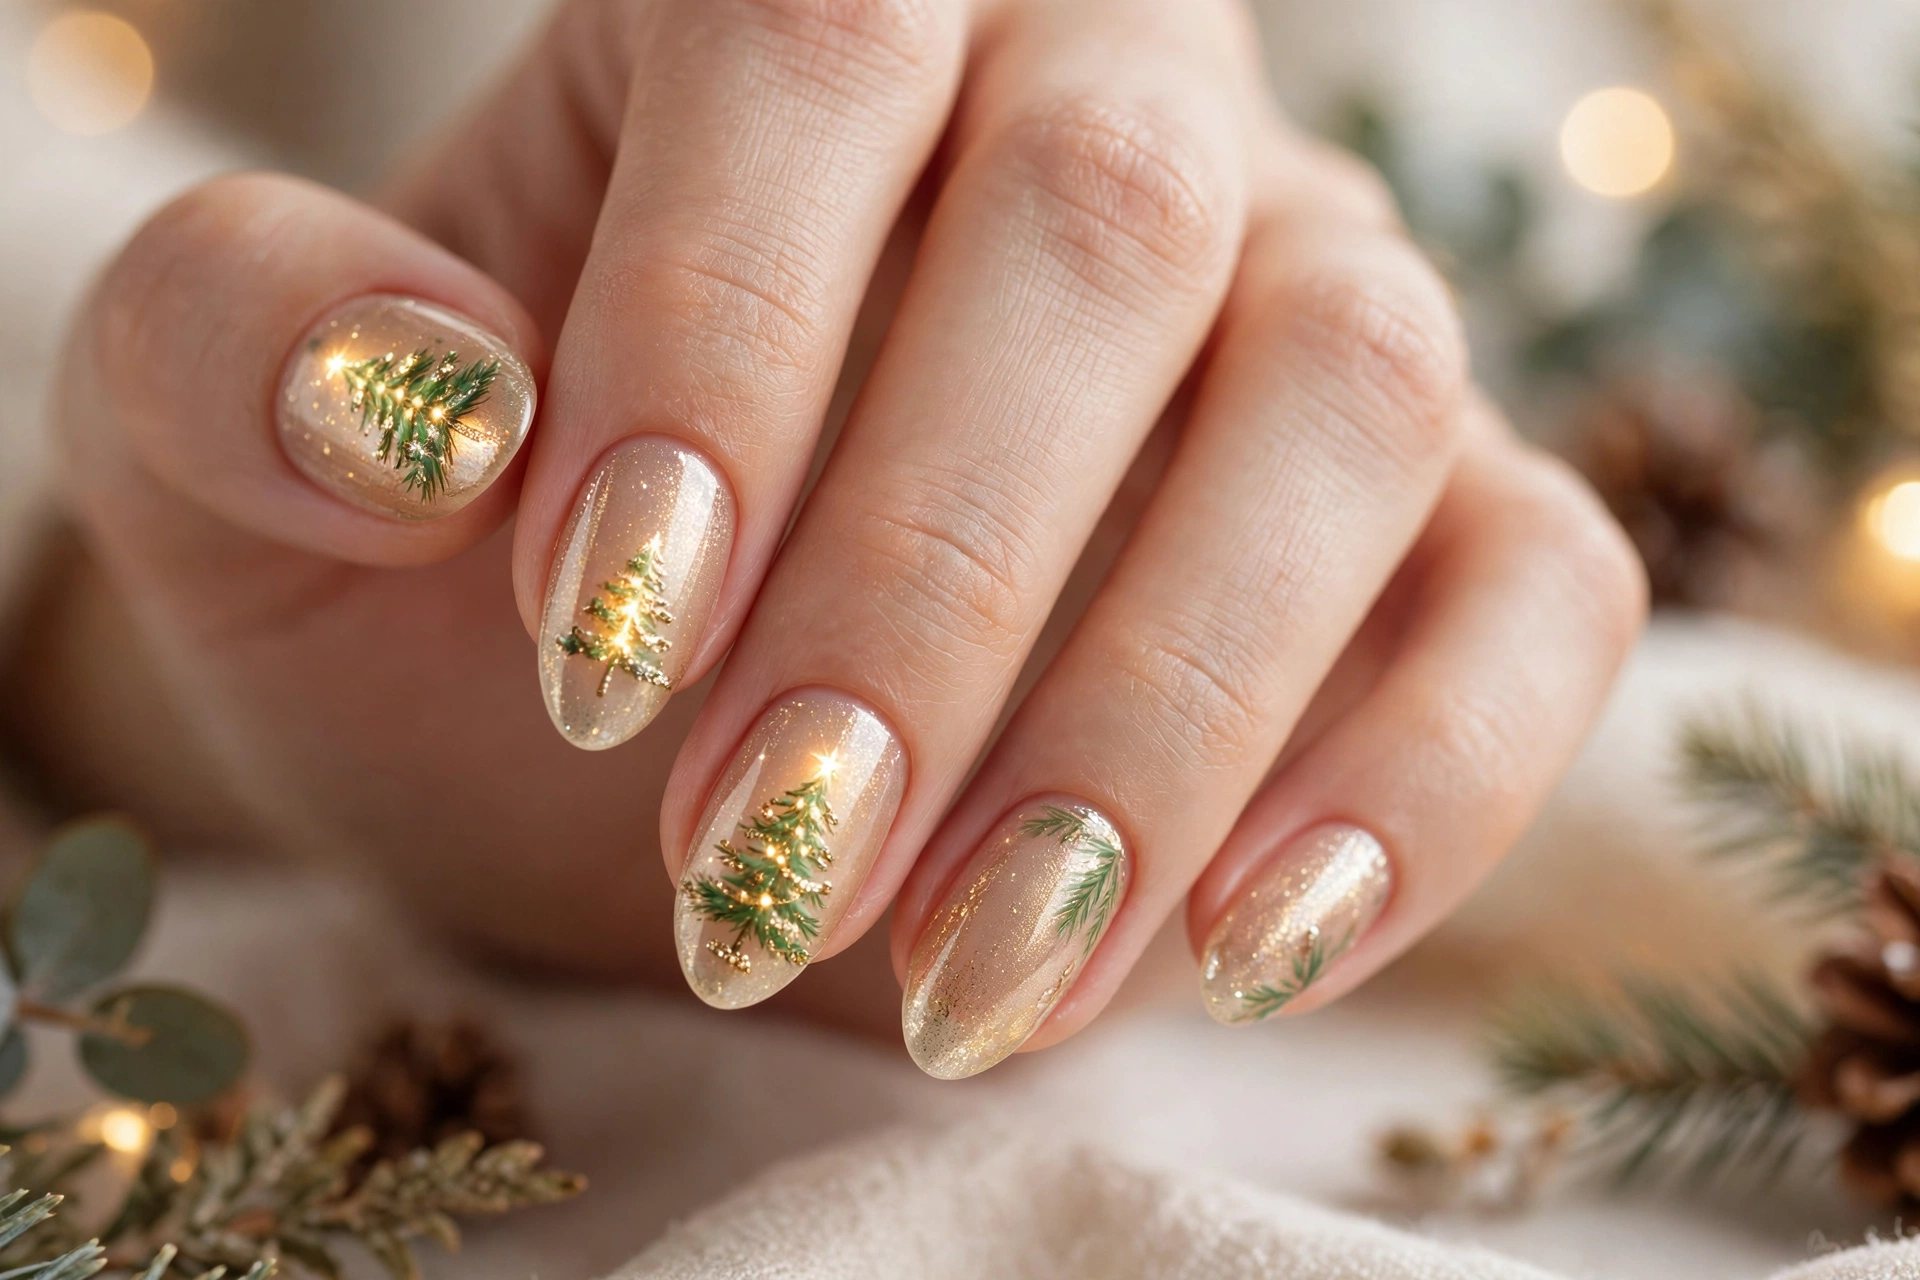
- Apply a nude base coat and let it dry fully.
- Paint a sheer champagne gold layer over all nails.
- Add a green pine accent on one nail per hand.
- Add gold glitter to the accent nail only, then seal with top coat.
Champagne gold suits every skin tone because it glows without overpowering the green. Keep the gold sheer on most nails, save the full glitter for one accent, and finish with a high shine top coat. The finished look feels luxe, warm, and perfect for evening celebrations.
Burgundy Velvet Tree Tips
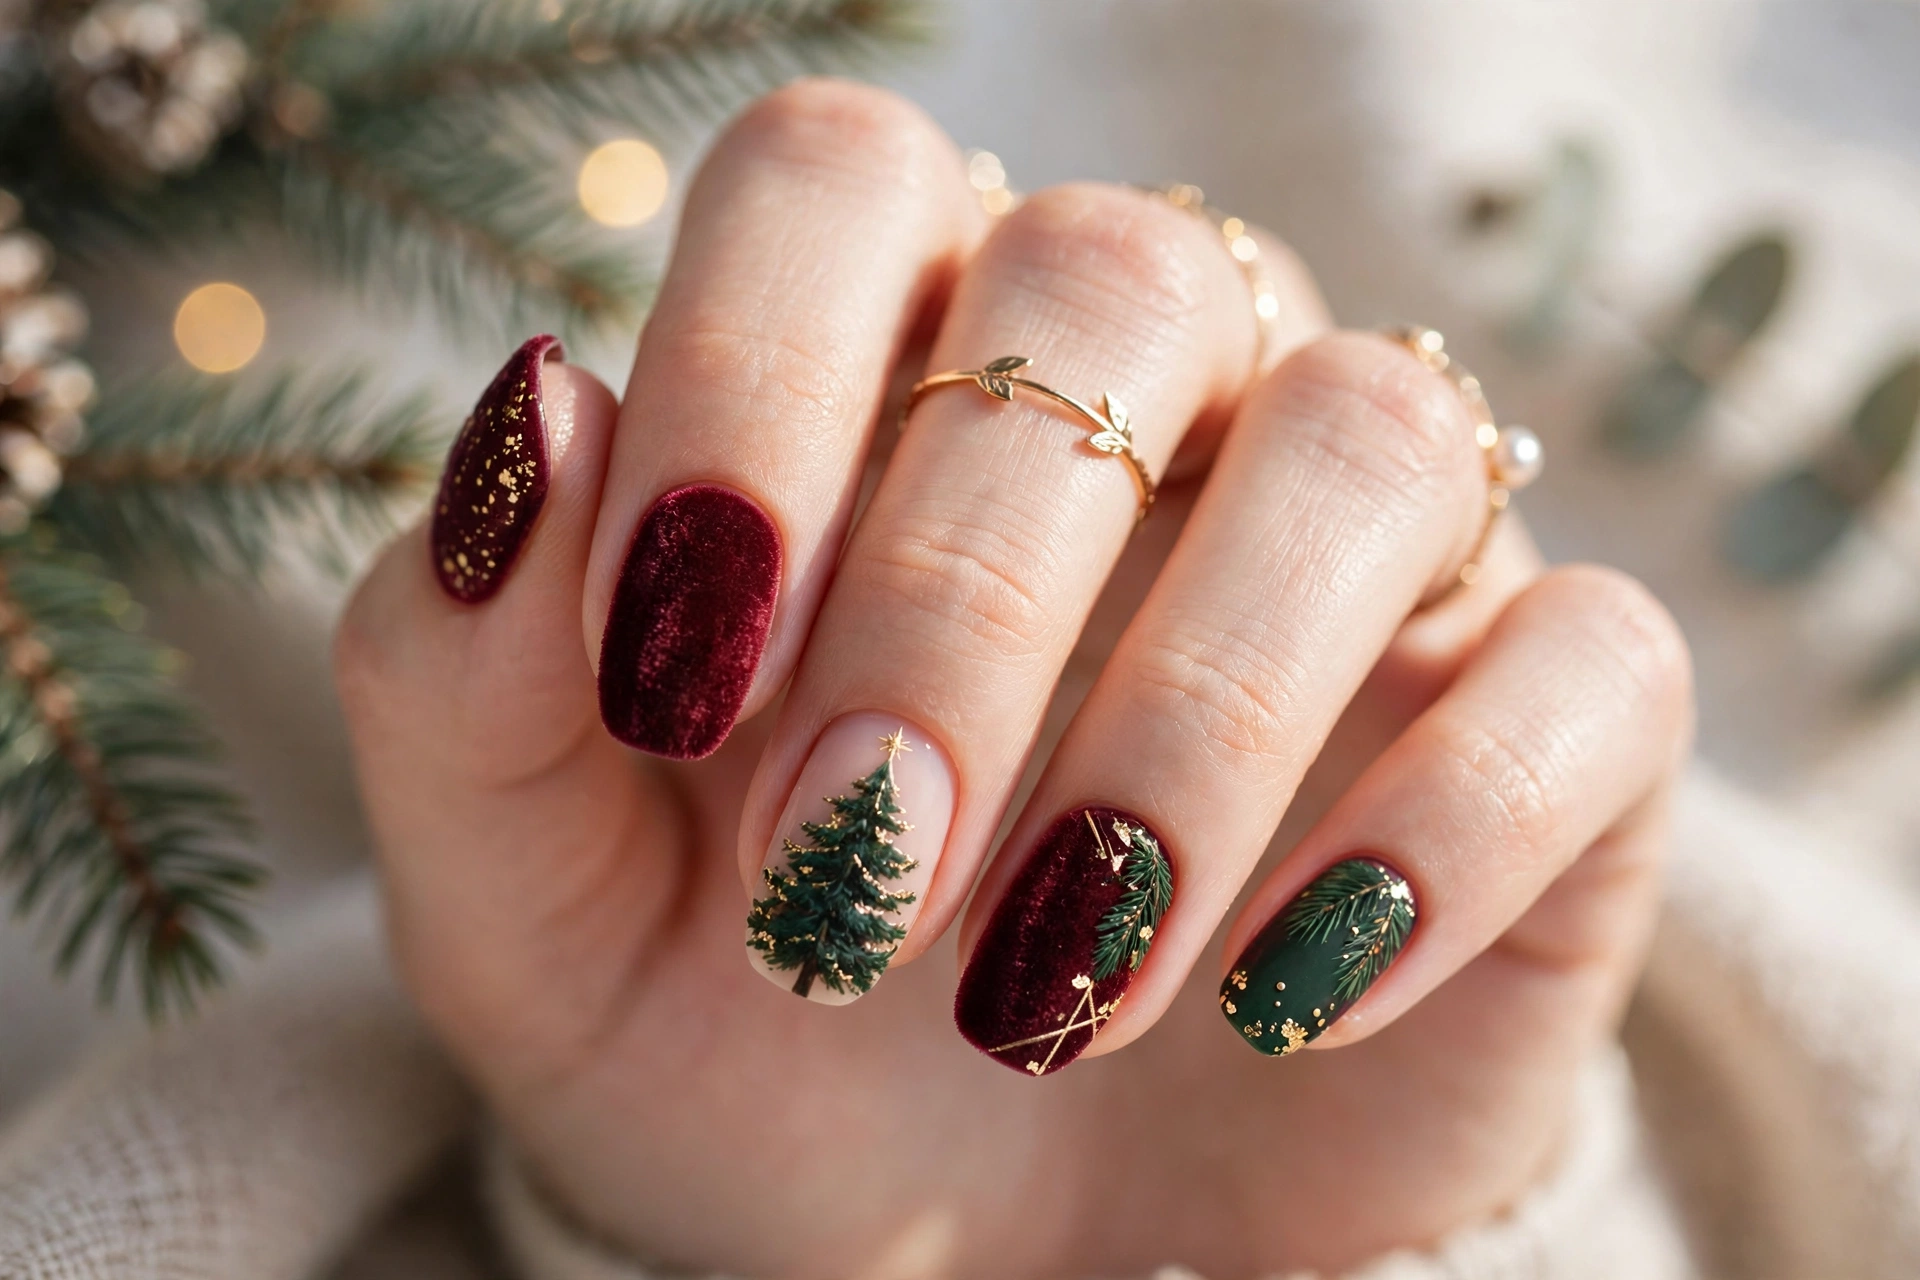
| Look | Main colour | Best for |
|---|---|---|
| Burgundy only | Deep burgundy | Simple elegant evenings |
| Burgundy plus green | Burgundy with green accents | Festive family gatherings |
| Burgundy plus gold | Burgundy with gold detail | Glamorous party nights |
Burgundy and deep green create a rich, velvety pairing that still feels festive. Use burgundy as the main colour, add green only on accent nails, and finish with gold for warmth. This combination suits longer nails best, photographs beautifully, and works from office parties to New Year gatherings.
Pink Blush Tree Accents
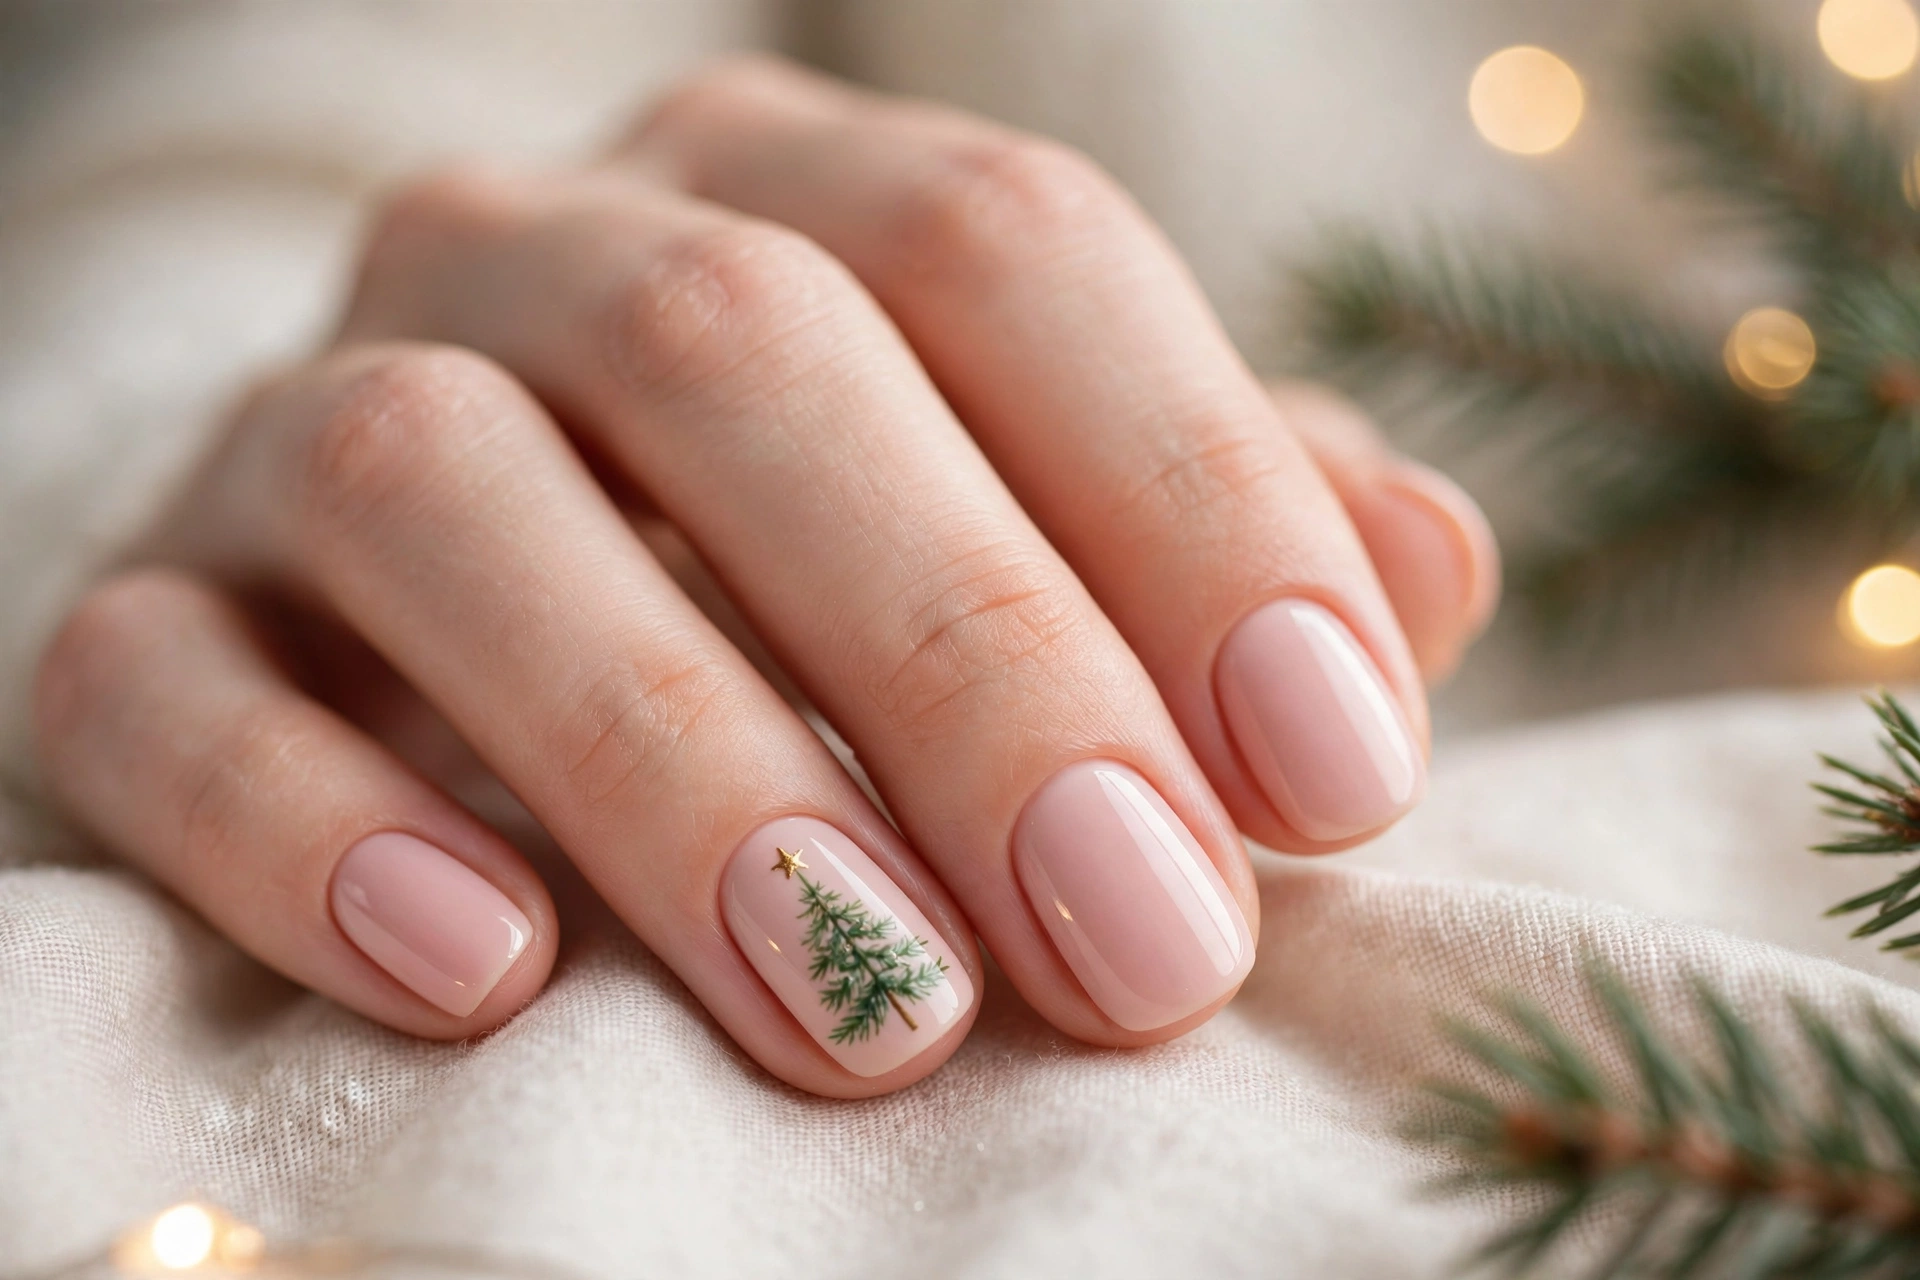
DO: Keep glitter light and place stars on accent nails only.
DO: Pair blush pink with one green accent for balance.
DON’T: Cover every nail with green or heavy glitter.
DON’T: Mix too many bright colours with soft pink.
Pink blush keeps the festive theme soft, sweet, and easy to wear daily. Pair blush pink with one green accent, add a single gold star, and keep glitter light for balance. This gentle version suits shorter nails, workdays, and anyone who loves a pretty look without bold colour.
Silver Star Tree Sparkle
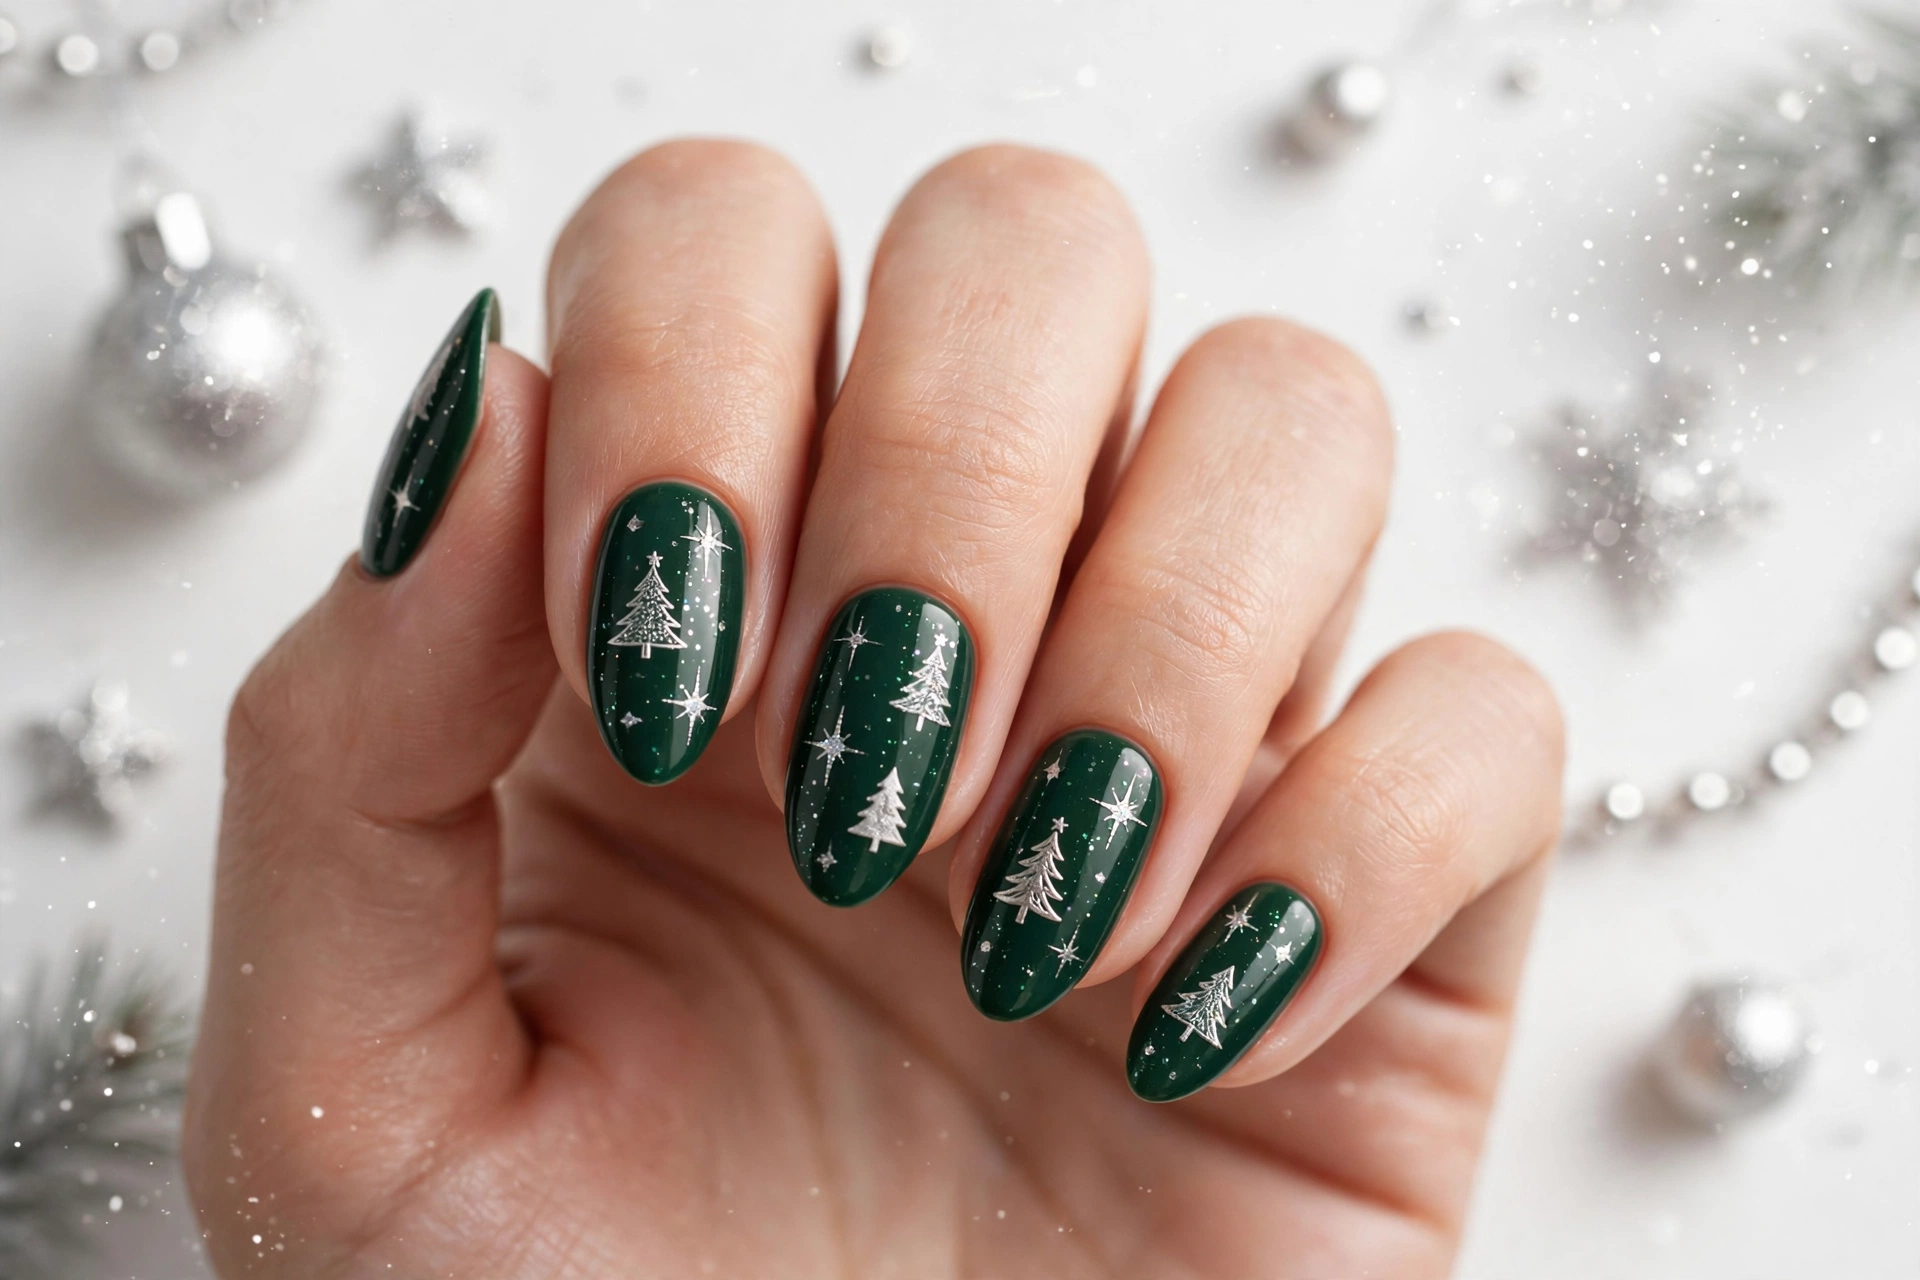
Quick Fact: Base colour: deep green polish with a glossy top coat.
Quick Fact: Star detail: tiny silver stars placed near the tree tips.
Quick Fact: Best shape: almond or oval nails show the design clearly.
Quick Fact: Finish: light silver glitter adds sparkle without heaviness.
Start with two coats of deep green polish, then paint a slim tree on one accent nail using silver glitter polish. Place a tiny silver star at the top and add small dots for lights. Keep the other nails simple so the sparkle stands out. Seal with a glossy top coat for a festive finish.
Midnight Navy Tree Stars
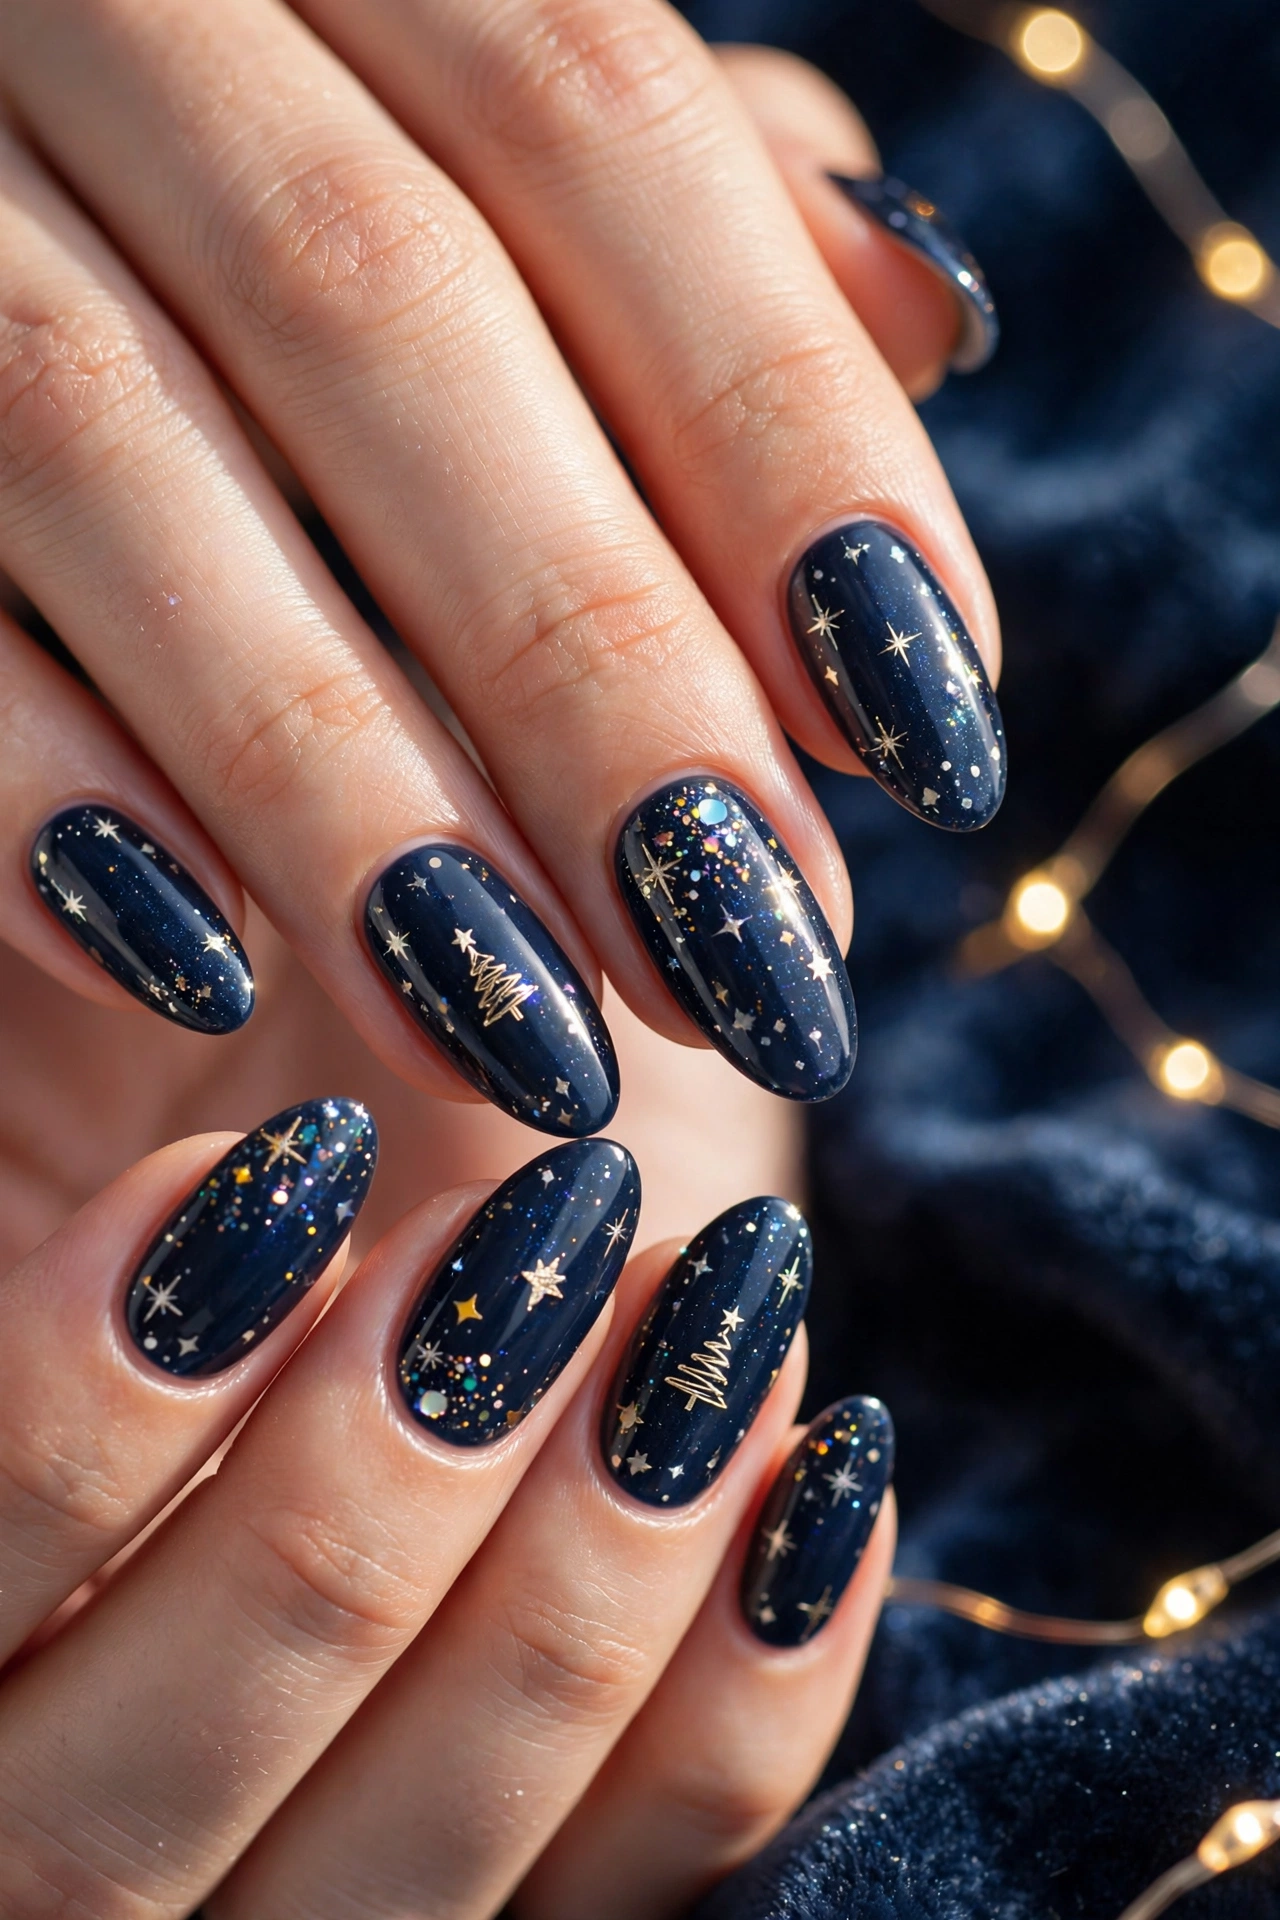
A midnight navy base gives tree designs a calm, evening feel that still looks festive. Paint small trees in gold on two accent nails, then add tiny silver stars above each tree for a soft glow.
Use a thin brush for the tree shape, starting narrow at the top and widening gently toward the base. Add small dots in gold and silver for lights, keeping them spaced so the design stays neat. Finish with a glossy top coat to lock in the sparkle and help the look last through parties and family dinners.
Rose Gold Tree Details
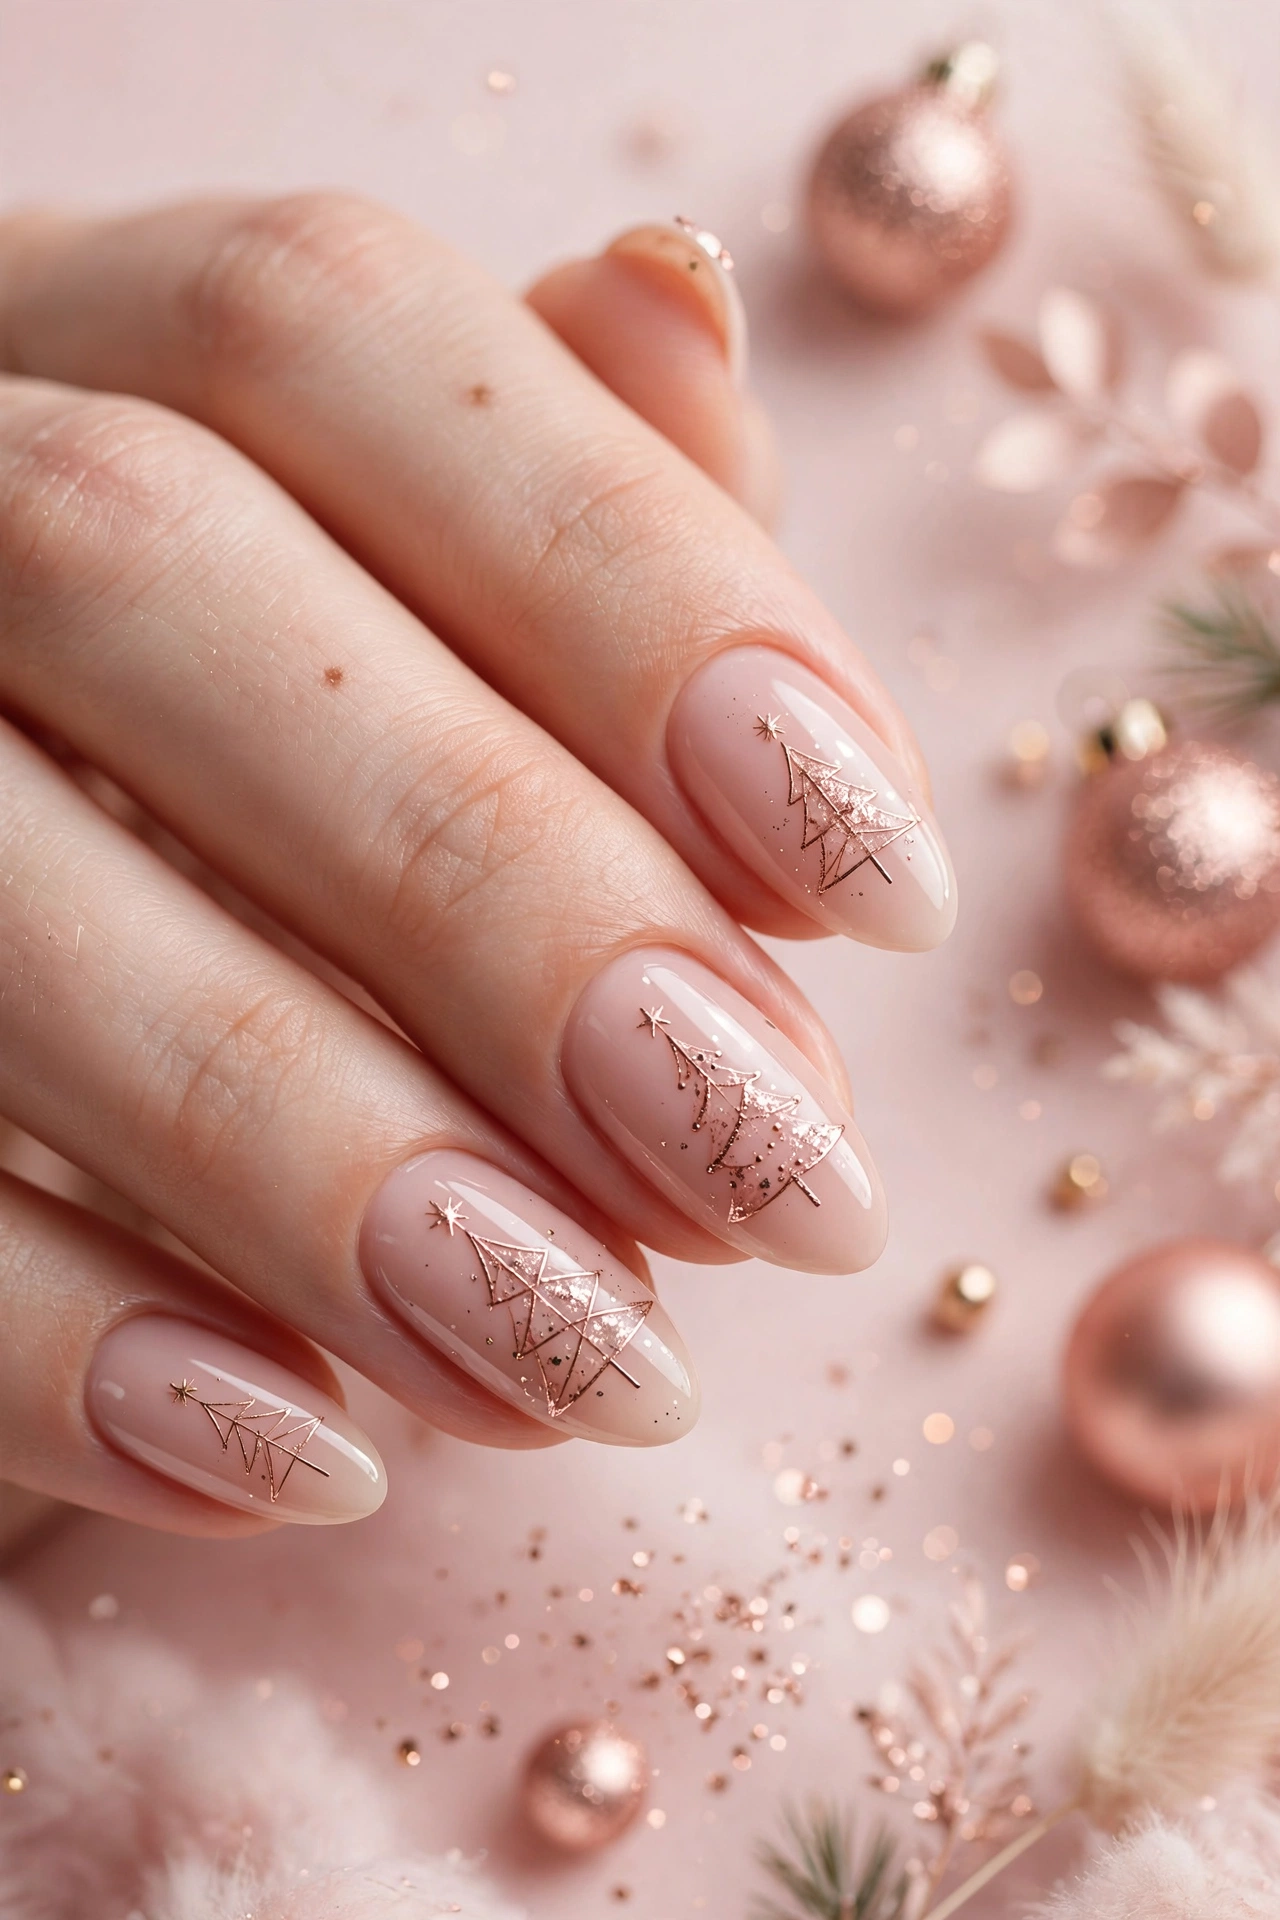
- Start with a soft pink nude base on every nail.
- Paint slim rose gold trees on two accent nails.
- Add tiny rose gold dots as gentle tree lights.
- Keep the other nails plain with a glossy finish.
- Seal the design with a clear top coat.
This soft look suits both casual days and dressy evenings. The rose gold lines catch light gently, while the nude base keeps the festive tree manicure feeling fresh and easy to wear. Try it for a holiday dinner, a gift exchange, or a quiet evening at home with loved ones.
Frosted Winter Tree Glow
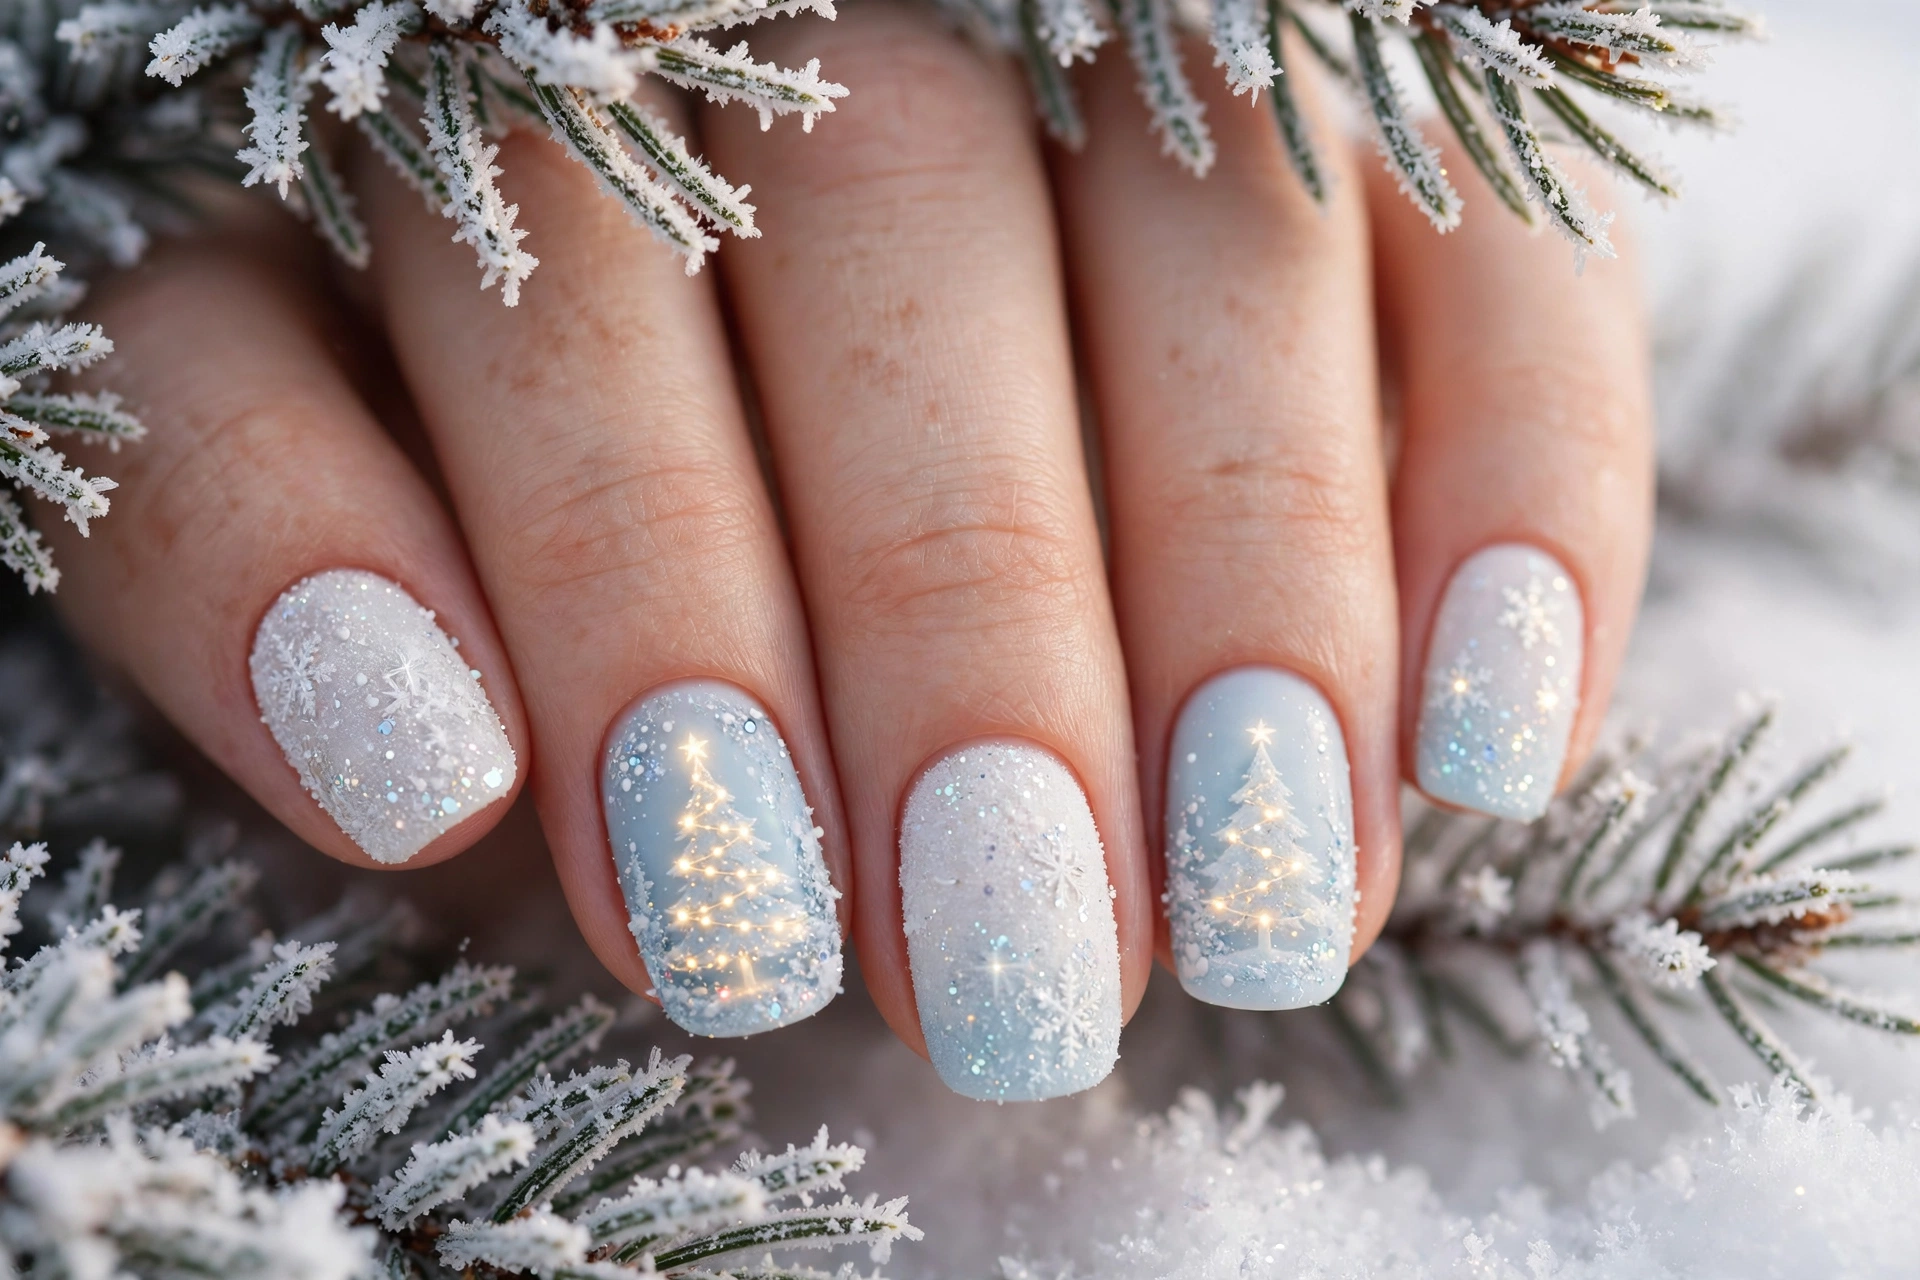
Quick Tip: Use a matte top coat over white polish to get a soft frosted effect.
Paint pale icy trees on a frosted white base, then add fine snow glitter near the tips for a gentle glow. Keep the shapes simple and slim so the look stays calm and wintry. A glossy accent nail can add contrast, while a clear top coat protects the glitter and keeps the design smooth.
Cozy Plaid Tree Tips
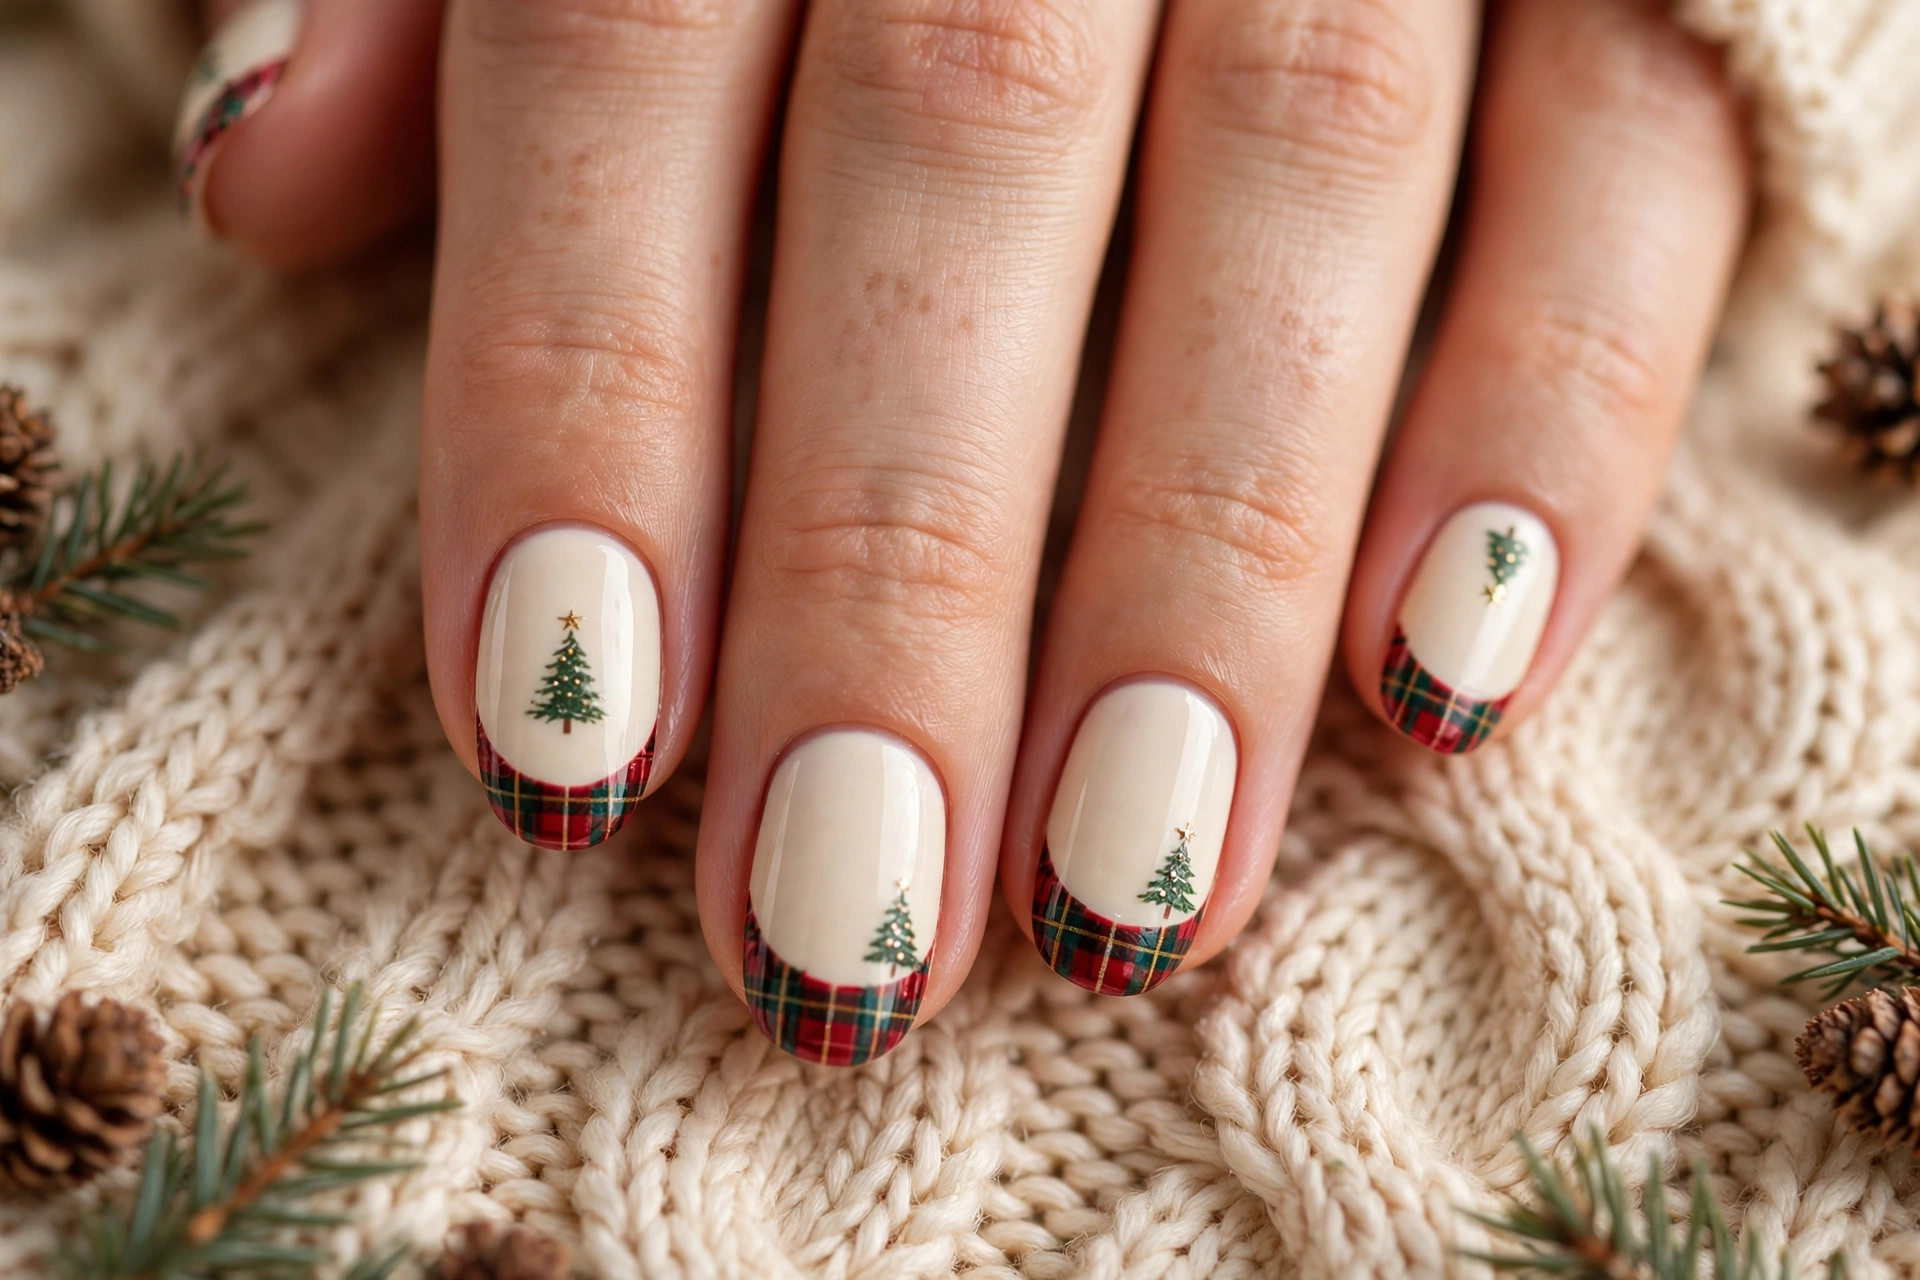
Before: Plain cream nails with no pattern or festive detail.
After: Warm plaid tips with small green tree accents on two nails.
Start with a cream base, then paint red and green plaid lines across the tips. Add a small tree on your ring finger and a tiny star on top. Keep the lines thin so the pattern looks neat, not busy. This cosy design pairs well with knit sweaters and holiday scarves.
Pearl White Tree Elegance
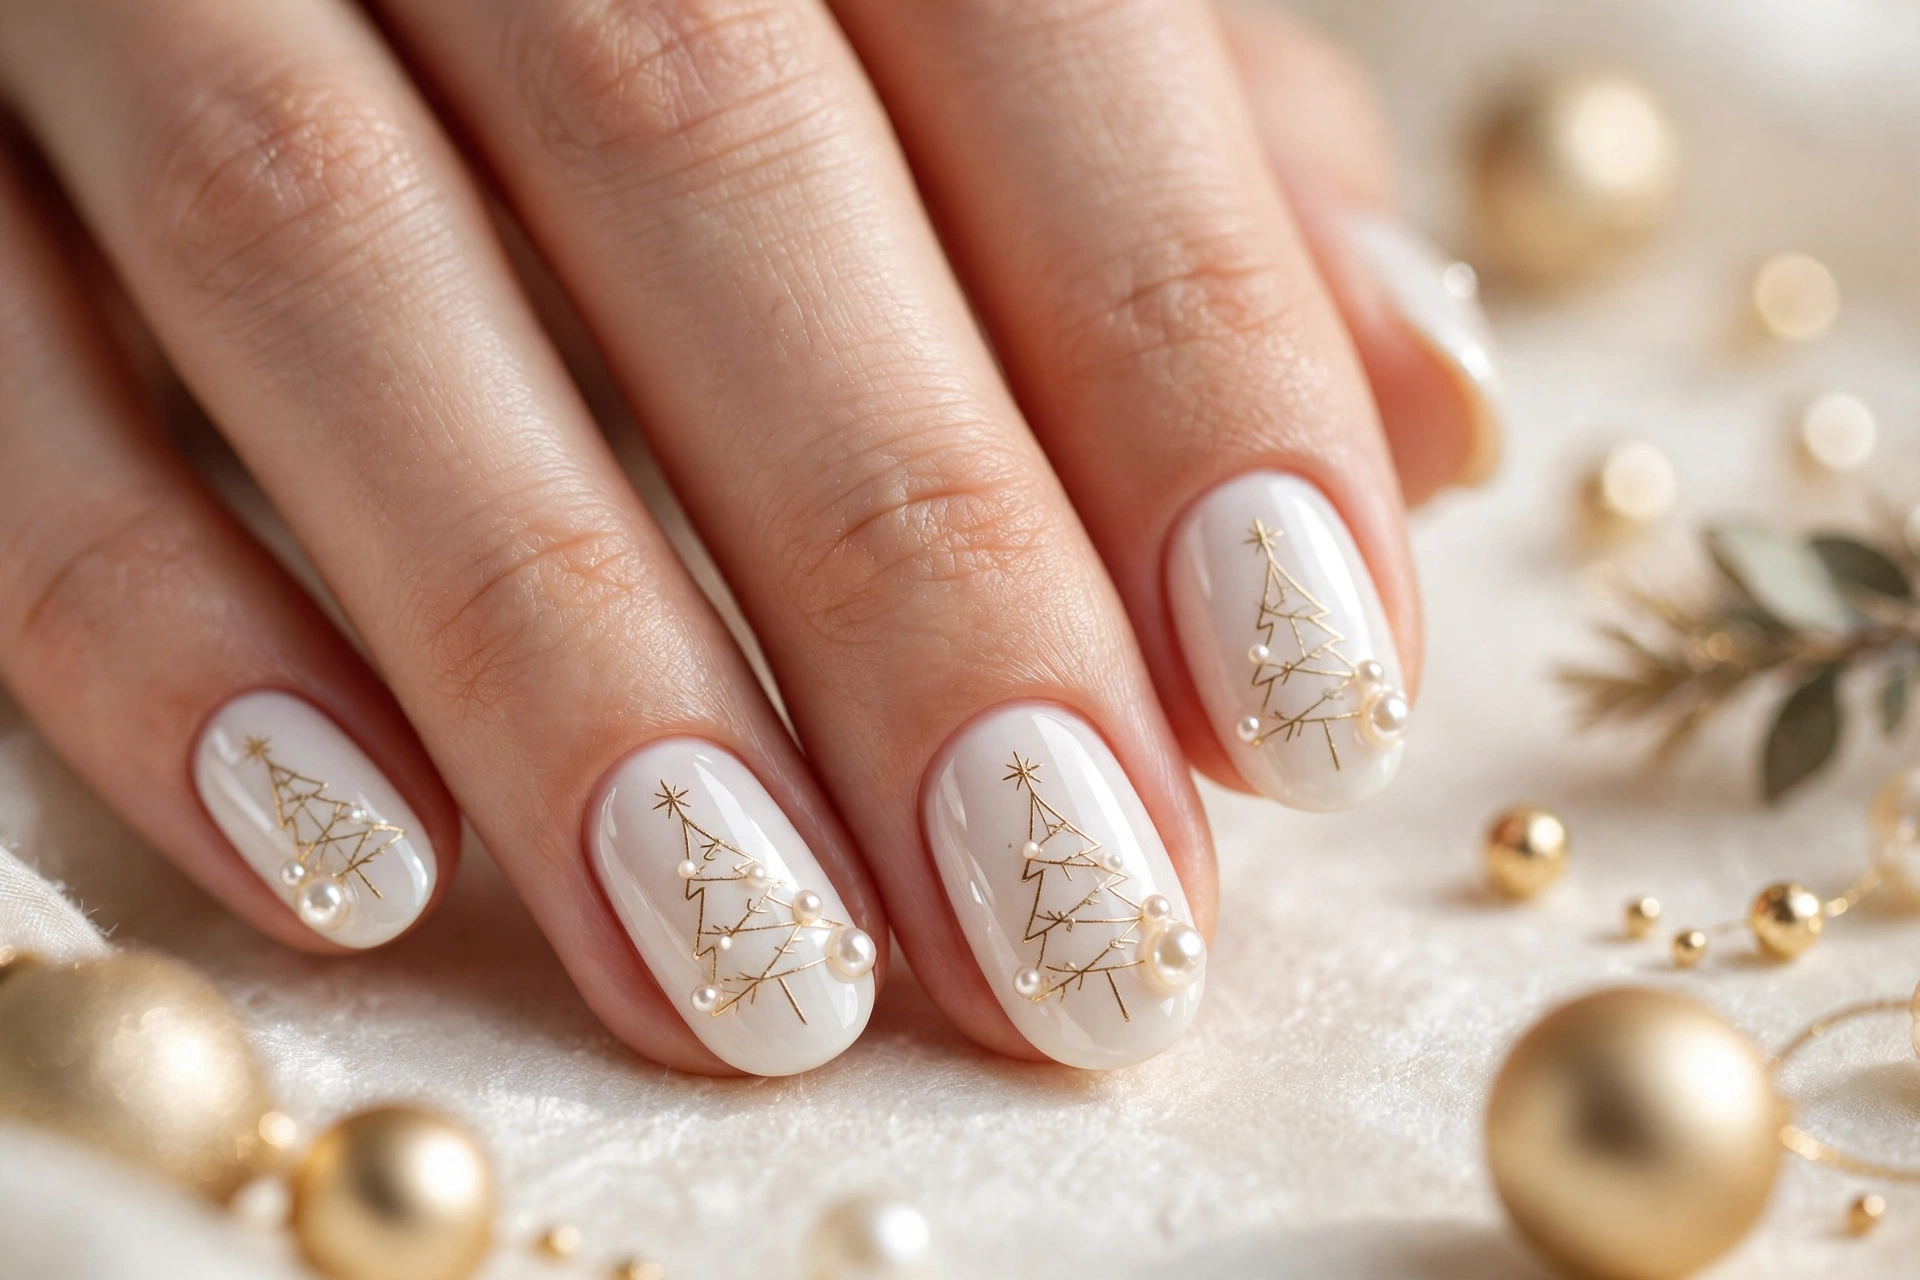
- Apply a pearl white base coat on clean, shaped nails.
- Paint thin gold tree outlines on two accent nails.
- Place a tiny pearl at the top of each tree.
- Add small gold dots for soft, simple lights.
- Seal with a glossy top coat for shine.
This elegant look works for weddings, formal dinners, and quiet holiday evenings. The pearl base gives a soft glow, while gold tree line art keeps the festive tree manicure refined and timeless. Keep jewellery simple so your nails stay the focus. It also photographs beautifully in soft natural light.
Candy Cane Tree Accents
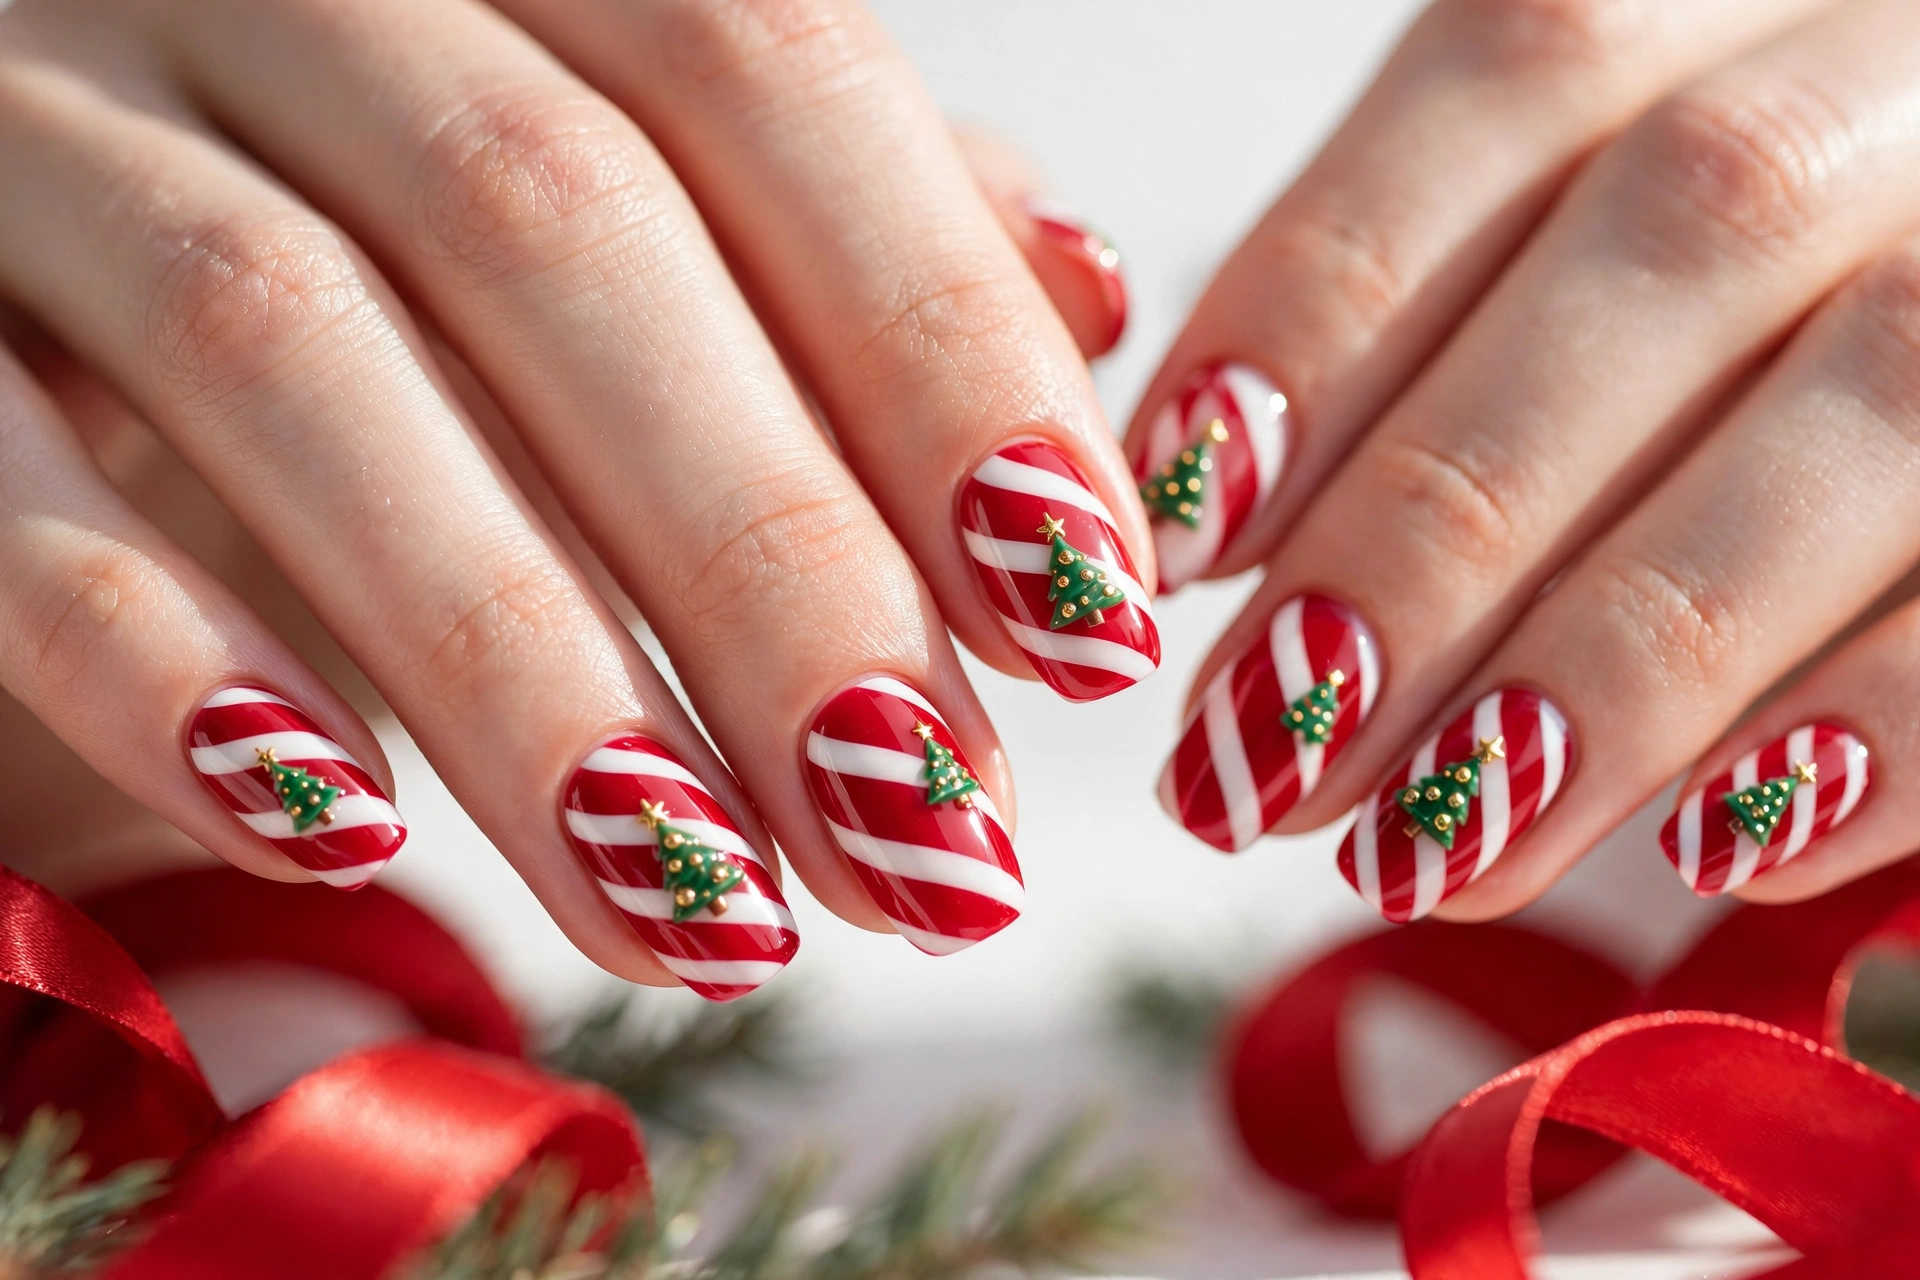
| Style | Best For | Finish |
|---|---|---|
| Classic Red Stripe Tree | Short nails and party looks | Glossy |
| Soft Pink Candy Tree | Everyday festive wear | Satin |
| Glitter Candy Tree | Evening events and photos | Sparkling |
Choose the classic style for a bold party look that photographs well, and pick the softer pink version for work or family gatherings. Add glitter only on one or two accent nails so the design stays neat. Seal stripes with a clear top coat, and clean edges with a small brush for a crisp finish.
Gingerbread Tree Cream Tips
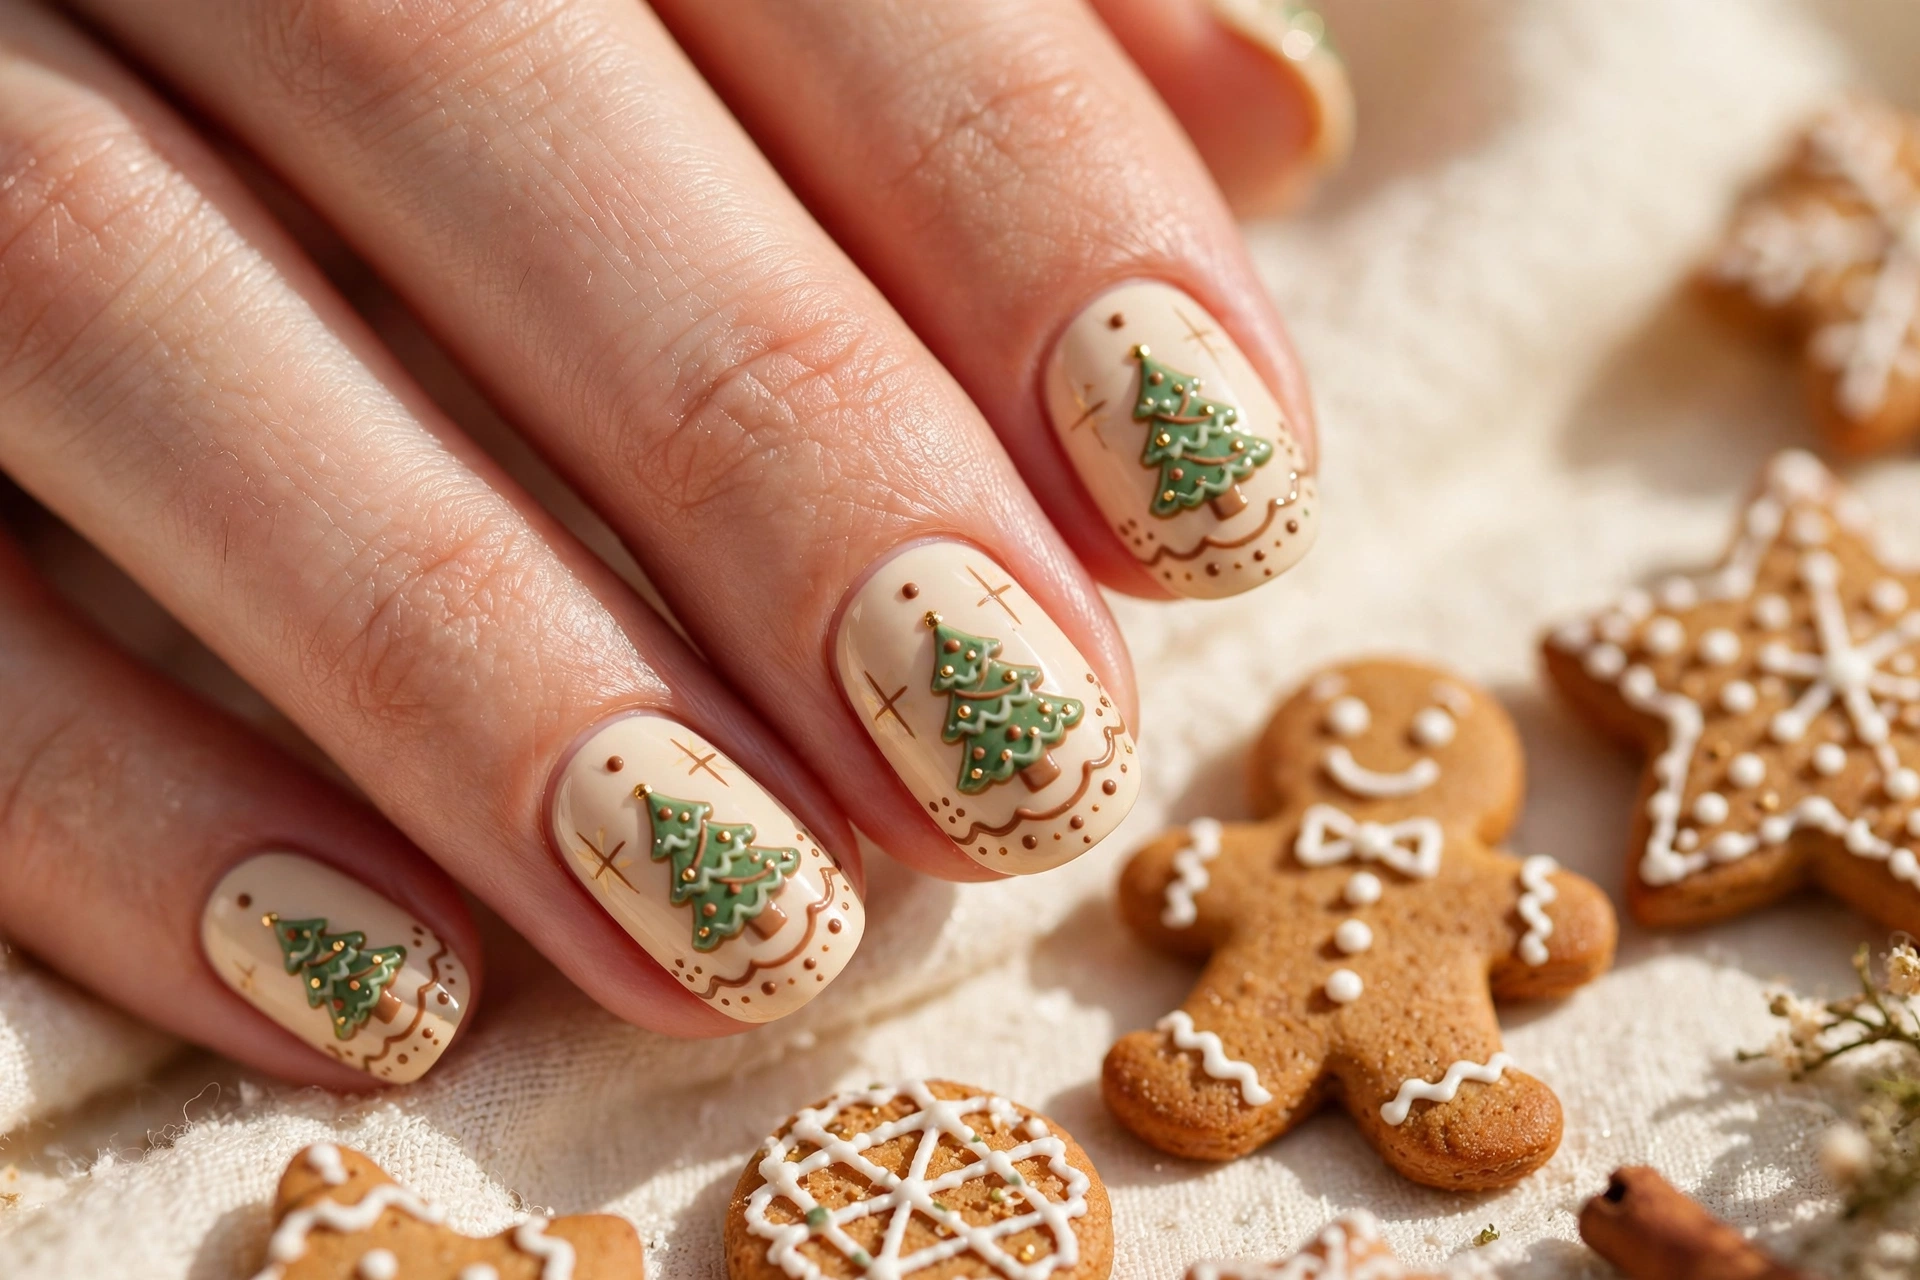
DO: Let the cream base dry fully before painting the tree shapes.
DO: Use a thin brush for neat branches and small gold dot ornaments.
DO: Keep the other nails plain so the tree tips stay the focus.
DON’T: Paint thick layers that smudge the cream base.
DON’T: Add too many colours that hide the gingerbread feel.
Start with a warm cream base and let it dry fully before painting tiny tree shapes. Use a thin brush for clean branches, then add small gold dots for a baked gingerbread feel. Keep other nails simple so the tree tips stand out, and finish with a glossy top coat.
Emerald Pine Tree Sparkle
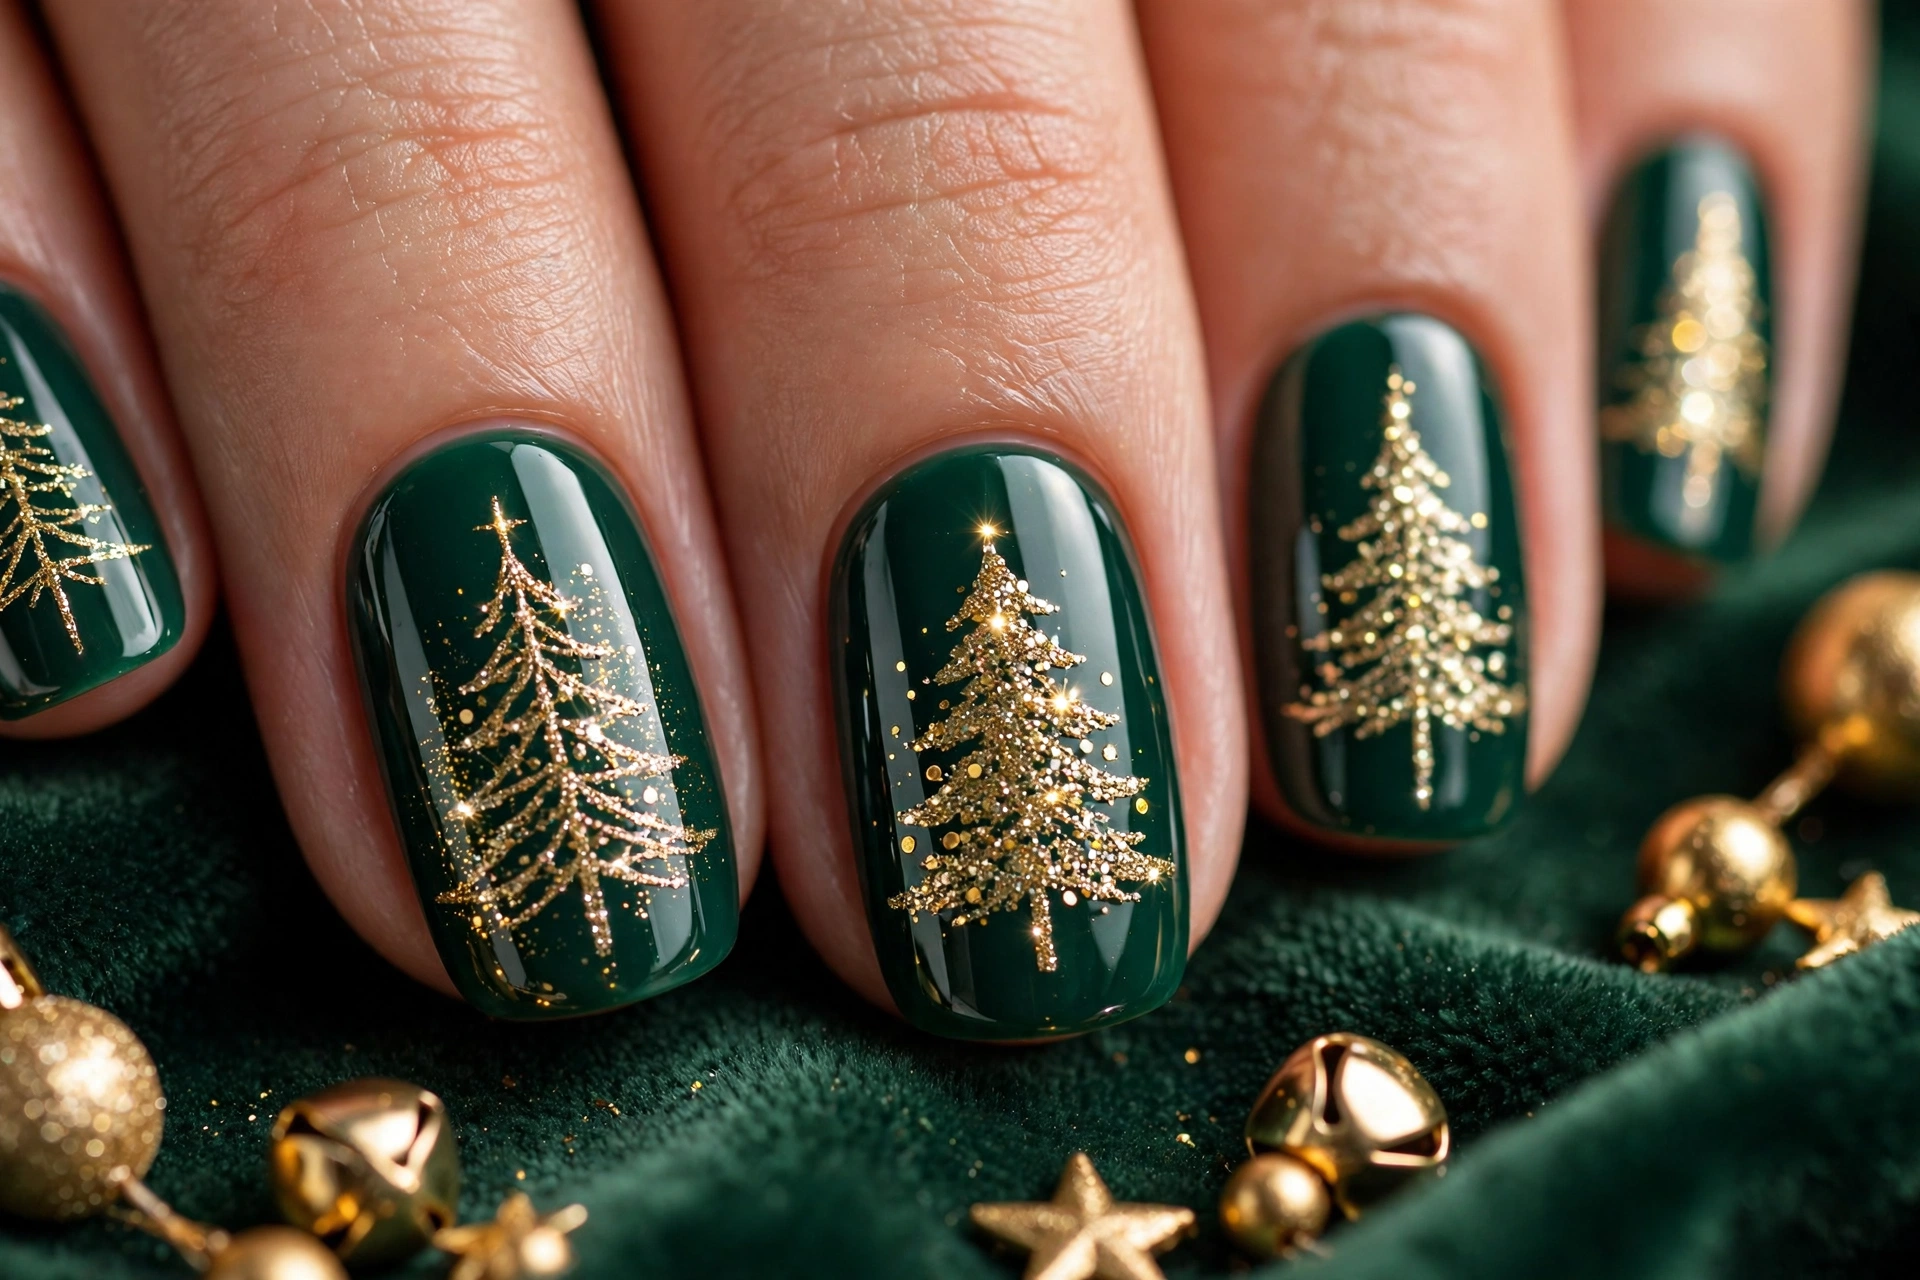
Quick Fact: Base Colour: Deep emerald green with a glossy shine.
Quick Fact: Sparkle Detail: Fine gold glitter along the pine branches.
Quick Fact: Best Length: Medium length shows the pine shape best.
Quick Fact: Wear Time: Lasts about seven days with a top coat.
Paint deep emerald as your base, then layer a small pine shape on each accent nail using a thin brush. Add gold glitter sparingly along the branches so the green stays rich and clear. Pair this look with gold rings or a green sweater, and refresh the top coat after three days for lasting shine.
Cranberry Gold Tree Tips
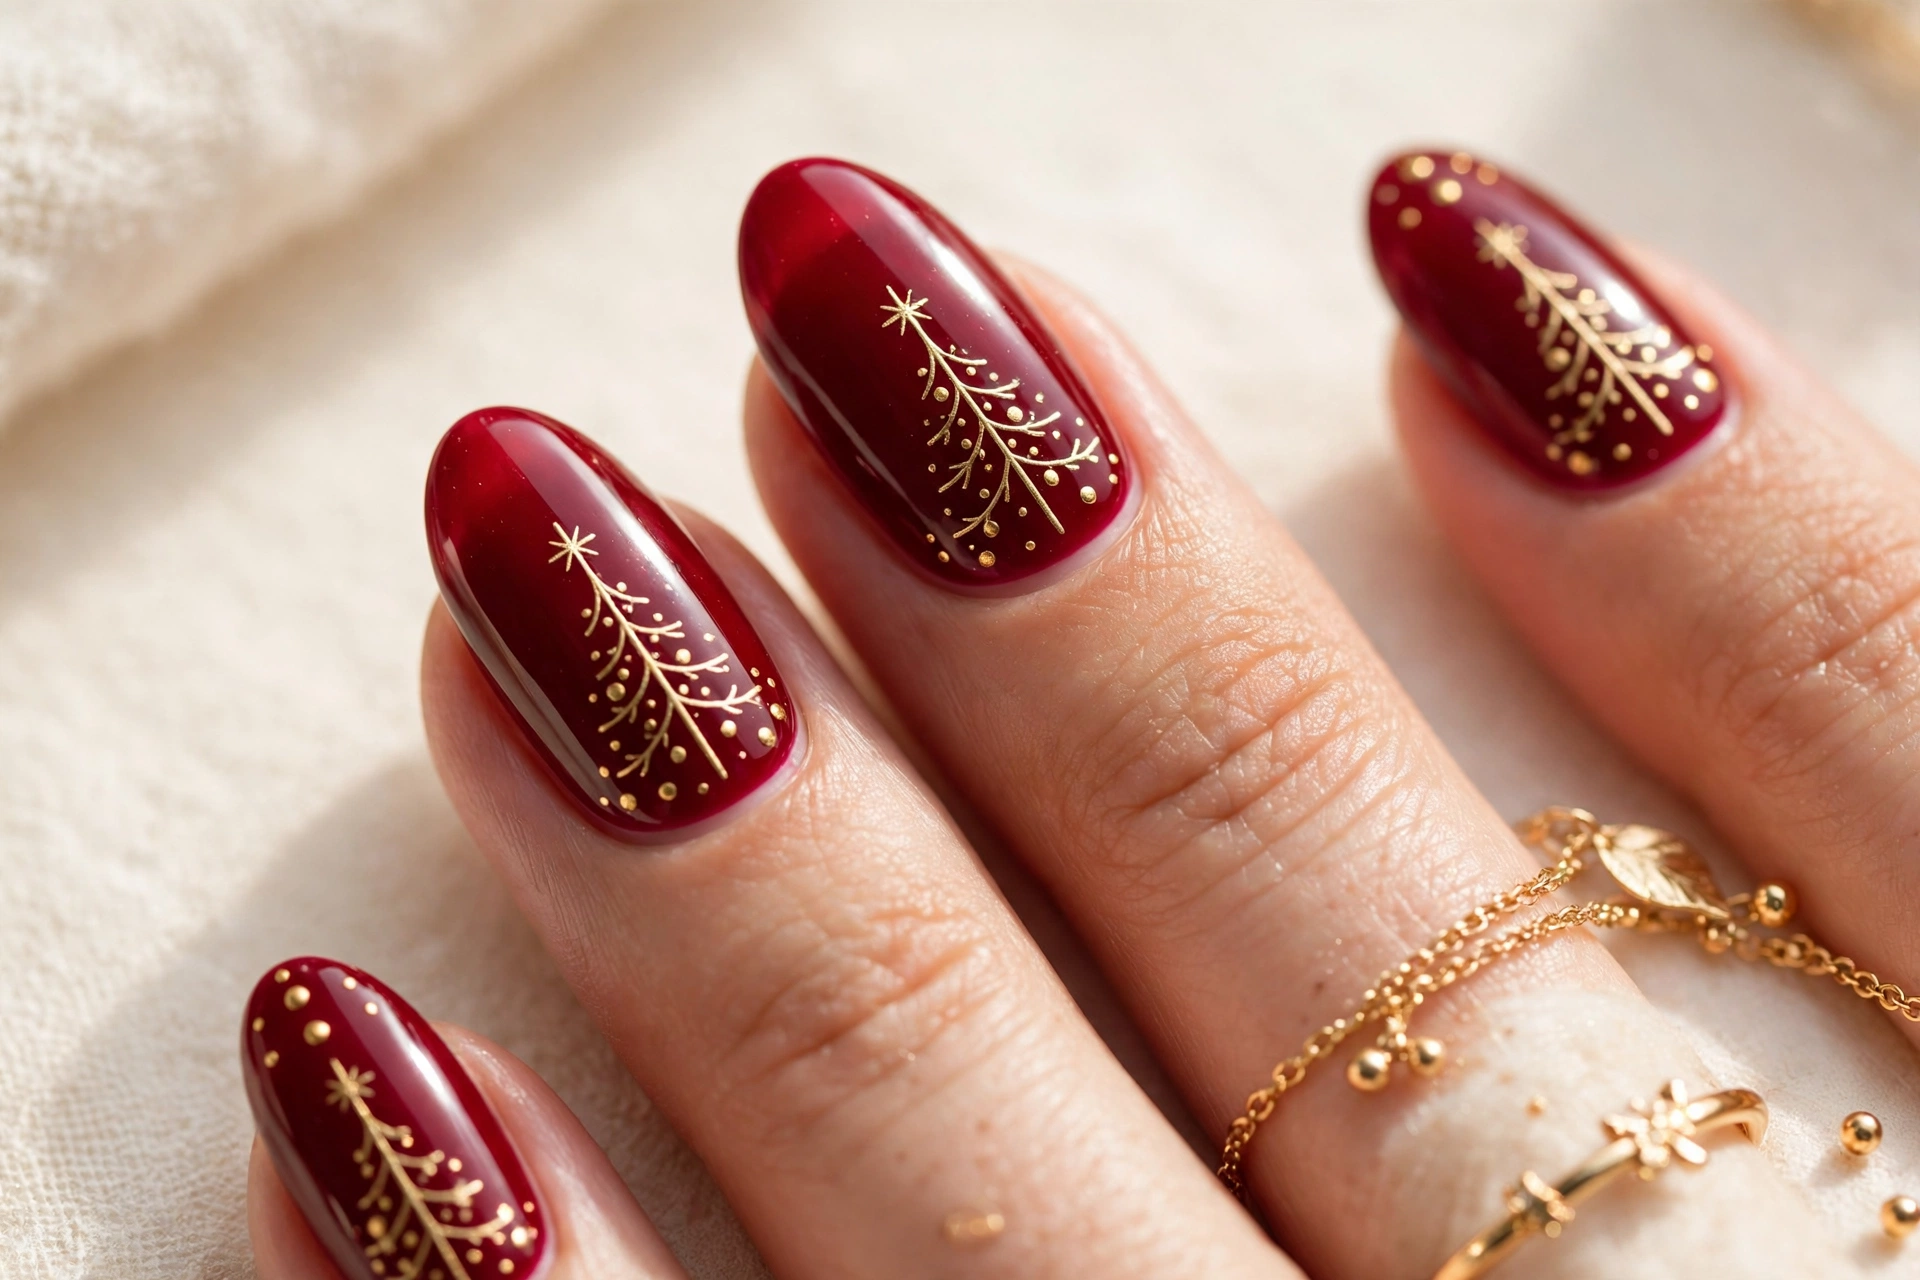
Cranberry red gives these tree tips a rich holiday glow that suits both short and long nails. Paint a deep cranberry base, then shape a small gold tree near the tip of each accent nail. Keep the lines soft and simple so the design looks polished rather than busy.
Add tiny gold dots as ornaments, then finish with a glossy top coat to lock in shine. Pair the look with gold jewellery and a classic red lip for festive evenings. If you prefer a quieter style, use gold only on two accent nails and keep the rest cranberry plain.
Icy Blue Tree Accents
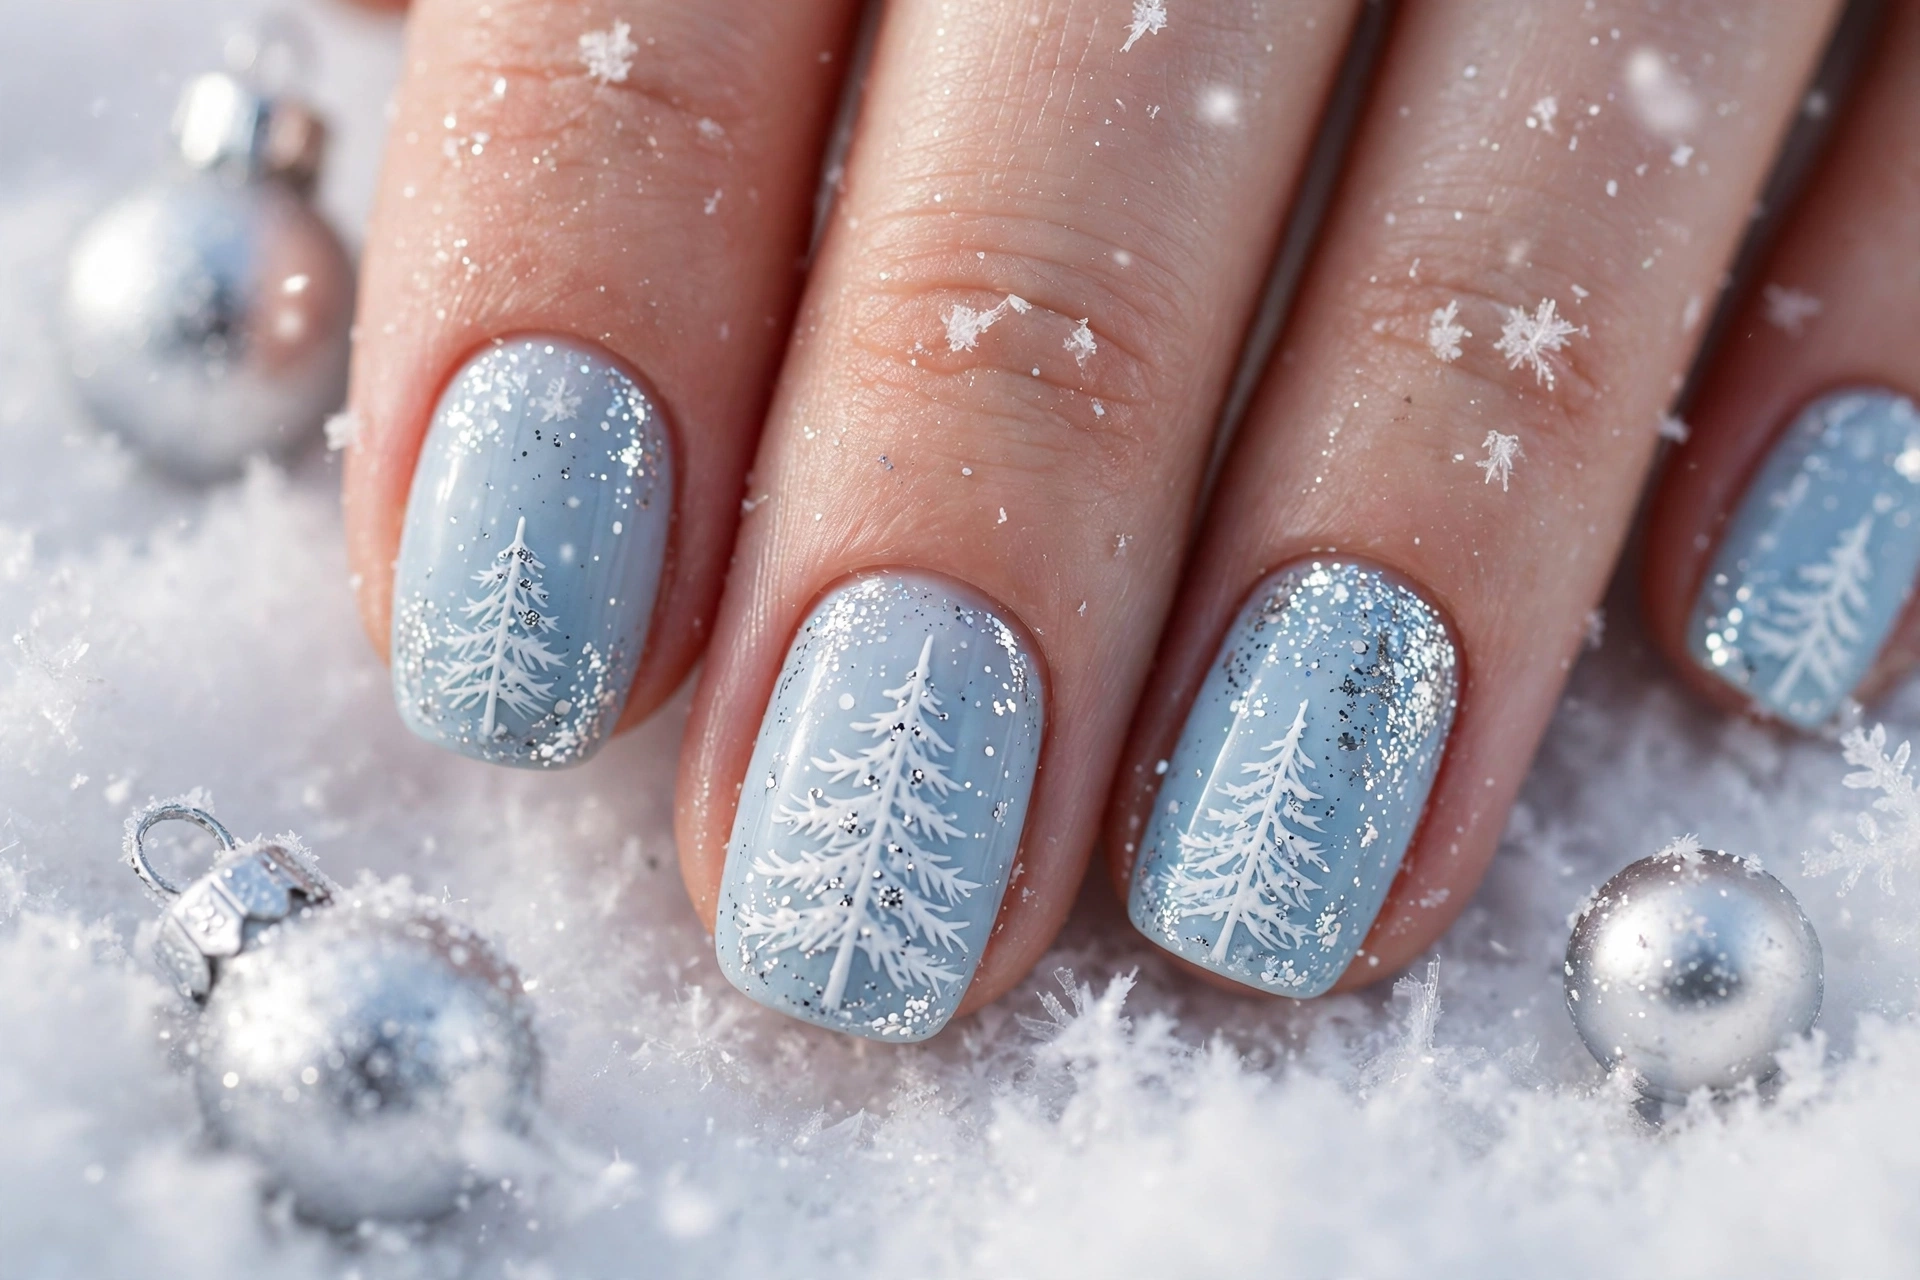
- Paint a pale icy blue base on all nails for a frosty winter feel.
- Add a white pine shape on two accent nails using a thin brush.
- Dot silver glitter along the branches for a light snowfall effect.
- Finish with a glossy top coat to keep the frosty shine lasting longer.
Keep the rest of your nails plain blue so the white tree accents stay the focus. This cool palette suits silver jewellery and winter outfits, and it looks lovely in photos. Refresh the top coat after a few days to stop chips and keep the icy glow bright.
Soft Nude Tree Glow
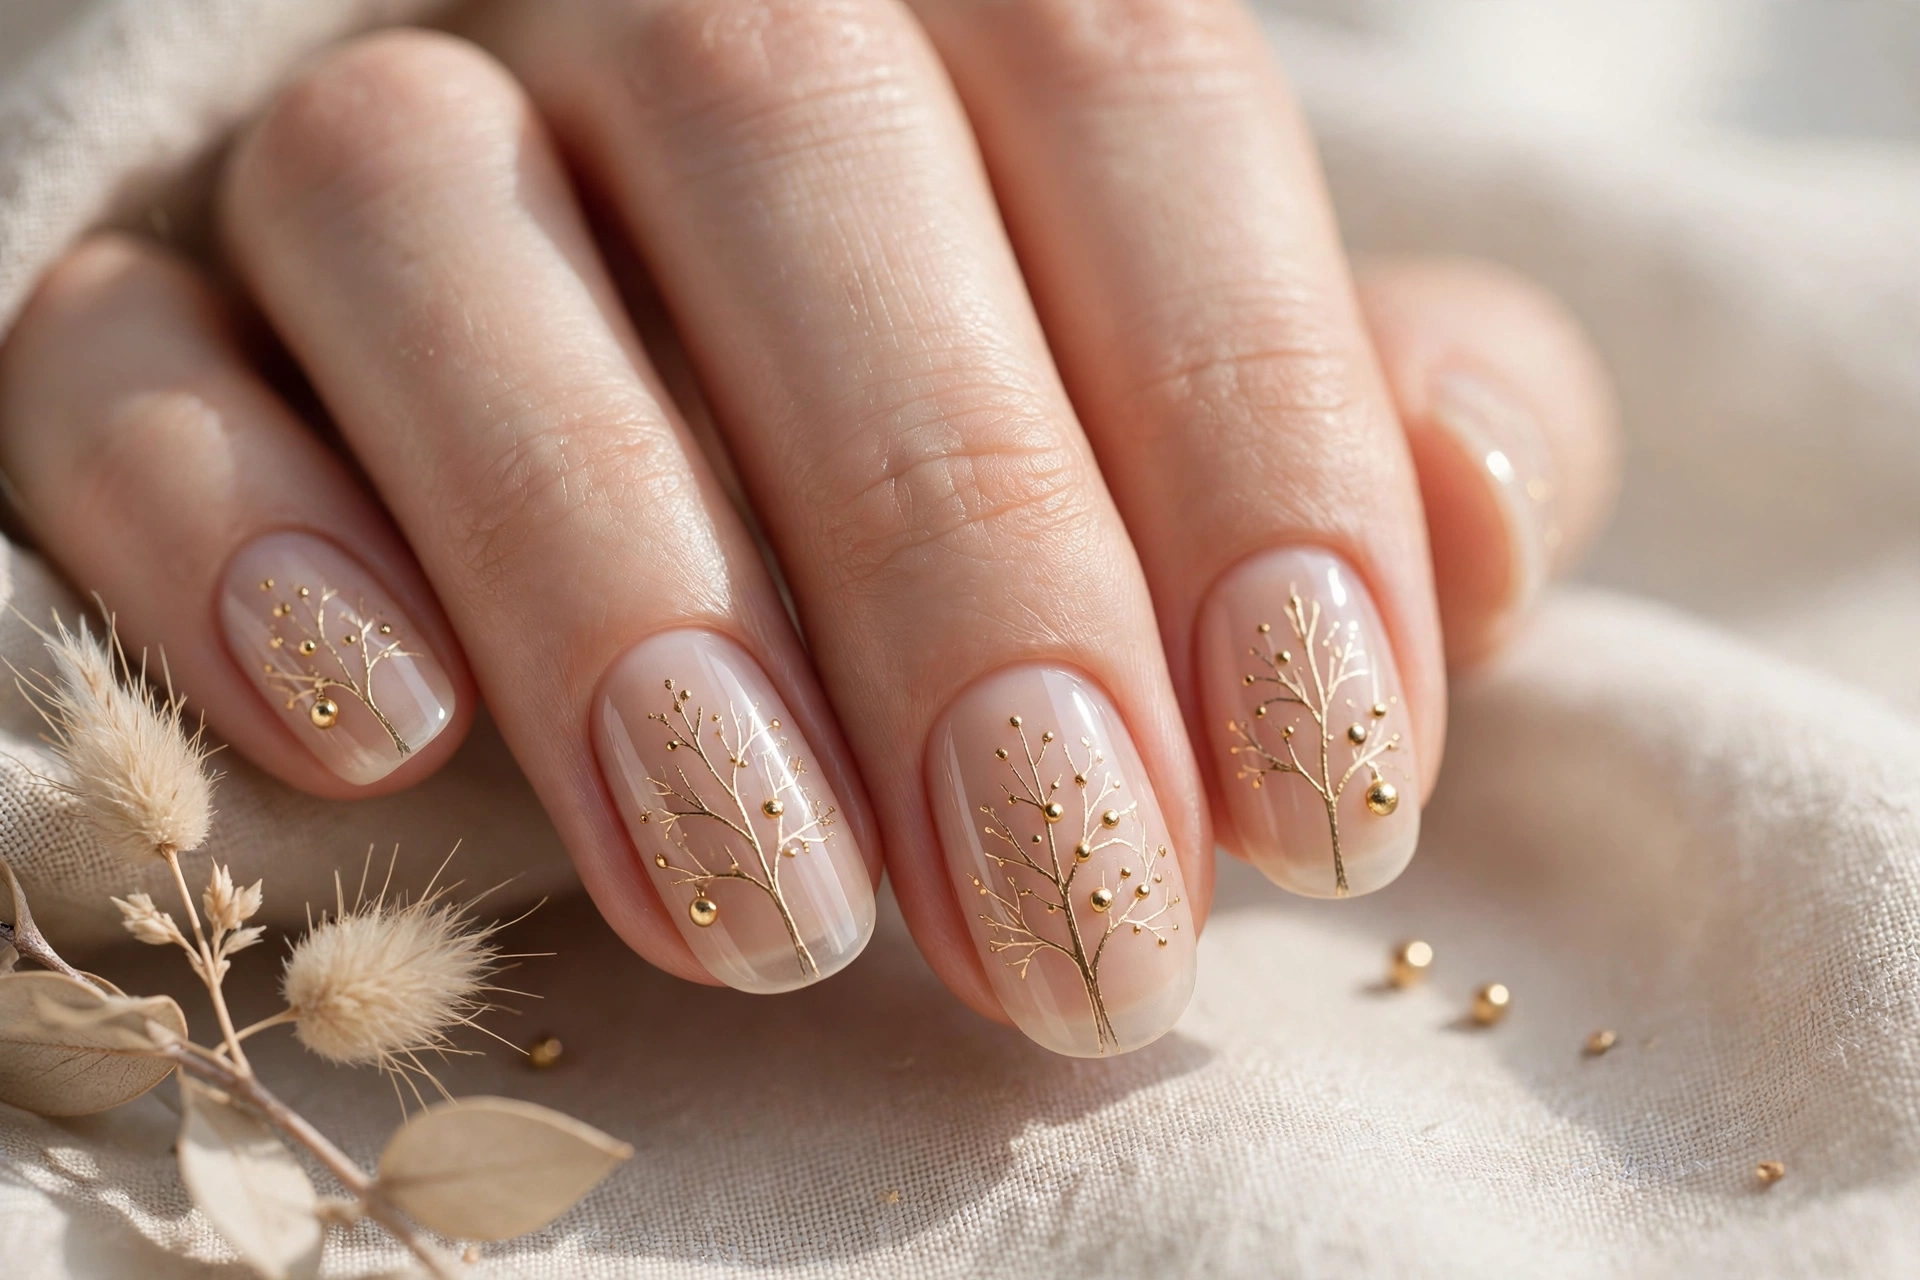
Quick Tip: Use a sheer nude base so the soft tree glow looks natural and clean.
Paint a sheer nude base and let it dry fully before adding a delicate tree outline in soft gold. Keep the branches slim and the ornaments tiny so the design feels calm and elegant. This gentle style suits everyday wear, office days, and quiet holiday gatherings with ease.
Holly Berry Tree Tips
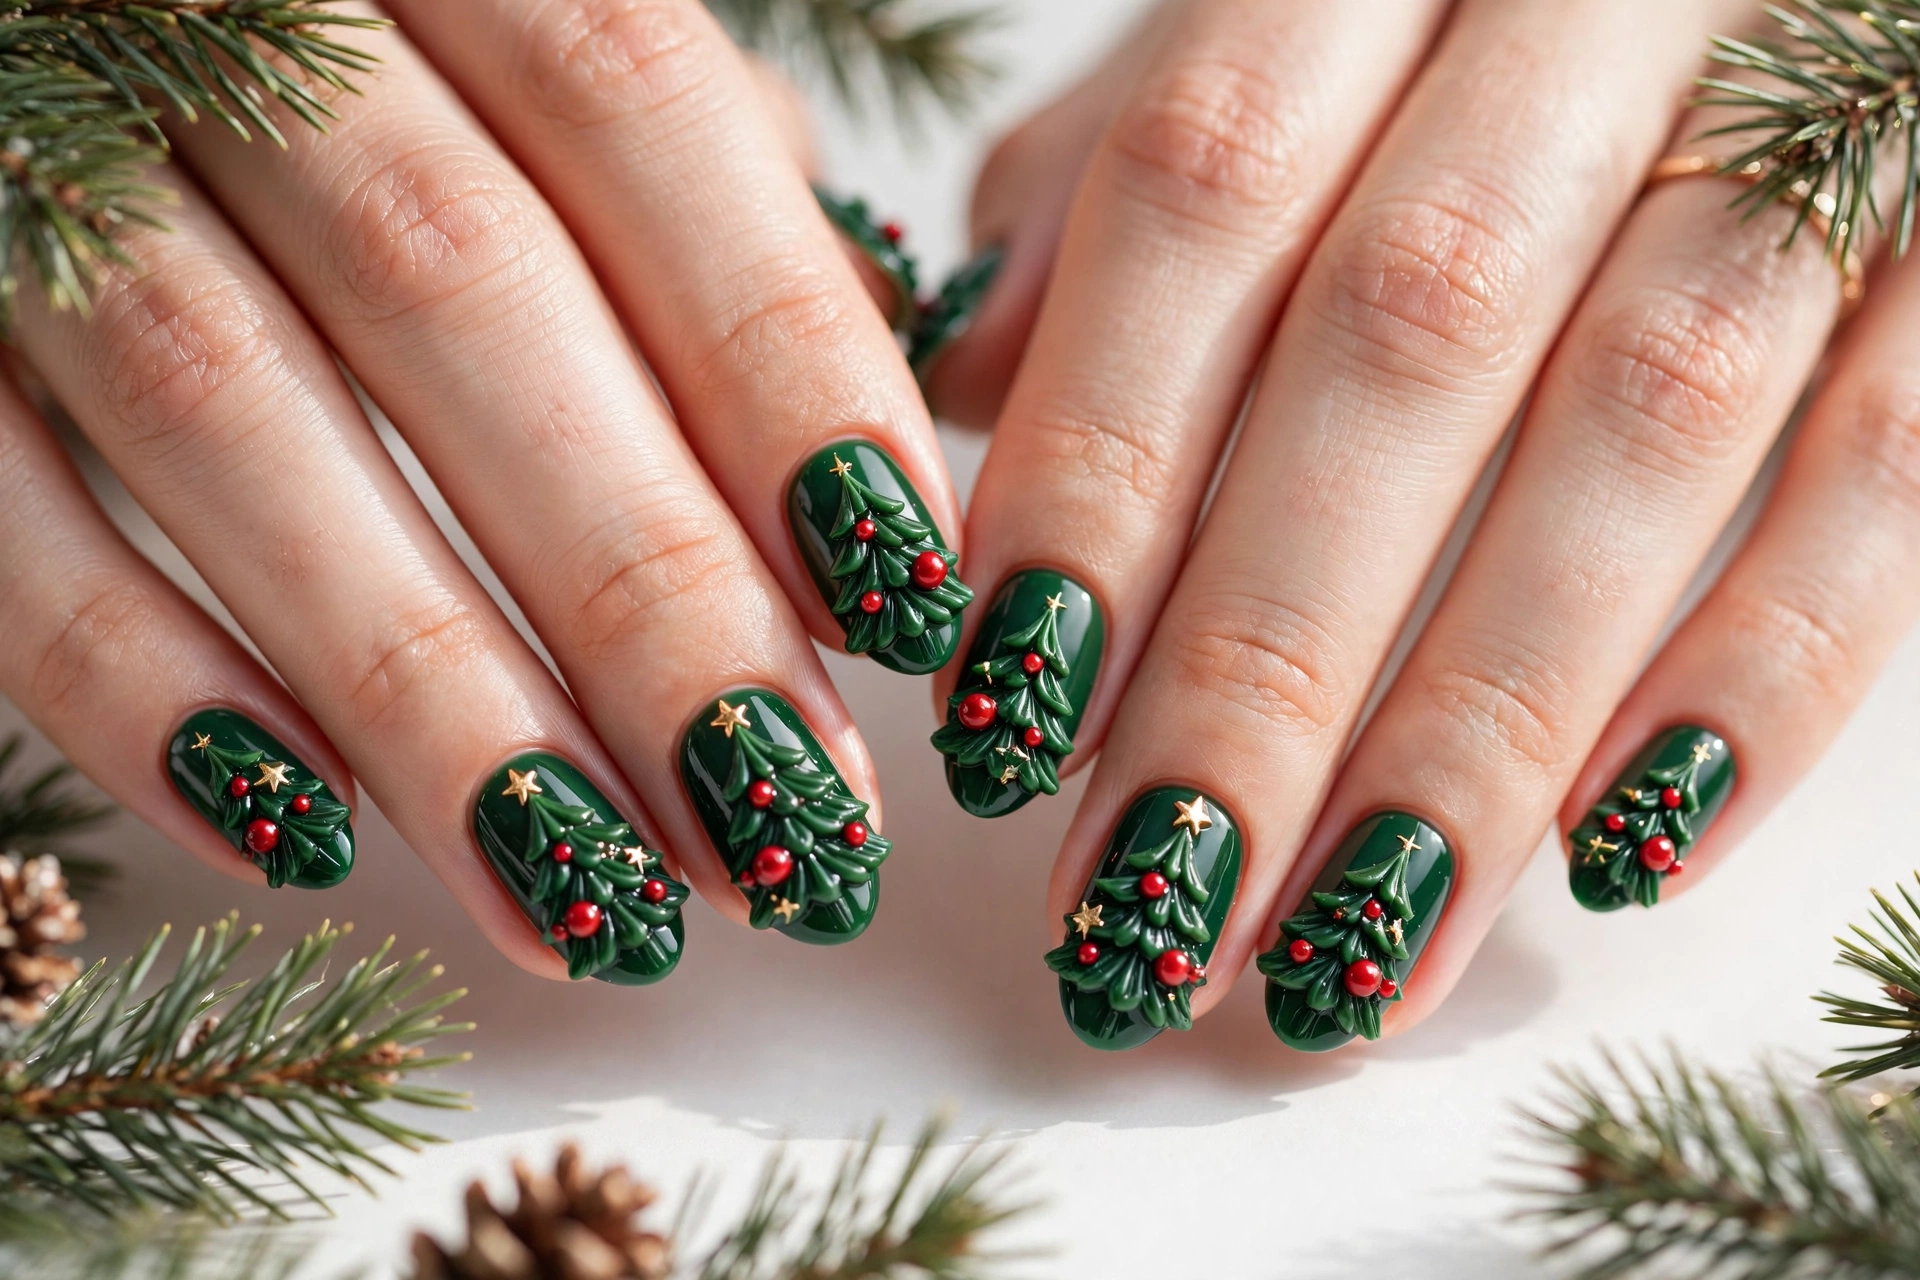
Before: Plain green tips with a simple top coat and no festive detail.
After: Deep green tips shaped like tiny trees, dotted with glossy red berries and a soft gold star at each peak.
Start with a rich forest green base, then paint a neat triangle near each tip to suggest a small pine. Add three tiny red dots as berries and one gold dot as a star. Seal with a shiny top coat for a fresh holiday look that stays neat for parties and family photos.
Elegant Gold Tree Crowns
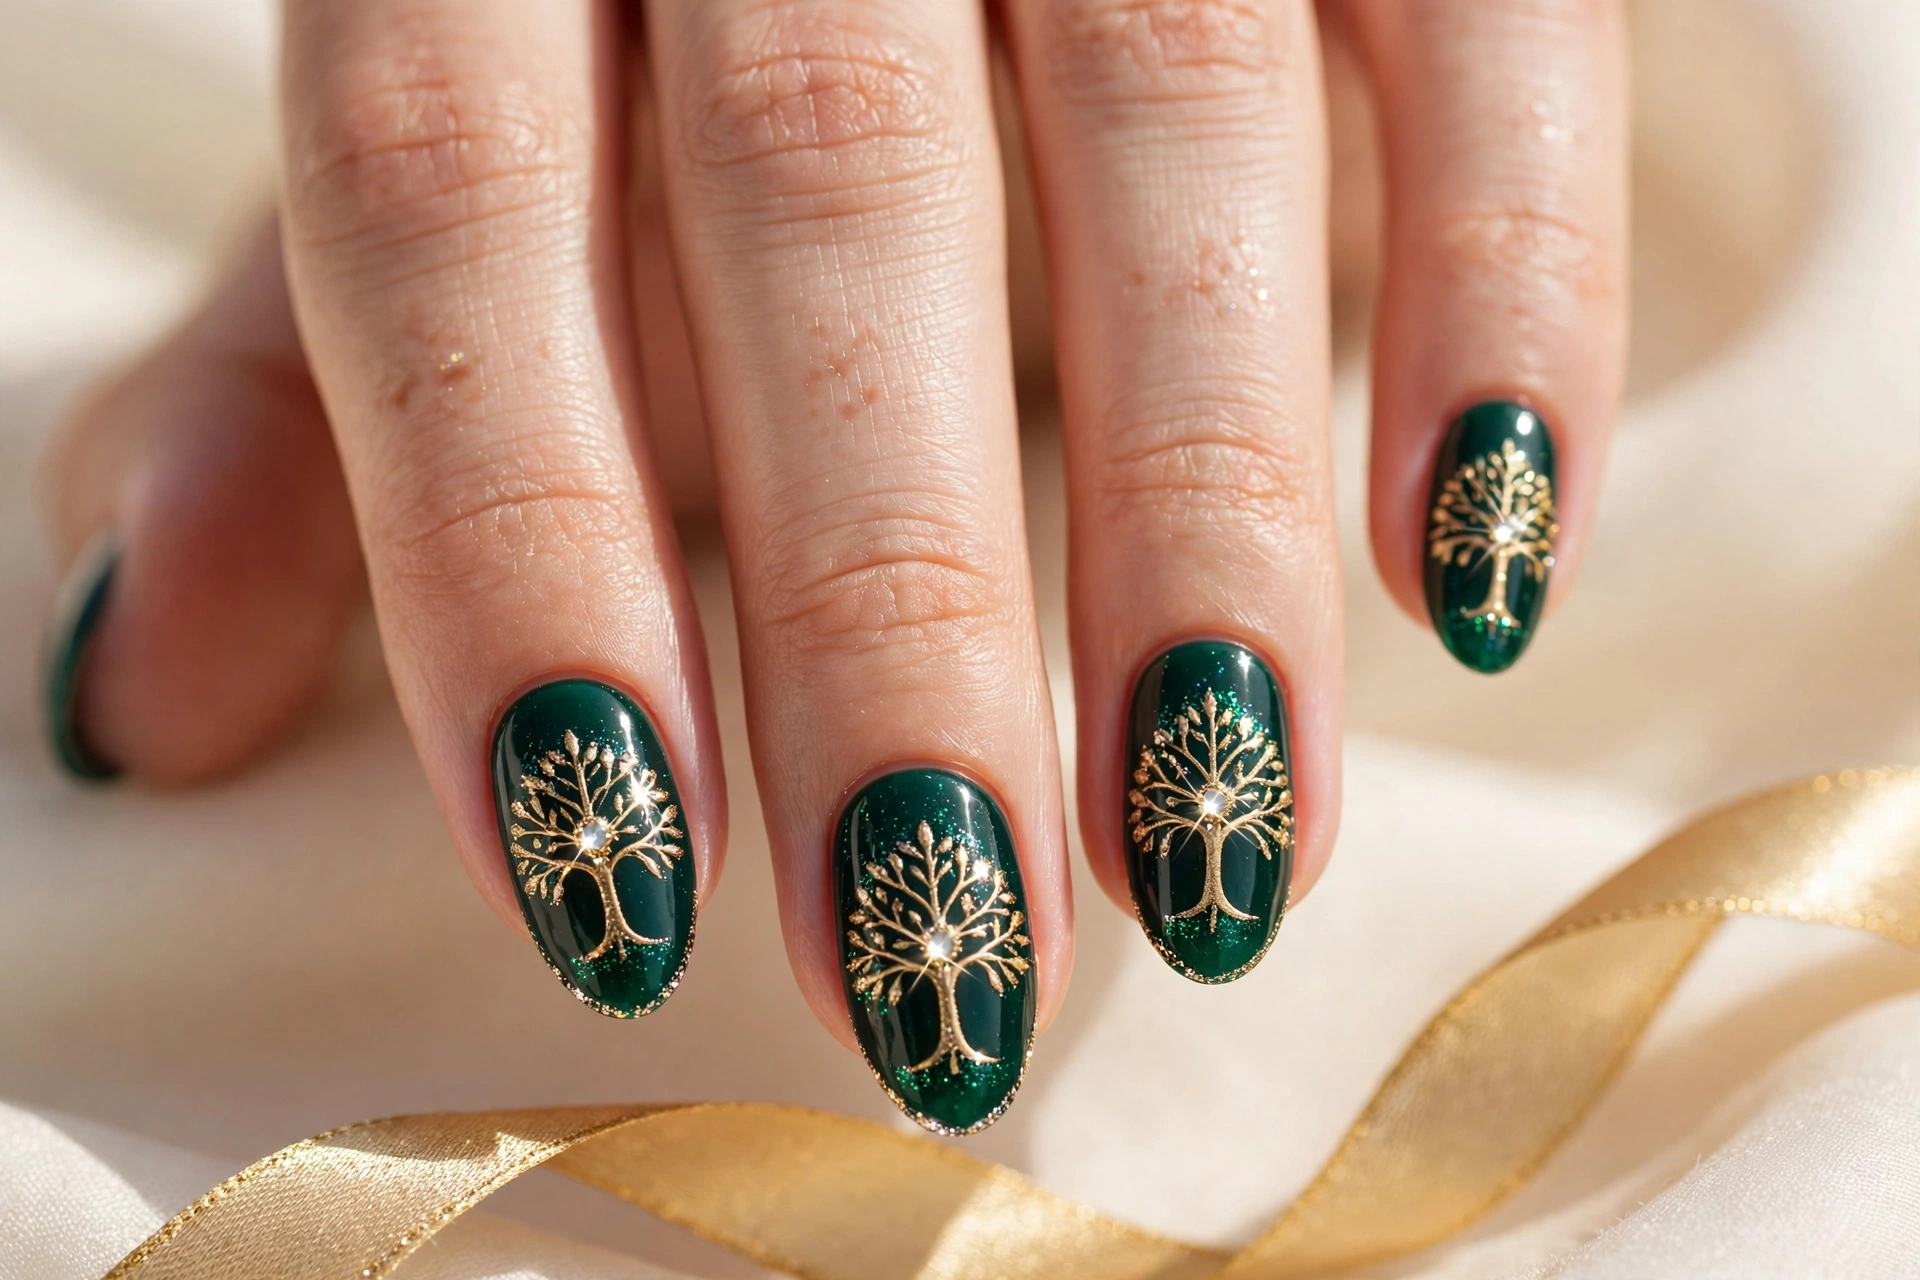
- Paint nails in a deep emerald shade and let them dry fully.
- Add a small gold triangle near the tip to form a crown shape.
- Outline the crown with fine gold glitter for a clean edge.
- Place one tiny crystal at the centre for a regal sparkle.
Keep the rest of the nail simple so the gold crown stays the focus. A matte emerald base makes the shine stand out, while a glossy top coat protects the glitter through long evenings. This refined design suits formal dinners, looks lovely in photos, and feels special without taking much time to create.
Cozy Sweater Tree Tips
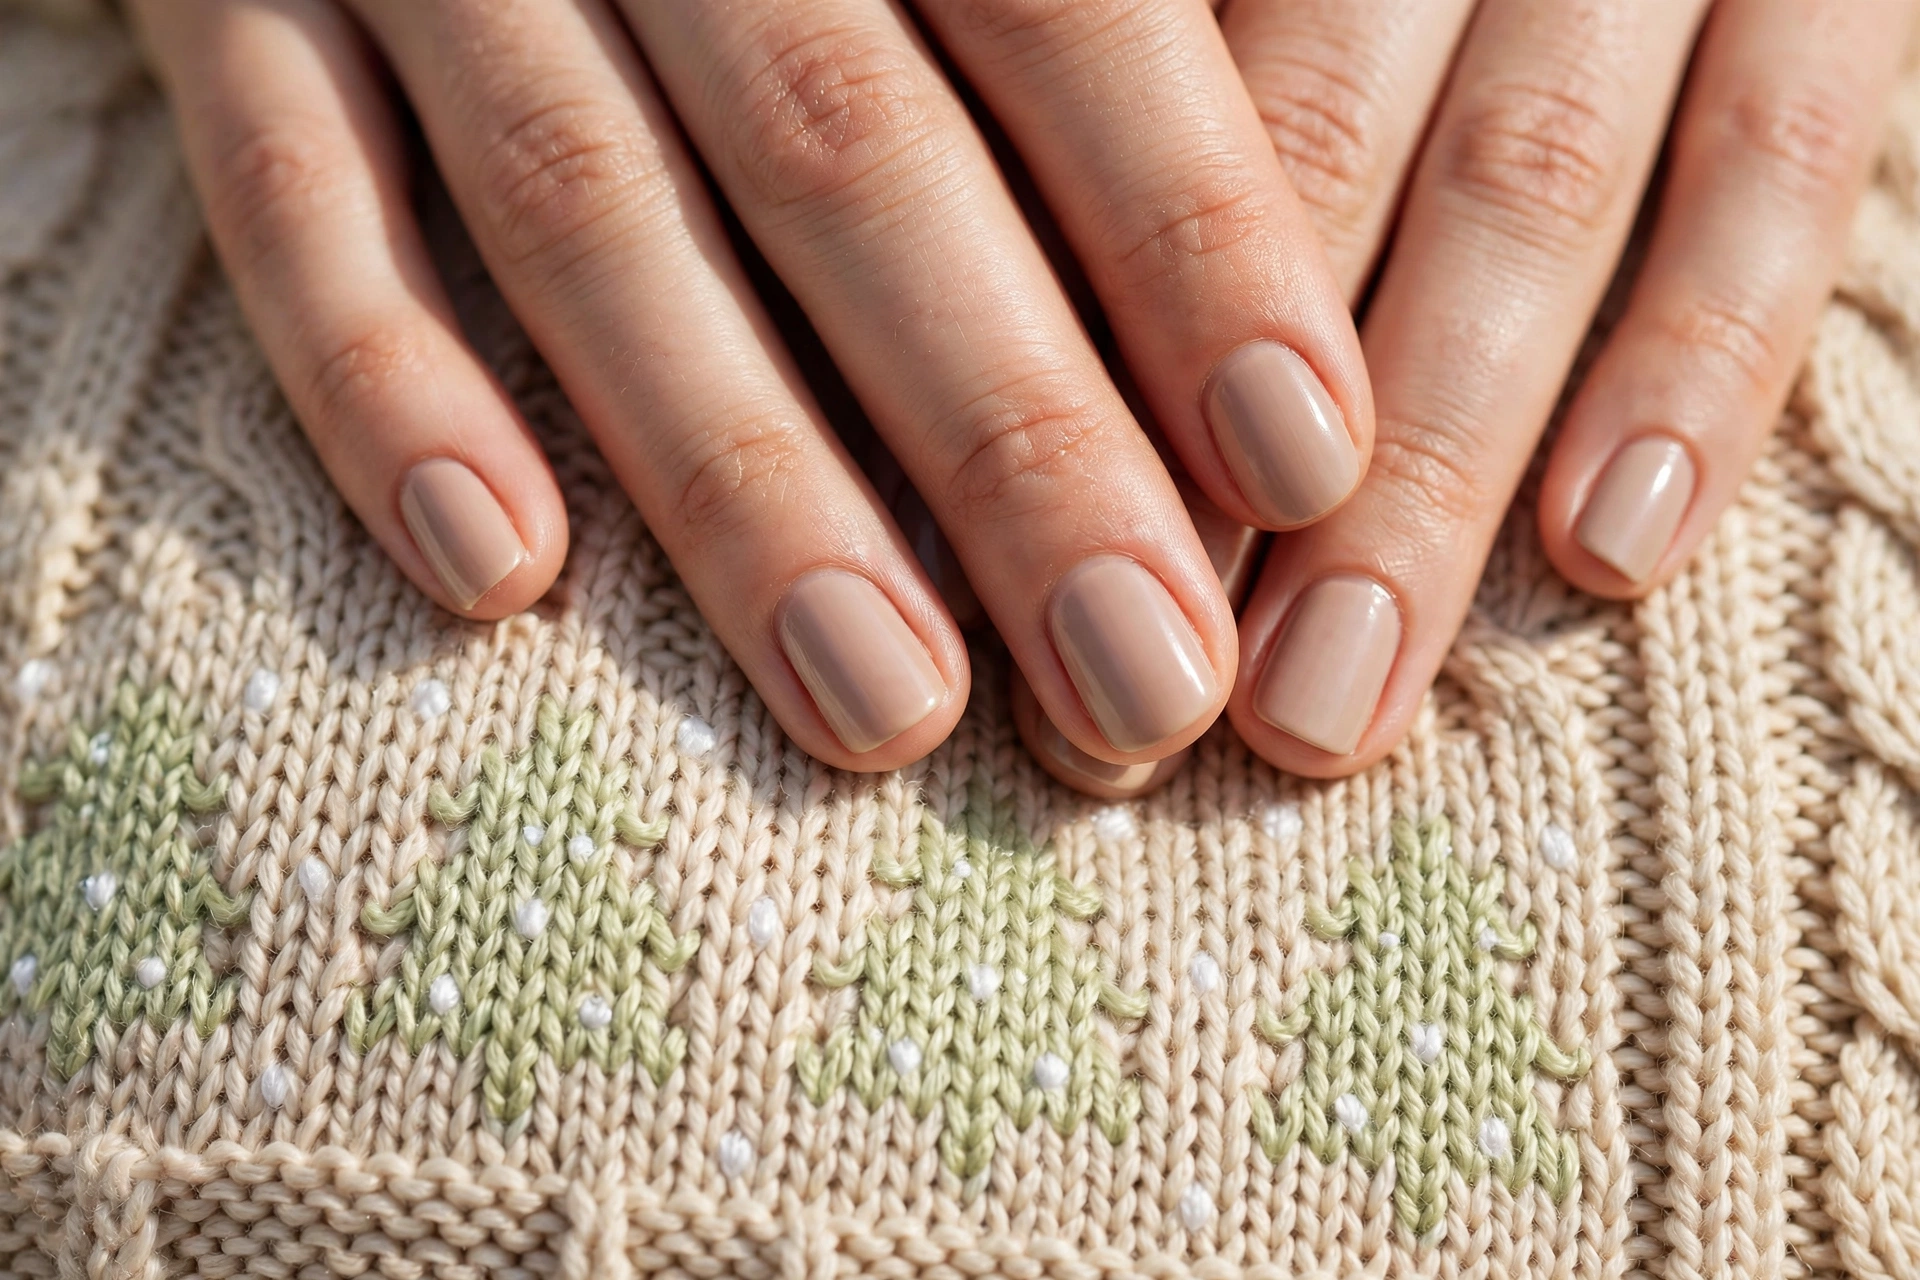
| Style | Best for | Finish |
|---|---|---|
| Soft knit texture | Cozy gatherings | Matte |
| Fine cable pattern | Everyday winter wear | Satin |
| Chunky knit accent | Statement party nails | Glossy |
Choose a soft neutral base, then press a knit pattern gently over each tree shape for a cozy sweater effect. Keep lines light so the tree stays clear, and add tiny white dots for snow. A matte top coat completes the warm knitted feel, making this design perfect for cold days and festive family moments.
Winter White Tree Swirls
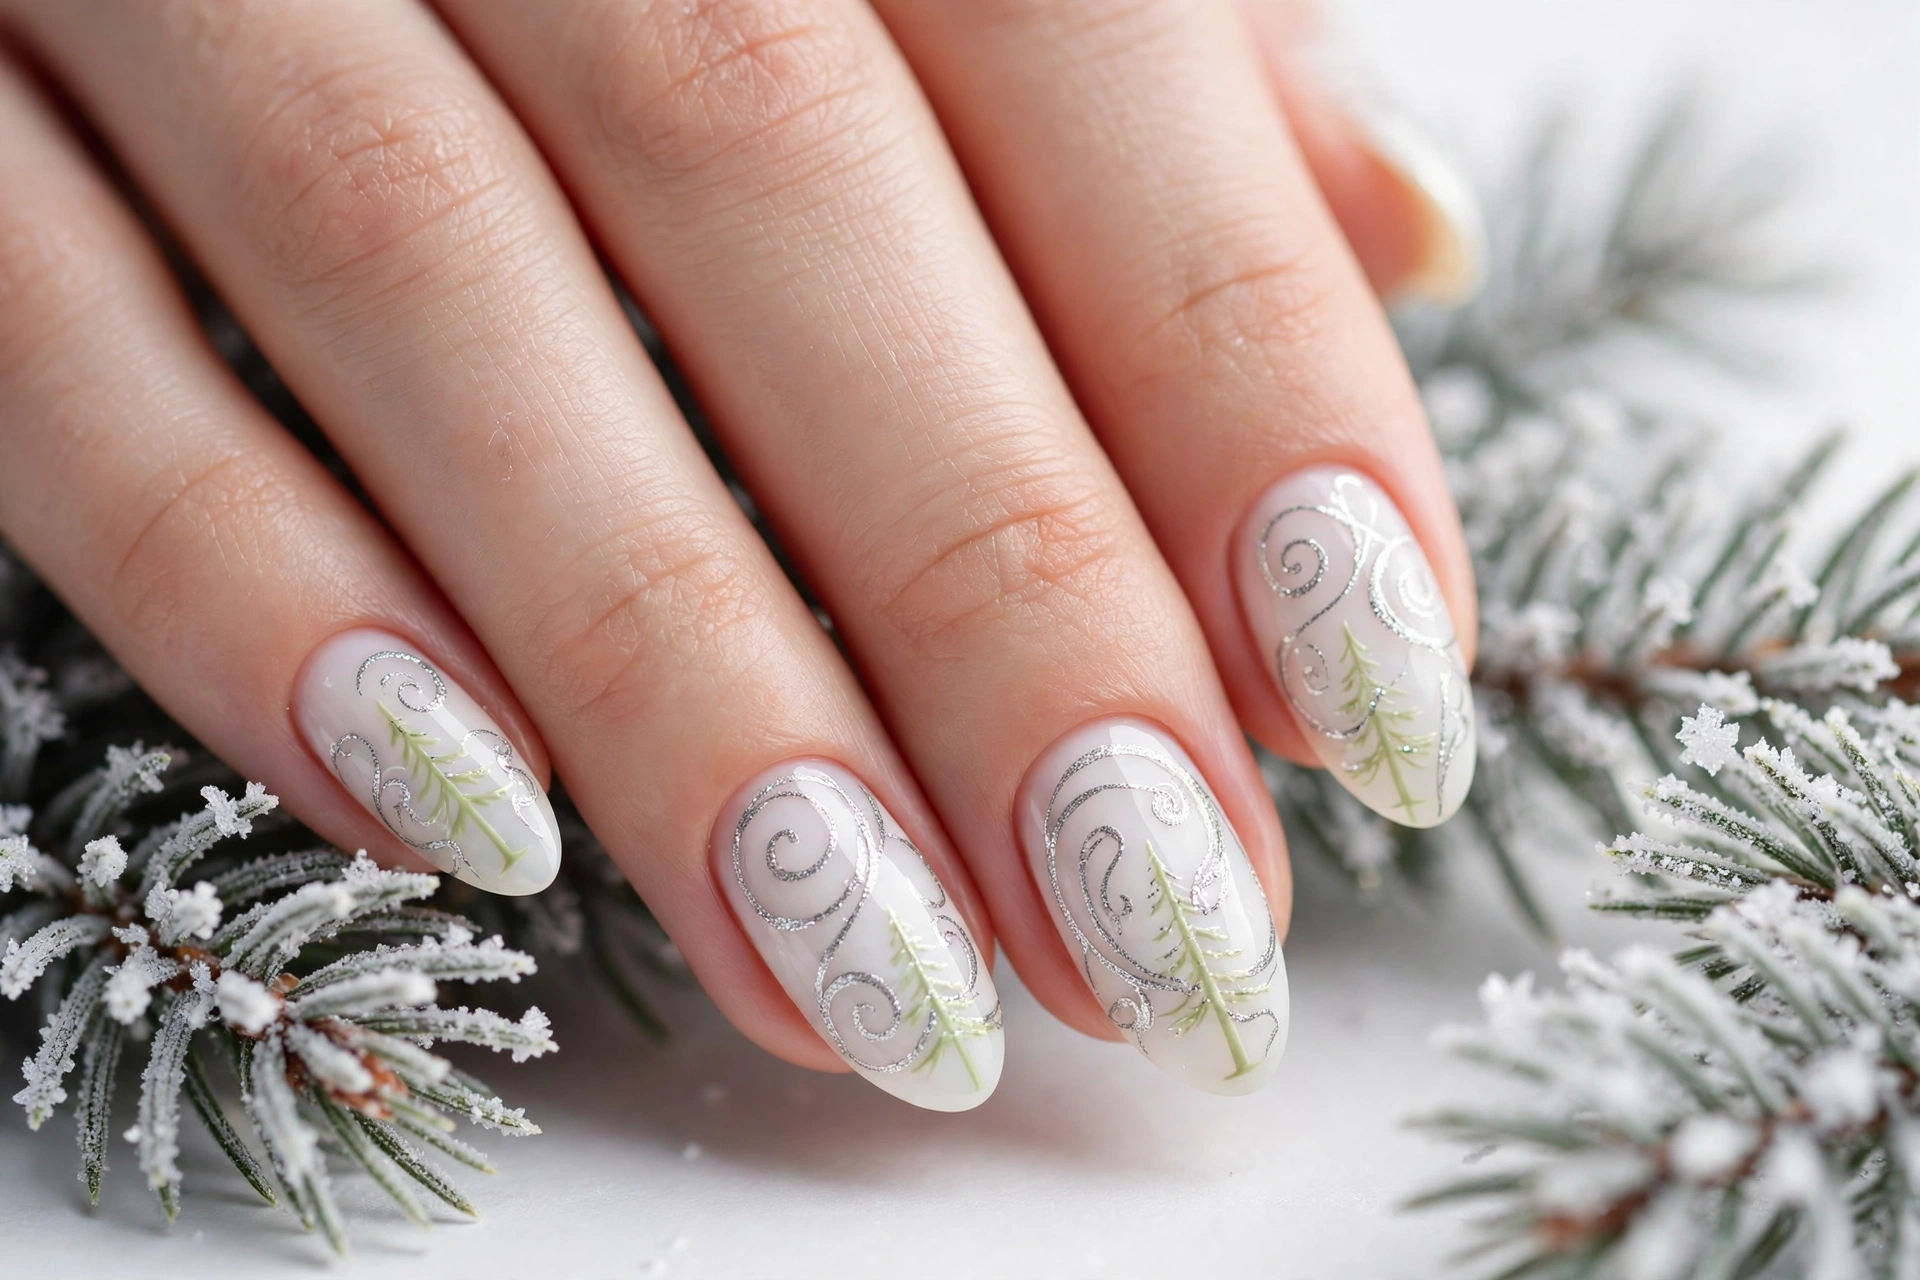
DO:
- Use a milky white base for a soft snowy glow.
- Paint thin silver swirls over a pale green tree shape.
DON’T:
- Overload the nail with thick glitter that hides the swirl.
- Rush drying time between layers.
Start with two thin coats of milky white and let each coat dry well. Draw one gentle swirl from the base to the tip, then add a second curve for movement. Keep the tree shape slim and clean, finish with a glossy top coat, and enjoy a calm winter design for holiday evenings.
Twinkling Lights Tree Tips
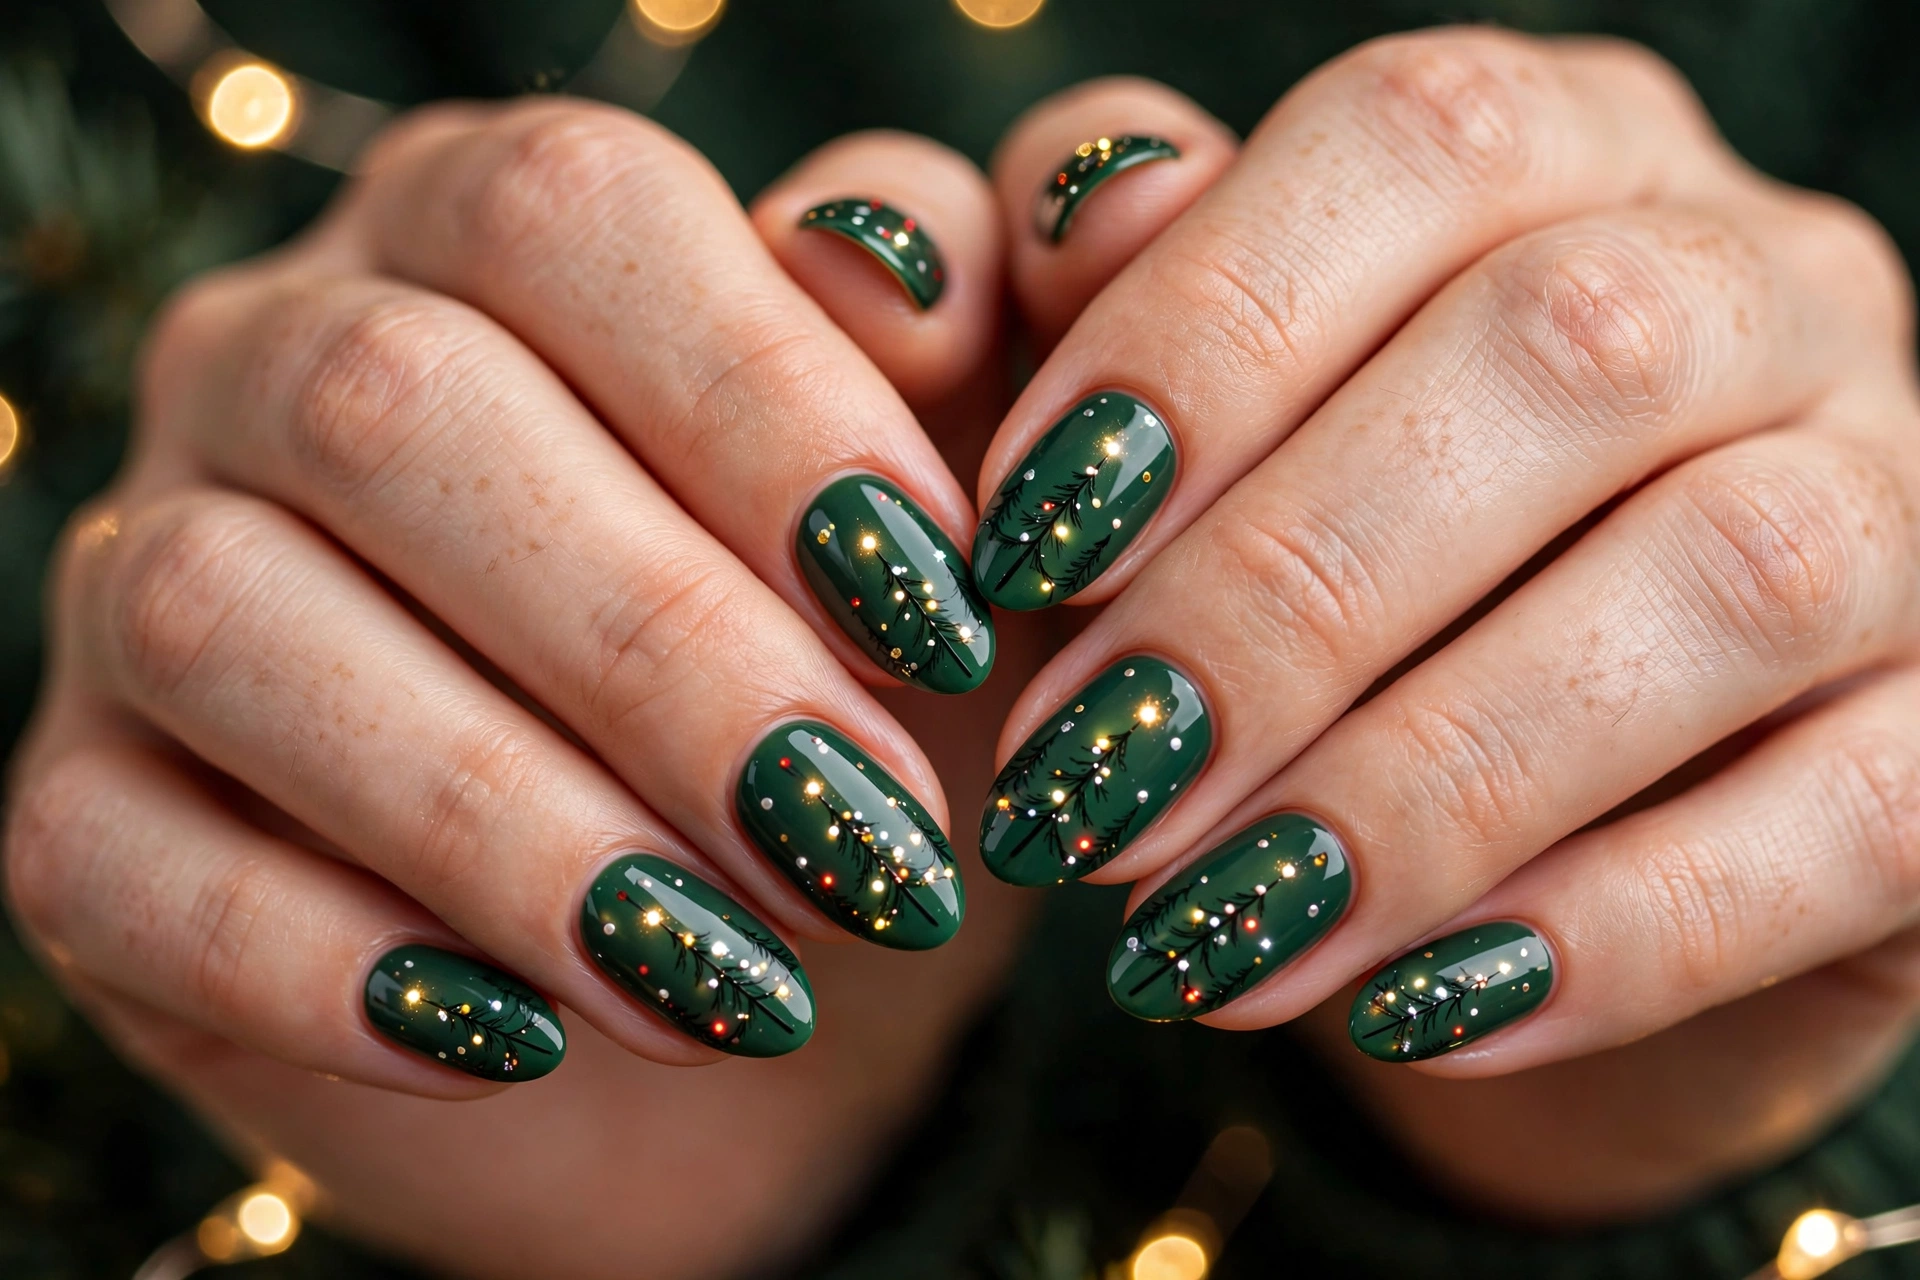
Quick Fact: Best base: Deep green polish with a glossy finish.
Quick Fact: Light effect: Tiny gold and silver dots mimic glowing bulbs.
Quick Fact: Top coat: Two thin layers keep the lights bright and chip free.
Paint a slim tree on each nail, then place small dots in warm gold, soft silver, and bright red along the branches. Space the dots evenly so each light stands out clearly. Finish with a glossy top coat for a cheerful glow that looks wonderful at evening parties, in photos, and beside a decorated tree.
Regal Christmas Tree Party
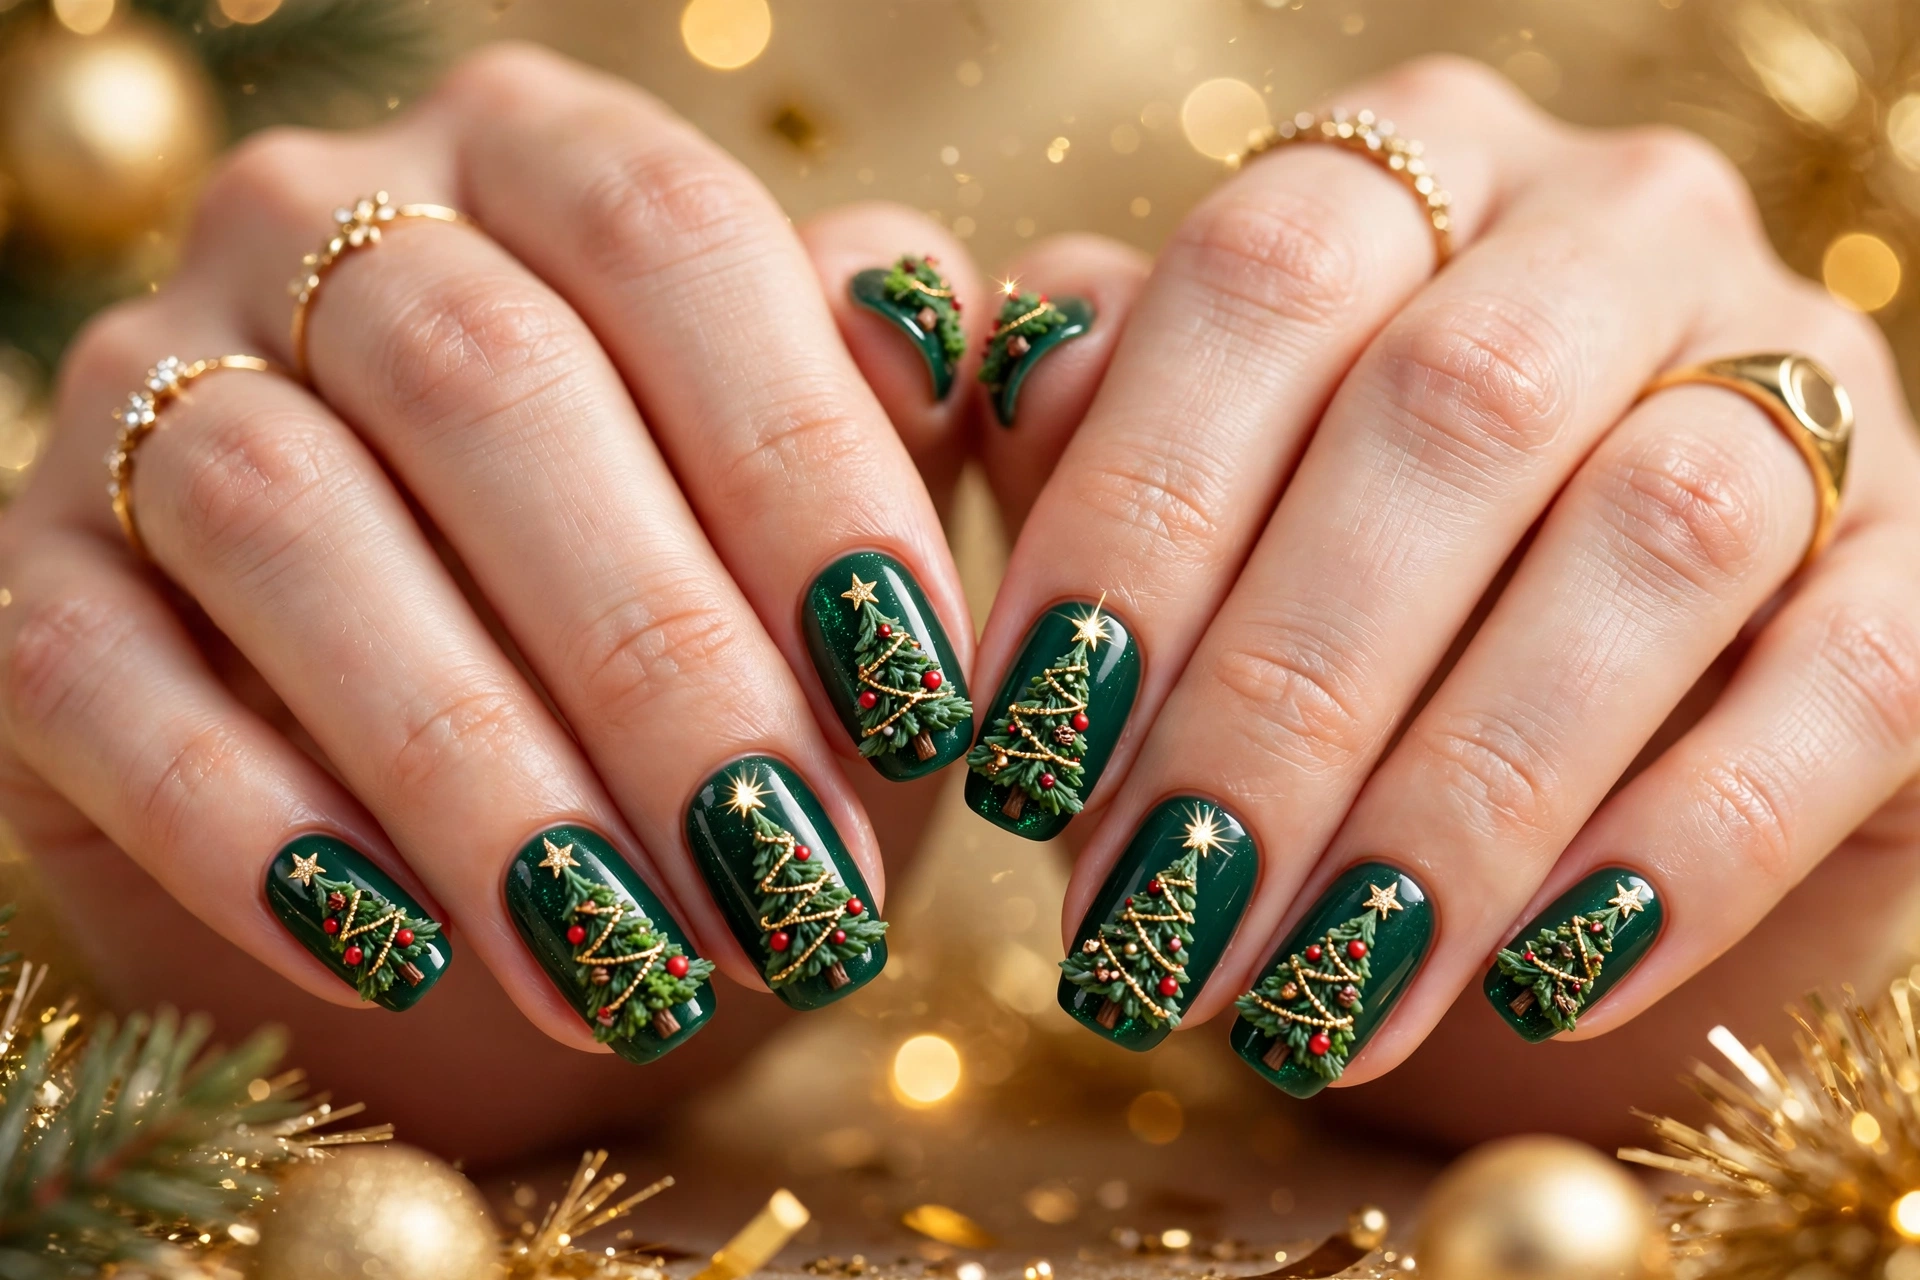
A regal party design begins with a deep green base and a tall, elegant tree painted down the centre of each nail. Add gold garlands, tiny red ornaments, and one sparkling star at the top for a truly festive finish. It suits long nails best and also works on shorter nails.
Keep the background rich and glossy so the gold details shine beautifully in warm evening light. A careful top coat protects the art through dancing, dining, and photographs, leaving your hands looking polished, joyful, and ready for every celebration throughout this merry season.
Conclusion
From classic green tips to regal gold crowns, this collection shows how a tree design can carry the whole holiday season with warmth and charm. Choose the idea that matches your mood and your plans, then give yourself a calm evening to paint it well. Christmas tree nails suit quiet winter days, cozy family evenings, and joyful holiday parties, and they pair beautifully with rings, knits, and winter dresses. Save your favourites on Pinterest, try one new idea each week, and share your result with friends who love festive beauty too. Your hands deserve a look that feels merry, timeless, and yours.