
Flat roots and wispy ends can make styling fine hair feel frustrating, especially when you want a fuller, more voluminous look. The right haircut can change everything.
These Haircuts for Thin Fine Hair feature 24 inspiring styles that create the appearance of more body, movement, and thickness without requiring complicated daily routines. From blunt bobs and soft layered lobs to textured pixies and face-framing cuts, there is something for different lengths, preferences, and lifestyles.
I’ve noticed that small details, such as keeping the ends full, placing layers strategically, and choosing a flattering part, can make a hairstyle look noticeably more dimensional. The secret isn’t always adding more layers. It’s choosing a shape that works with your natural hair texture.
Whether you love short, chic styles or prefer to keep your length, these ideas will help you find a fresh look worth saving for your next salon appointment.
1. Blunt Chin-Length Bob

A blunt bob creates the illusion of thicker hair through one simple detail: a clean, even perimeter. Rather than thinning out the ends with heavy layers, the stylist cuts the hair to a consistent length around the chin. This makes the bottom edge appear denser and more defined.
For anyone exploring haircuts for thin fine hair, this classic shape offers a practical starting point. Ask your stylist to keep the ends relatively solid and avoid excessive texturizing. A little root lift and a gentle blow-dry can make the finished style look fuller without requiring complicated styling techniques.
2. Soft Layered Lob
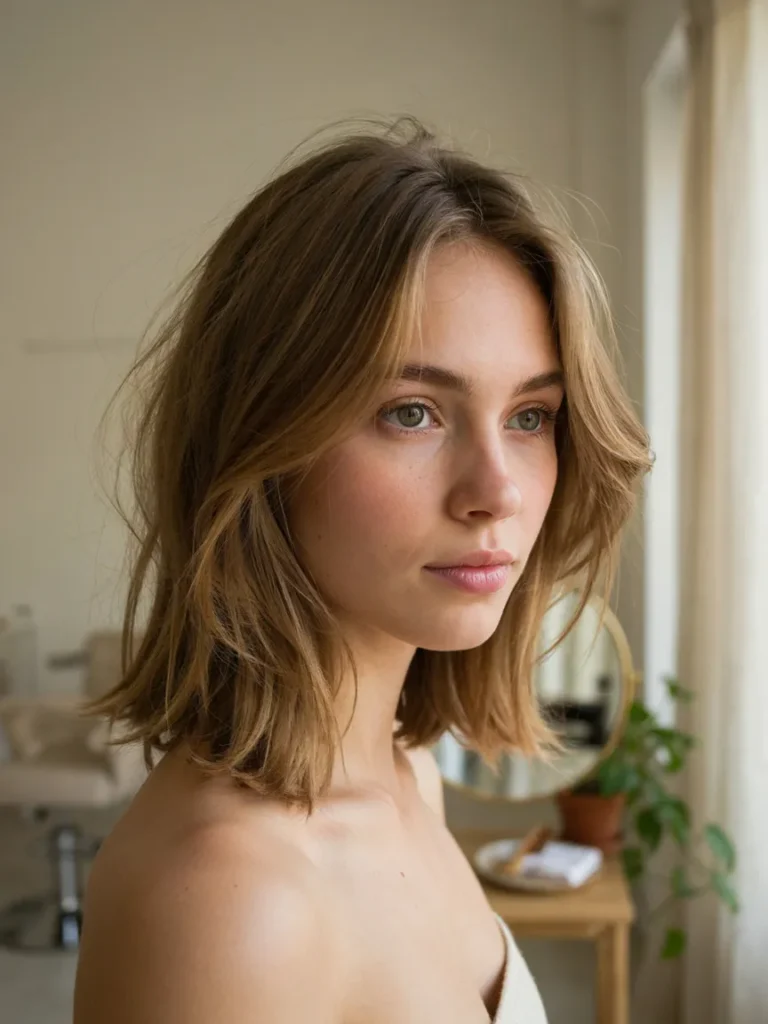
Shoulder-length hair with soft layers offers movement without sacrificing too much fullness. The longer bob, often called a lob, keeps enough length for ponytails while preventing the ends from looking overly weighed down.
- Length: Between the chin and shoulders or just below.
- Layers: Keep them subtle and concentrated around the face.
- Parting: A slightly off-center part can introduce natural-looking lift.
- Styling: Blow-dry with a round brush, directing the roots upward.
- Finish: Turn the ends slightly inward or outward for movement.
I’ve noticed that restrained layering tends to work better for fine hair than numerous short layers throughout the head. Ask your stylist to preserve density at the perimeter, especially if your ends already look wispy. The result is a versatile cut with a fuller-looking outline and an easy everyday shape.
3. Side-Parted Pixie

Short hair can create an immediate impression of fullness because less length weighs down the roots. A side-parted pixie adds another advantage: the sweeping front section directs attention toward the crown, where a little extra height creates a more dimensional silhouette.
For the best result, request a pixie with softly textured layers on top and neatly tapered sides. Keep the crown long enough to style with your fingers, rather than cutting every section equally short. A pea-sized amount of lightweight styling cream can separate the strands without making them greasy or flat. This cut suits anyone who enjoys quick morning styling and regular salon trims.
4. Feathered Shoulder-Length Cut

BEFORE
Flat, one-length hair can sometimes hang close to the face, making the overall shape appear limp. Heavy ends may also lack movement when the hair is naturally fine.
AFTER
Feathered layers introduce gentle movement around the cheeks and shoulders. The ends look lighter and more flexible, while the overall length remains long enough for everyday styling.
This cut works especially well when the layers are concentrated around the face instead of scattered throughout the entire head. Ask your stylist to keep the lower perimeter reasonably full. A round brush and a light blow-dry lotion can help the feathered sections curve naturally without making fine strands feel coated or greasy.
5. Textured Short Bob

- Choose the length. Ask for a bob that sits between the ears and chin, depending on your face shape and preferred styling.
- Keep the perimeter strong. Request light internal texture rather than heavily thinned ends.
- Create crown lift. Blow-dry the roots in the opposite direction of your usual part.
- Separate the ends. Work a tiny amount of lightweight styling paste through the tips.
A textured short bob gives fine strands a little separation while maintaining a compact silhouette. The key is balance: too much thinning can make the ends appear sparse, but carefully placed texture adds dimension. This cut is particularly useful for people who prefer short hair with a relaxed finish rather than a perfectly polished, flat shape.
6. Inverted Bob
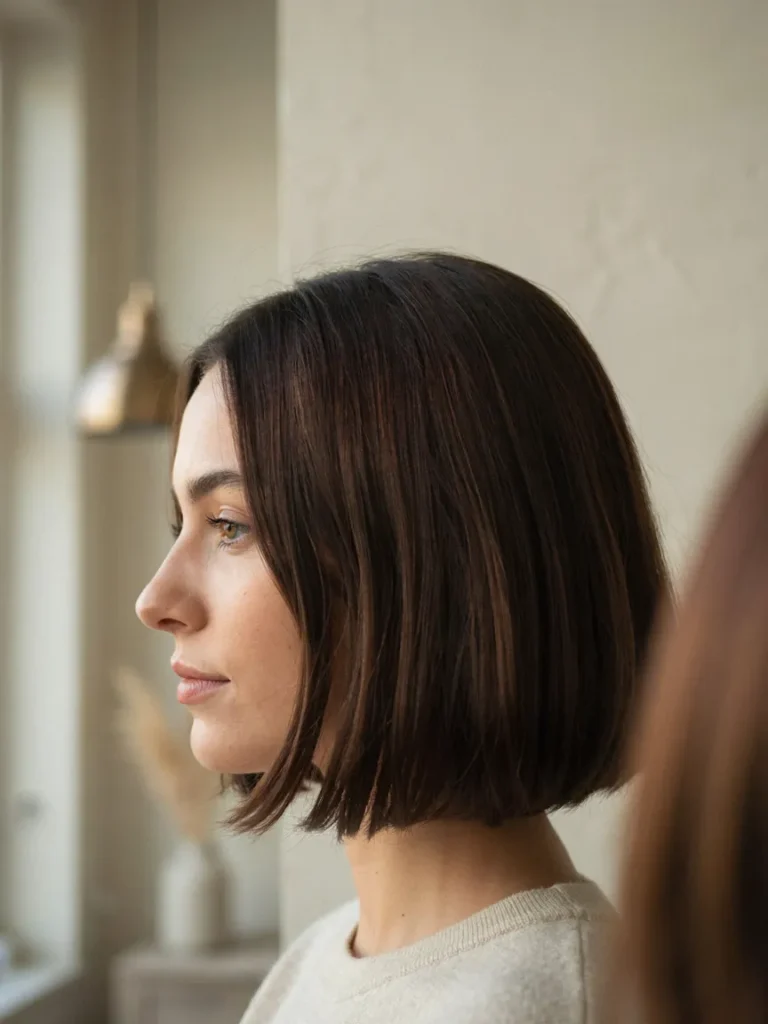
| Feature | Option A: Classic Bob | Option B: Inverted Bob |
| Back shape | Usually even or softly rounded | Shorter and slightly graduated |
| Front sections | Similar length to the back | Longer toward the chin |
| Visual effect | Clean, balanced outline | More lift and dimension at the back |
| Styling | Straight, curled, or softly waved | Smooth crown with curved front pieces |
An inverted bob can make fine hair look fuller at the back because its graduated shape creates structure around the crown and nape. Ask your stylist for a subtle angle rather than an extreme difference between the front and back. A smooth blow-dry with a medium round brush helps emphasize the shape without requiring heavy products.
7. Wispy Curtain Bangs

DO
- Ask for lightweight curtain bangs that split naturally around the center.
- Keep the shortest pieces near the brows, adjusted to your features.
- Blend the longer sides into the rest of your haircut.
- Use a small round brush to lift the roots while blow-drying.
DON’T
- Request an excessively thick fringe that removes too much hair from the sides.
- Apply heavy oils directly to the bangs.
- Cut the fringe too short before checking its natural movement.
- Overuse hot tools on delicate strands.
Wispy curtain bangs add shape around the face without requiring a dramatic haircut. They work particularly well with lobs and shoulder-length styles, creating the appearance of movement near the forehead and cheekbones. For easier maintenance, ask your stylist to customize the fringe to your natural part and how your hair falls when air-dried.
8. Collarbone-Length Cut
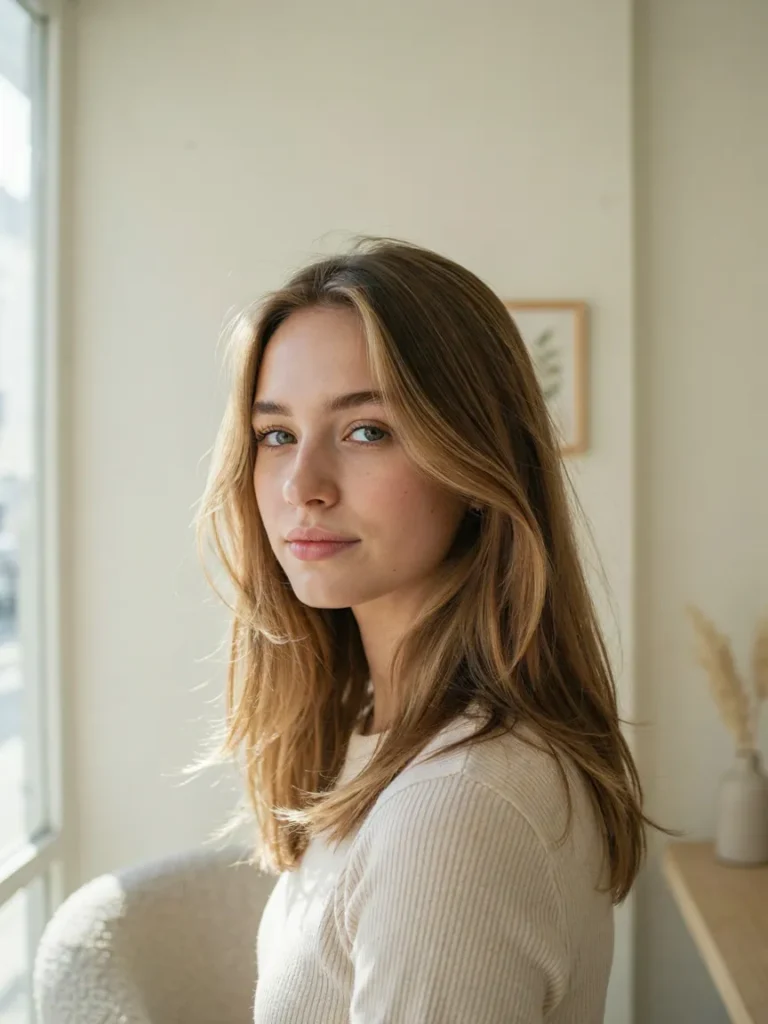
Best For: Fine hair that needs a balance of length and fullness.
Length: At the collarbone or slightly above it.
Styling Time: Around 10 to 15 minutes with a simple blow-dry.
Maintenance: Regular trims help preserve the shape and prevent wispy ends.
Result: A versatile silhouette with movement and a fuller-looking outline.
The collarbone cut offers a useful middle ground for anyone who finds short bobs too restrictive but notices that longer hair falls flat. Keeping the ends near the collarbone limits excess weight while preserving styling options. A subtle bend through the lower half adds dimension, and a side part can provide extra lift at the roots.
9. Chin-Length French Bob

Few short hairstyles feel as polished as a French bob with its compact shape and softly imperfect finish. The chin-length outline helps fine hair appear more substantial, while subtle texture keeps the style from looking overly rigid.
For the most flattering result, ask your stylist to adapt the fringe and length to your hairline, face shape, and natural growth pattern. A small amount of lightweight mousse at the roots can provide gentle lift, while finger-styling the ends preserves their natural movement. Avoid heavy creams that can flatten the fringe. This haircut is especially appealing if you prefer a distinctive, low-fuss style with a classic Parisian feel.
10. Rounded Layered Bob

A rounded bob creates a fuller-looking silhouette by building gentle shape around the back and sides. Its curved outline helps fine strands appear more substantial than a cut with heavily tapered ends.
- Shape: Request a softly rounded profile with subtle graduation at the back.
- Length: Keep the ends near the jawline for a compact outline.
- Layers: Concentrate shaping at the crown rather than thinning the perimeter.
- Styling: Blow-dry with a round brush, lifting the roots before curving the ends inward.
- Finish: Use a lightweight finishing spray instead of a heavy smoothing cream.
For hair that tends to fall flat, this structured bob offers a balance of polish and movement. Ask your stylist to adjust the graduation to your natural density so the back looks rounded without exposing too much scalp.
11. Root-Lifted Layered Cut

Quick Tip:
Ask your stylist for discreet crown layers that encourage movement without removing too much weight from the ends. During styling, lift small sections at the roots and direct warm air underneath them. Let each section cool before brushing it out to help the added height last longer.
The goal is natural-looking volume, not a heavily teased finish. A lightweight volumizing mousse applied sparingly near the roots can help fine strands maintain their shape throughout the day. Keep the lower layers relatively substantial, especially if your hair is sparse toward the ends. This cut works well for shoulder-length styles that need extra height without sacrificing overall length.
12. Asymmetrical Short Bob

BEFORE: A conventional short bob may look flat when both sides fall evenly and the roots lack lift. Fine strands can also lose definition when the haircut has little shape or contrast.
AFTER: An asymmetrical bob introduces a diagonal line that adds visual interest and makes the silhouette feel more dynamic. The longer front section frames the face, while the shorter side creates a sharper outline.
For the most wearable version, keep the difference between the sides subtle and preserve density at the ends. A deep side part can enhance the shape without requiring excessive styling. This cut is a smart choice for anyone who wants a modern, distinctive look while keeping the daily routine relatively simple.
13. Short Shaggy Bob

- Choose a soft shape. Ask for a shaggy bob that sits around the jawline, with gentle movement rather than aggressive thinning.
- Keep the layers controlled. Request shorter pieces around the crown and subtle face-framing sections.
- Add lightweight texture. Apply a small amount of mousse to damp hair and scrunch gently.
- Finish naturally. Air-dry or use a diffuser on low heat to preserve the separated ends.
A short shaggy bob gives fine hair a relaxed, piecey appearance that can make the overall style look more dimensional. The secret is keeping enough density around the bottom edge while introducing texture higher up. If your hair is very straight, ask your stylist to create movement that works with your natural pattern rather than relying on daily heat styling.
14. Classic Graduated Bob
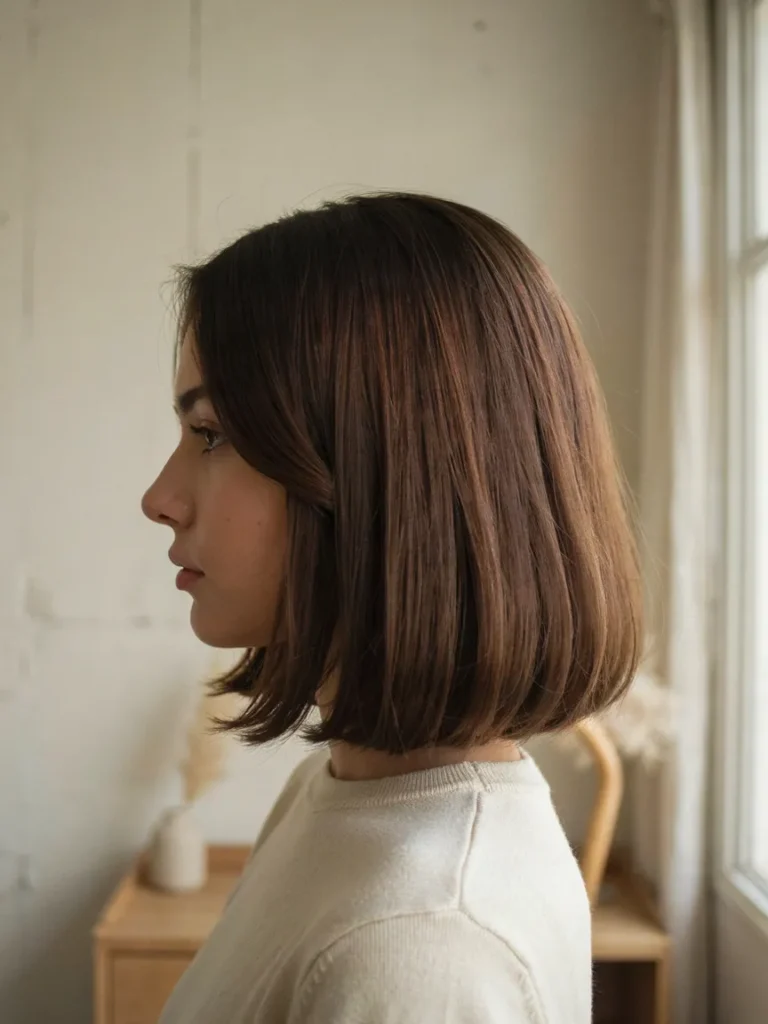
| Feature | Option A: One-Length Bob | Option B: Graduated Bob |
| Back profile | Even length | Shorter, stacked sections |
| Crown shape | Naturally follows the head | More structured and rounded |
| Styling effect | Sleek, simple outline | Added shape and dimension |
| Best suited for | Those preferring minimal layering | Those wanting a shaped back and fuller-looking crown |
A graduated bob uses carefully stacked sections to create a rounded profile, especially around the back of the head. This structure can help fine hair look more substantial without depending on lots of styling products. Ask your stylist for a gentle graduation that suits your natural density, and keep the front sections long enough to frame your face comfortably.
15. Long Face-Framing Layers

DO
- Keep most of the length intact while shaping the sections around your face.
- Ask for long, blended layers rather than short, scattered pieces.
- Begin the shortest face-framing sections at a length that suits your cheekbones or jawline.
- Use a round brush to curve the front pieces away from your face.
DON’T
- Remove too much hair from the bottom perimeter.
- Request extensive layering throughout already sparse ends.
- Apply heavy styling oils before blow-drying.
- Expect layers alone to create lasting root volume without suitable styling.
Long face-framing layers offer movement while preserving the length many people prefer. They draw attention toward the eyes and cheekbones, giving straight hair a softer outline. For the best result, ask your stylist to keep the longest sections full and focus the shaping around the front. This approach adds dimension without making the ends appear overly thin.
16. Soft Wavy Lob

Best For: Fine, straight or slightly wavy hair that needs more visible movement.
Styling Time: Approximately 10 to 15 minutes with a curling wand or heatless styling method.
Skill Level: Beginner-friendly with a little practice.
Result: Soft waves create dimension and help the hair appear fuller through the mid-lengths.
A wavy lob gives fine strands a break from lying in one straight line. Alternating loose bends creates the appearance of depth without requiring heavy layers or elaborate styling. Keep the waves relaxed rather than tightly curled, and leave the ends slightly straighter for a modern finish. A lightweight texturizing spray can help maintain separation without weighing down the roots.
17. Chin-Length Layered Cut

The right layers can give a short haircut more movement without sacrificing its fuller-looking outline. A chin-length cut keeps the overall shape compact, while carefully placed layers prevent the sides from appearing too heavy or flat.
For a balanced result, ask your stylist to concentrate the layering near the temples and upper sections while preserving density around the bottom edge. A small round brush can lift the roots during blow-drying, and a light styling lotion can help the ends fall into place. Avoid excessive razor cutting if your hair is already sparse at the tips. This shape works especially well for anyone who wants a shorter style with a little softness and dimension.
18. Deep Side-Part Lob

BEFORE: A center-parted lob can sometimes look flat when fine hair naturally falls close to the scalp. Both sides may have little visible lift, particularly around the front hairline.
AFTER: A deep side part shifts more hair across the crown, creating an appearance of extra height and movement. The longer front section also adds an attractive diagonal line around the face.
To recreate the style, part your hair while it is damp, then blow-dry the roots in the opposite direction before placing the part where you want it. Finish with a light mist of flexible-hold spray. Keep the part comfortable and natural rather than forcing the hair against its growth pattern.
19. Airy Butterfly Bob
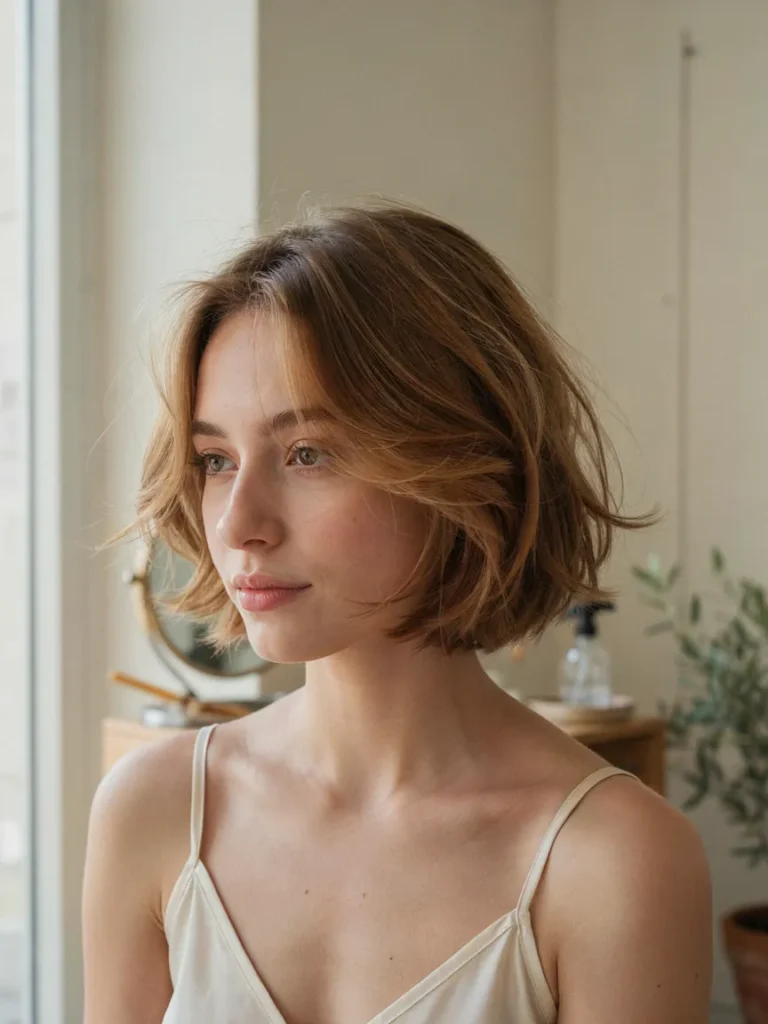
- Set the base length. Ask for a bob that falls around the jawline or just below it.
- Shape the front. Request shorter, sweeping layers around the cheekbones that blend into the sides.
- Preserve the ends. Keep the bottom perimeter reasonably full rather than heavily thinning it.
- Style with a brush. Use a round brush to lift the roots and curve the front sections away from the face.
A butterfly-inspired bob borrows the face-framing movement of longer butterfly cuts but adapts it to a shorter silhouette. The sweeping layers create dimension around the face, while the compact length helps reduce excess weight. For fine hair, subtle layering is essential because too many short sections can make the ends look sparse instead of fuller.
20. Sleek Jaw-Length Bob
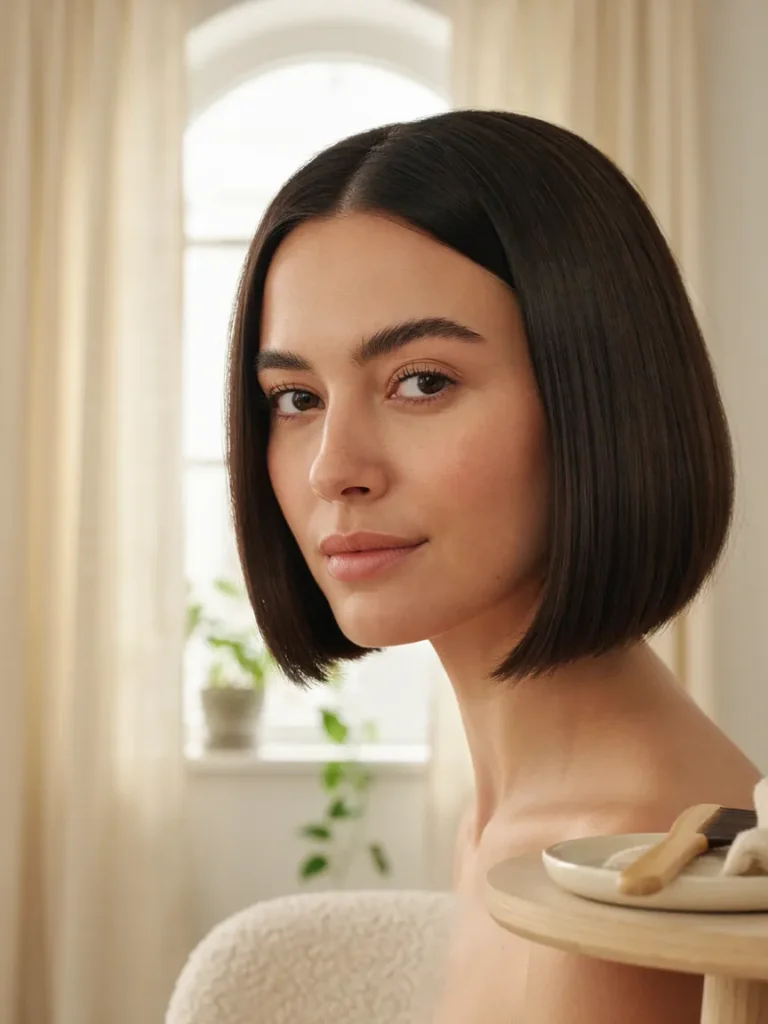
| Feature | Option A: Heavily Layered Bob | Option B: Sleek Jaw-Length Bob |
| Bottom edge | Can appear wispy with excessive thinning | Creates a cleaner, denser-looking outline |
| Surface | More separated texture | Smooth and polished |
| Daily styling | May need extra shaping | Usually straightforward with a blow-dryer |
| Best approach | Use layers where movement is needed | Preserve the perimeter and control flyaways |
A sleek jaw-length bob highlights the shape of the haircut rather than relying on elaborate styling. Its clean perimeter can make fine hair appear more substantial, especially when the ends are healthy and evenly cut. Use a heat protectant before straightening, and avoid heavy serums near the roots. A slight bend at the ends keeps the finish soft instead of rigid.
21. Wispy Textured Pixie
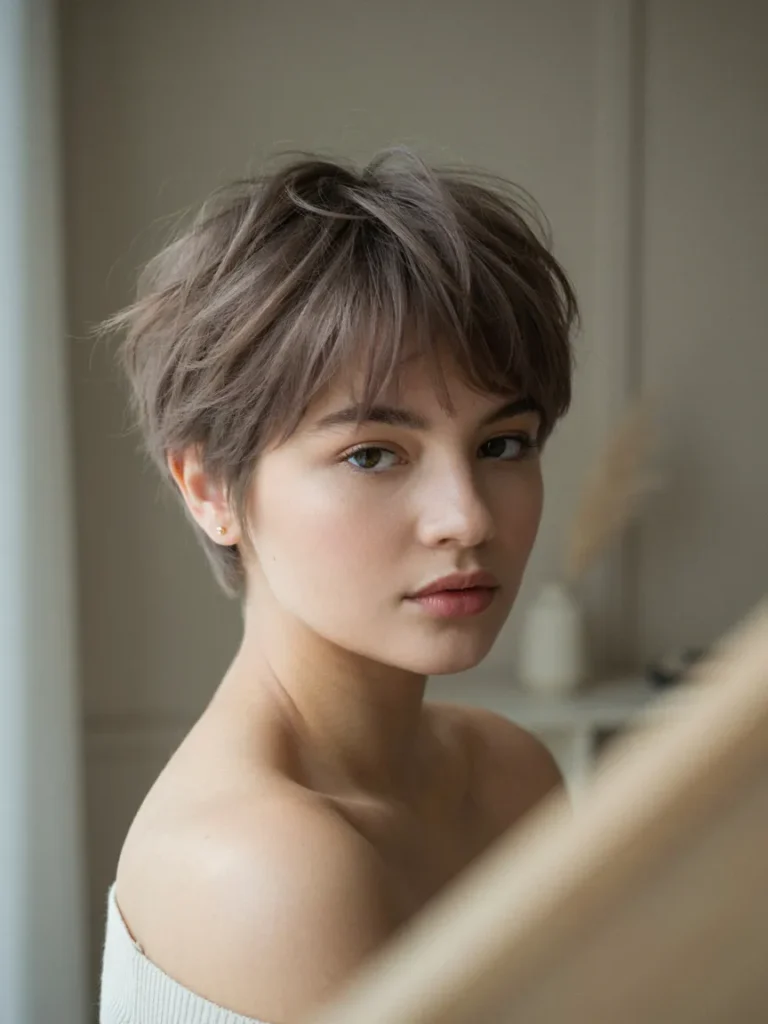
DO
- Keep enough length at the crown to create flexible movement.
- Ask for a soft, feathered fringe that blends into the top.
- Apply a small amount of lightweight volumizing mousse to damp roots.
- Use your fingertips to lift and separate the crown while drying.
DON’T
- Thin every section until the hair loses its shape.
- Apply wax heavily across the entire scalp.
- Flatten the fringe with repeated passes of a straightener.
- Ignore regular trims that maintain the pixie’s outline.
A wispy pixie creates a light, airy finish while allowing the crown to provide visual height. Unlike a heavily sculpted short cut, this version uses small variations in length to create movement. Ask your stylist to tailor the texture to your natural density, and use only enough product to define the strands without making them stick together.
22. Long Blunt Cut
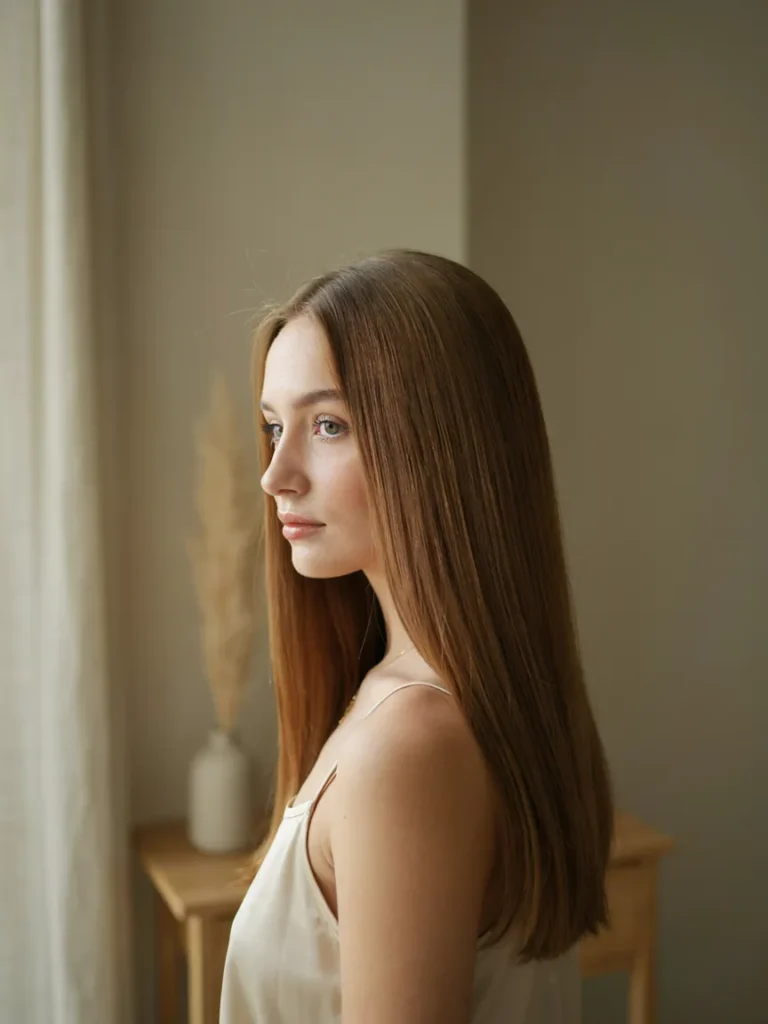
Long hair can still look fuller when the ends have a strong, clean outline. A long blunt cut preserves the length while avoiding the wispy appearance that sometimes develops with excessive layering.
For the best result, ask your stylist to trim the ends evenly and remove as little density as possible. If your hair is naturally fine, keeping the longest layers close to the same length can help the bottom edge appear more substantial. A lightweight volumizing mousse at the roots adds lift without sacrificing the sleek finish. This style suits people who love long hair and prefer a simple cut that works for ponytails, loose waves, and everyday straight styling.
23. Soft C-Shaped Layers

Quick Tip:
Ask your stylist to create long, curved layers that follow the outline of your face and blend into the ends. During blow-drying, use a round brush to guide the front sections inward, creating a soft C-shaped curve rather than sharp, choppy layers.
This technique adds movement around the cheeks and shoulders while preserving the appearance of fullness through the lower lengths. It works particularly well for medium to long fine hair that looks flat when worn completely straight. Keep the layers subtle, and avoid removing too much hair from the ends. The finished style should look smooth, flowing, and naturally dimensional.
24. Shoulder-Length Shag Cut

BEFORE: Fine hair can appear limp when the roots sit flat and the lengths fall in one uninterrupted line. Long, heavy sections may also make it difficult to create visible movement without extensive heat styling.
AFTER: A shoulder-length shag introduces carefully distributed layers that create separation around the crown and face. The wispy fringe and textured ends give the haircut a relaxed shape, while the shoulder-length base keeps it versatile.
Ask your stylist to customize the layers to your natural density, especially if the ends are already thin. A lightweight mousse and gentle scrunching can emphasize natural movement. For straighter hair, a little root lifting during blow-drying helps reveal the cut’s texture without requiring tight curls or heavy styling products.
CONCLUSION
Finding the right haircut can make fine hair feel easier to style and give it a fuller-looking, more dimensional finish. From sleek blunt bobs to airy shags and soft face-framing layers, these 24 Haircuts for Thin Fine Hair offer inspiration for different lengths and personal styles.
Remember, the best cut works with your natural texture, preserves fullness where you need it, and fits your daily routine. Save this article on Pinterest so your favorite styles are ready when you visit the salon. Try an idea that catches your eye, and share this guide with someone looking for their next haircut. Your next favorite hairstyle might be closer than you think!




One Comment