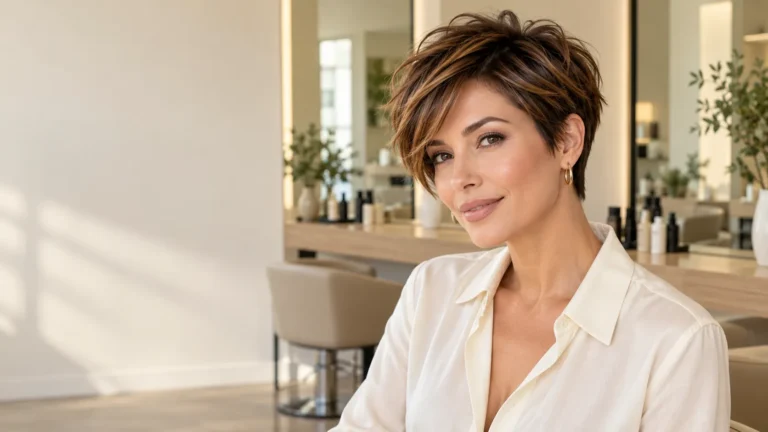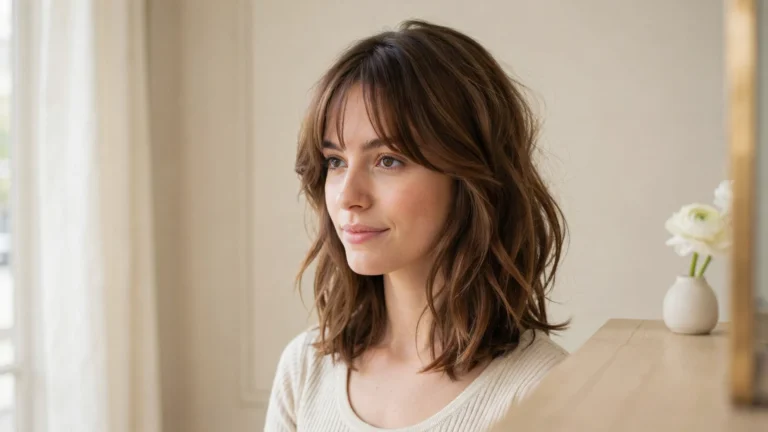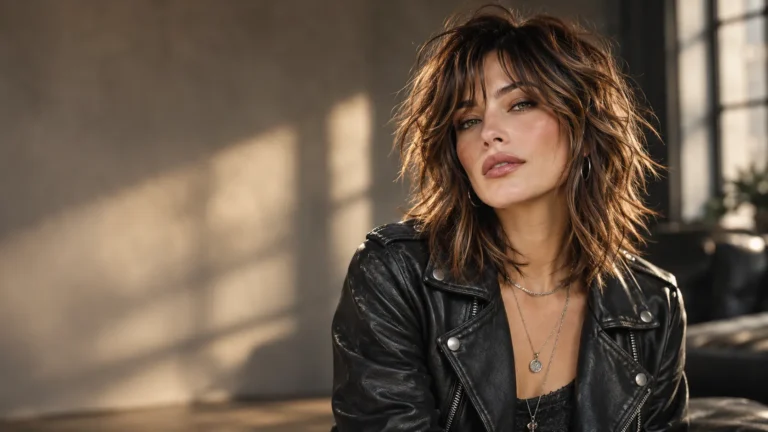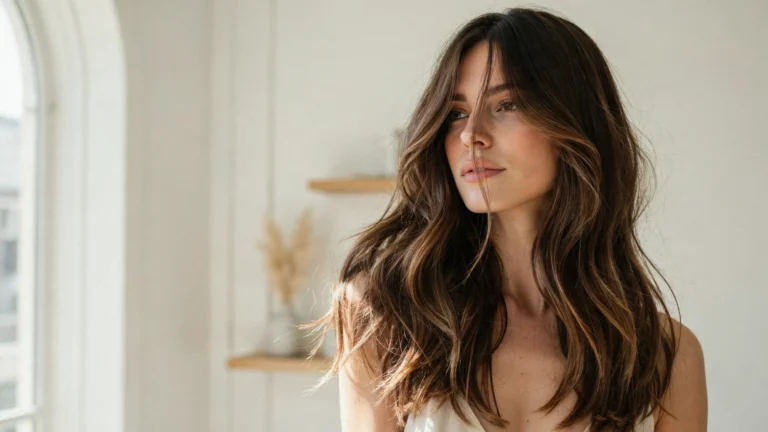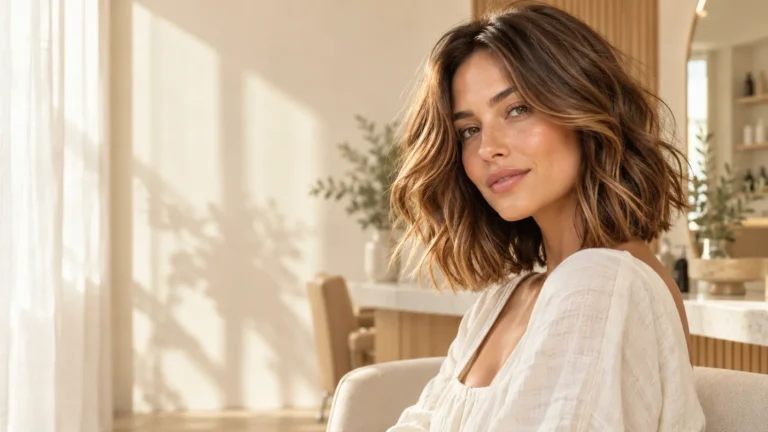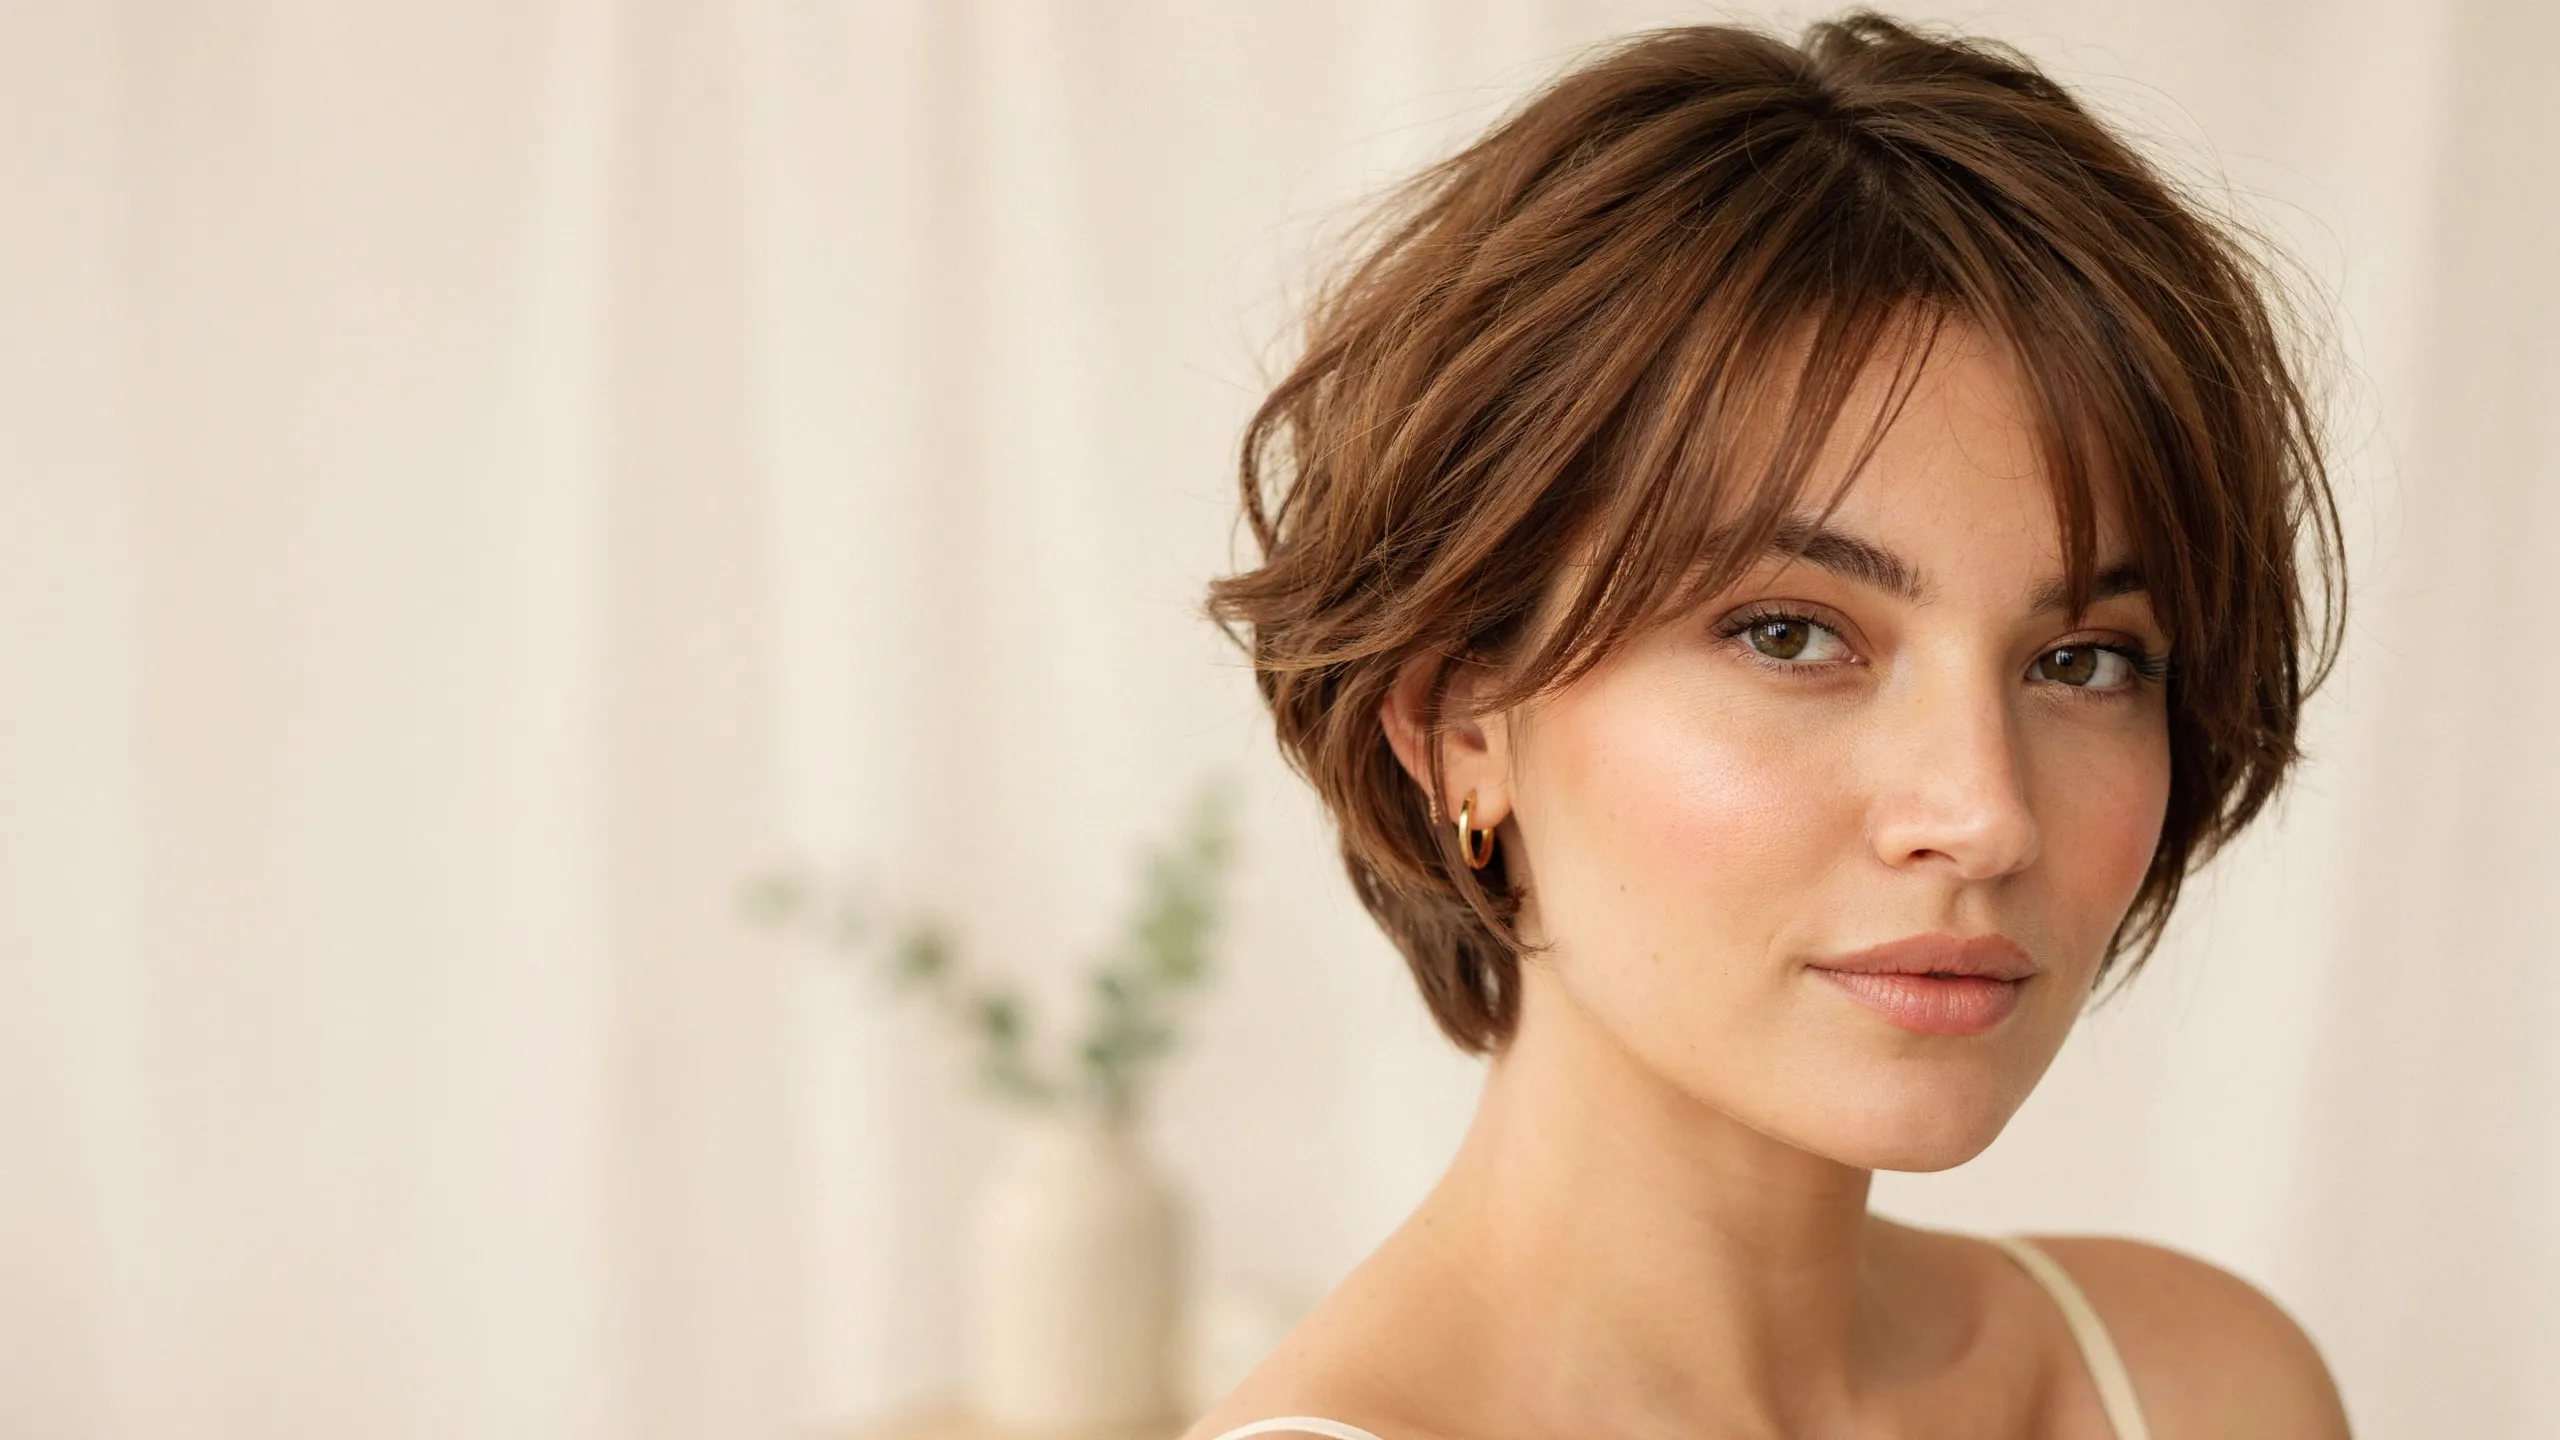
Short on time but still want a fresh, stylish spring look? The right pixie cut can make getting ready feel easier without sacrificing personality or charm.
These Spring Pixie Haircuts offer 22 beautiful ideas that take around five minutes to style, from tousled layers and soft fringes to sleek crops and naturally curly textures. Whether you’re heading to work, meeting friends for coffee, or enjoying a sunny weekend, there’s a short hairstyle to suit your routine and personal style.
The secret is choosing a cut that works with your natural hair texture, not against it. In my experience, simple techniques like finger styling, a quick root lift, or a little lightweight styling cream can make short hair much easier to manage. Explore these looks, find your favorite, and discover a fresh spring style that fits your everyday life.
1. Textured Tousled Pixie
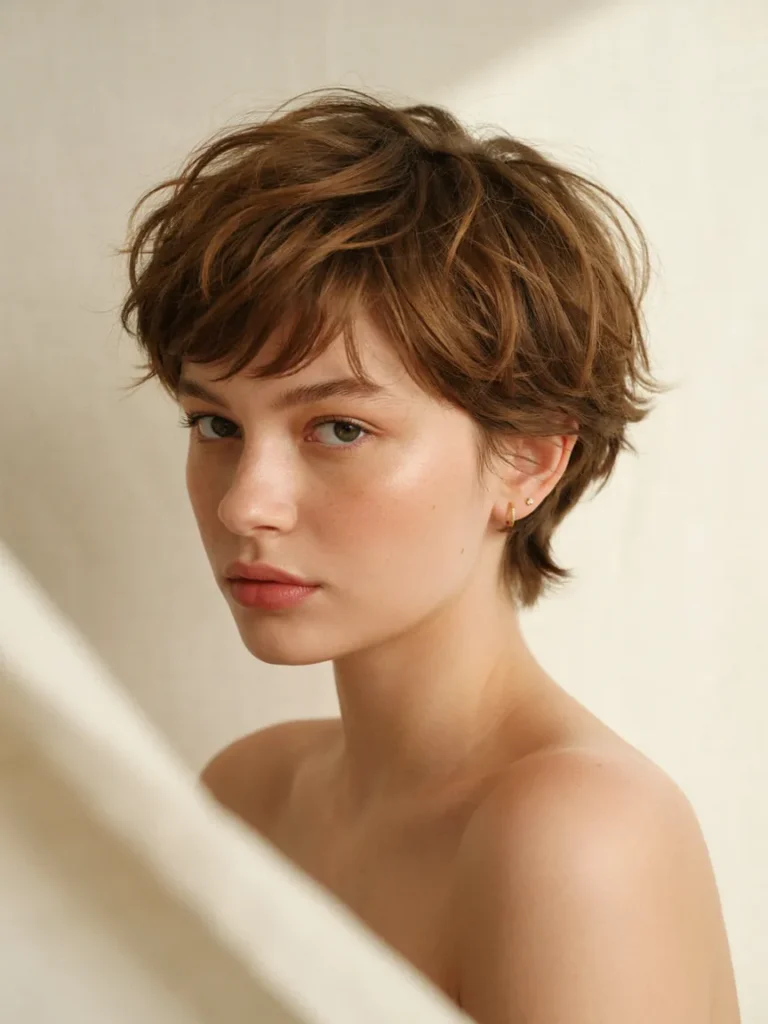
Spring mornings feel easier with a textured pixie that needs very little styling. The secret is a lightweight styling cream that separates the layers without making them stiff. Work a pea-sized amount through slightly damp hair, then use your fingertips to lift the crown and create natural movement.
For busy mornings, let your hair air-dry or use a blow-dryer on low heat while gently lifting the roots. I’ve noticed that shorter layers often respond well to finger styling because their shape becomes visible quickly. Finish by loosening a few pieces around the forehead for a relaxed, lived-in look.
2. Side-Swept Pixie
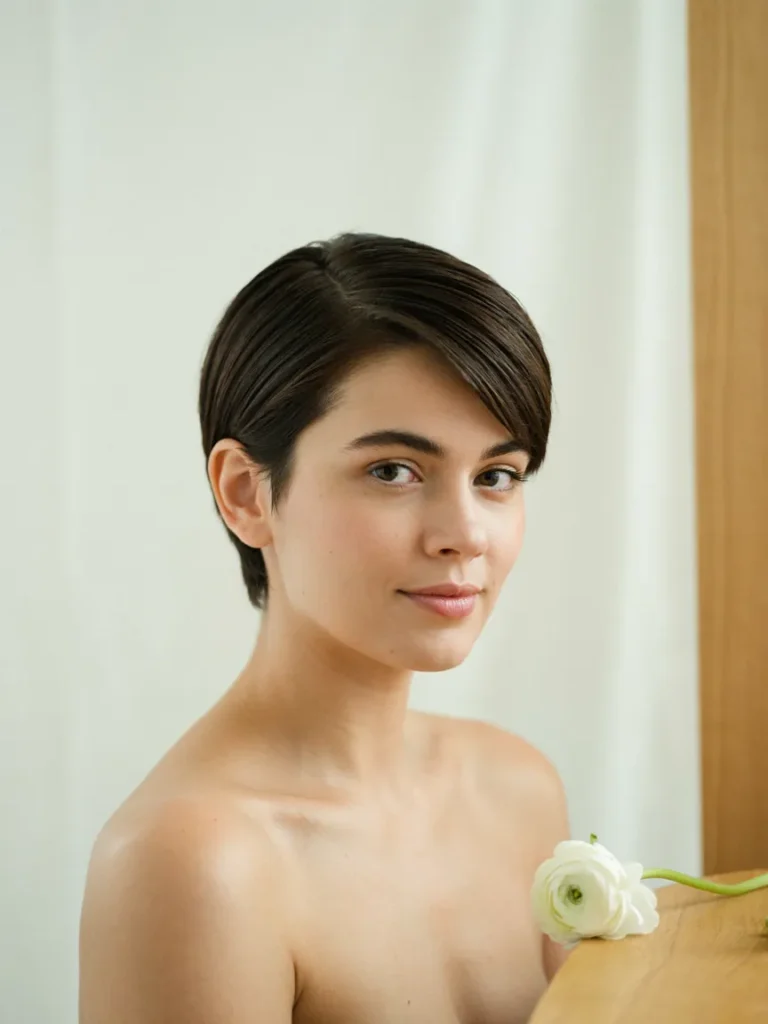
A deep side part can make a simple short haircut look polished in under five minutes. Sweep the longer front section diagonally across the forehead while keeping the sides neat and close to the head. The contrast creates movement without requiring complicated styling or multiple products.
- Start with damp hair: Apply a small amount of lightweight styling lotion.
- Create the part: Use a fine-tooth comb to define a clean side part.
- Direct the fringe: Brush the longer section across your forehead.
- Set the shape: Blow-dry briefly while guiding the hair with your fingers.
- Finish lightly: Smooth flyaways with a tiny amount of styling cream.
This look works especially well for straight or slightly wavy hair with a longer fringe. On mornings when time is limited, refresh the front section with a little water rather than restyling your entire head. Keep the part near your natural growth pattern for a shape that stays comfortable throughout the day.
3. Soft Curly Pixie
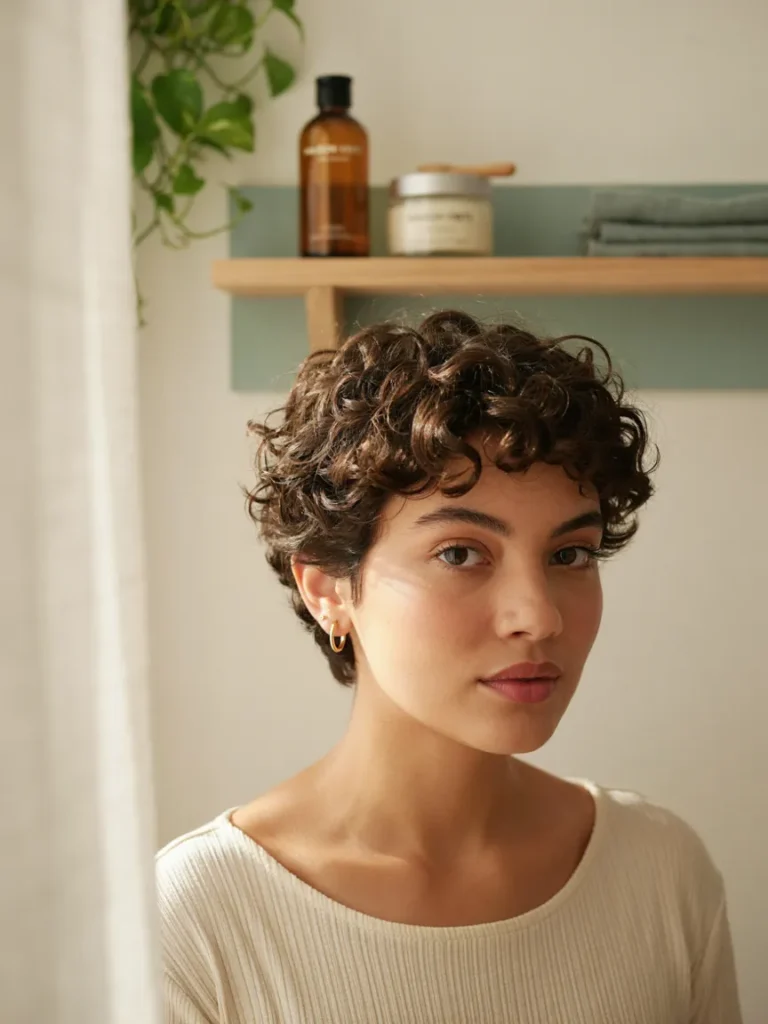
Natural curls bring instant character to a short haircut, and a little moisture helps them look defined rather than fluffy. Start with slightly damp hair and distribute a small amount of leave-in conditioner or curl cream through the curls. Gently scrunch upward with your hands to encourage their natural shape.
Quick Tip:
Keep a small spray bottle of water nearby for morning refreshes. Mist flattened curls lightly, smooth a little curl cream between your palms, and reshape individual sections with your fingertips. Avoid brushing dry curls, as this can separate the curl pattern and create unwanted frizz.
For a five-minute routine, concentrate on the crown, fringe, and any areas flattened during sleep. Let the curls air-dry while getting ready, or use a diffuser on low heat if you need faster results. The goal is defined, touchable texture, not perfectly identical curls. A well-shaped curly pixie should work with your natural pattern instead of fighting it.
4. Feathered Layered Pixie
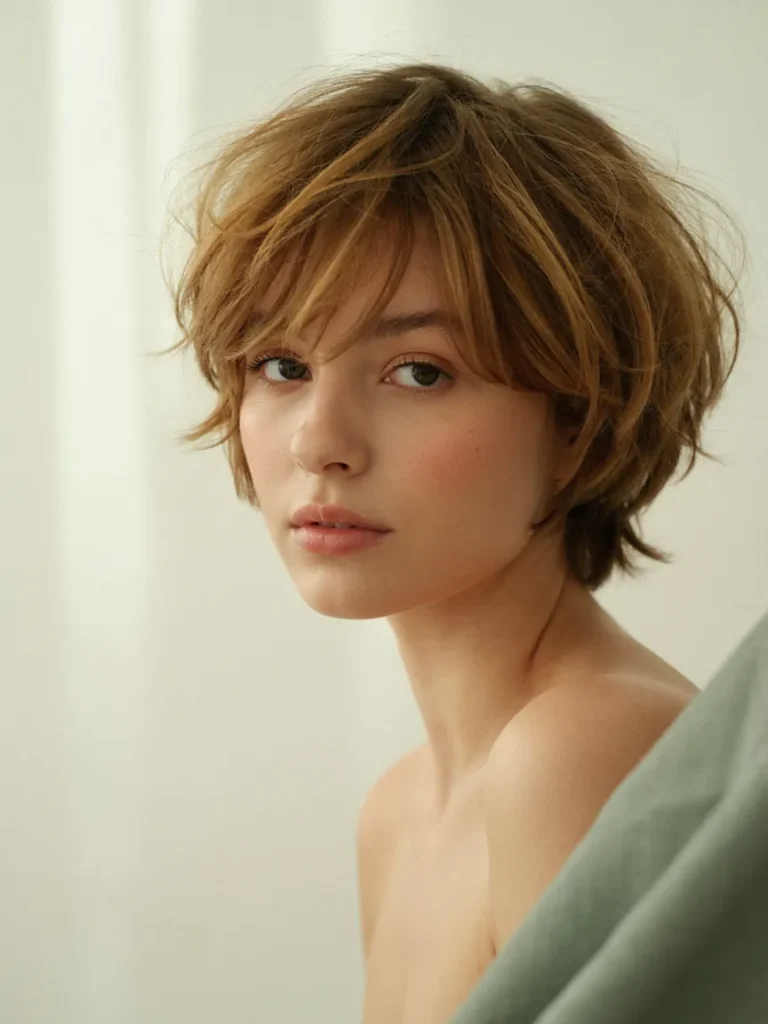
BEFORE: Flat layers can make short hair look heavy around the crown, especially after sleeping. Without a little direction, the ends may sit awkwardly instead of framing the face.
AFTER: Feathered layers create a lighter silhouette with soft movement around the forehead and temples. A quick lift at the roots helps the haircut look airy and refreshed.
To style it, rub a small amount of lightweight mousse between your palms and work it through damp hair. Direct the front layers outward with your fingers while blow-drying on low heat. Finish by separating a few ends for definition. This cut works particularly well for straight or fine hair that needs extra movement without a lengthy morning routine.
5. Spiky Crown Pixie
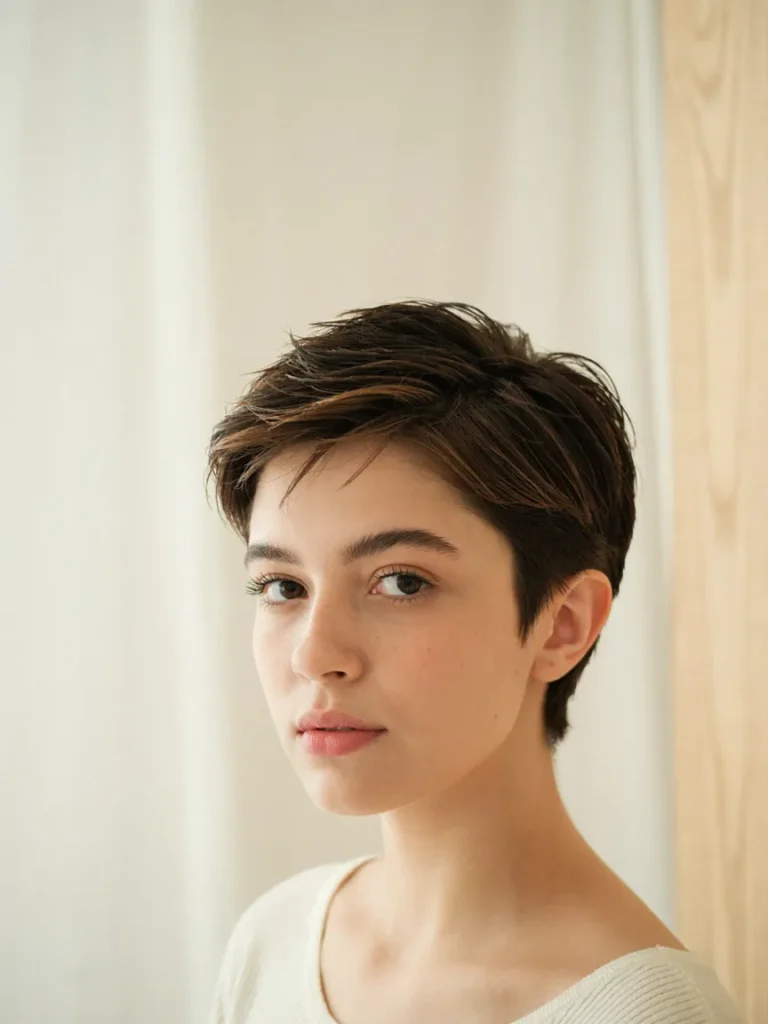
Sharp crown texture gives a short haircut personality without demanding a complicated routine. The trick is to direct the shorter layers upward while keeping the sides controlled, creating definition that looks intentional rather than messy.
- Start dry or slightly damp: Remove excess moisture with a towel if needed.
- Warm the product: Rub a pea-sized amount of matte styling paste between your palms.
- Lift the crown: Pinch small sections upward with your fingertips.
- Define the tips: Twist a few ends gently to create separation.
- Check the sides: Smooth down any pieces that stick out too far.
A matte paste usually provides better texture than a heavy, shiny gel for this finish. Fine hair may need only a tiny amount, while thicker hair might require slightly more product. Keep the spikes soft and irregular for a wearable spring style that takes around five minutes once you know your preferred shape.
6. Sleek Tapered Pixie
| Styling Detail | Option A: Natural Finish | Option B: Sleek Finish |
| Hair preparation | Slightly damp hair | Dry or nearly dry hair |
| Main product | Lightweight styling lotion | Small amount of smoothing cream |
| Styling method | Shape with fingertips | Comb the top into place |
| Final appearance | Soft and relaxed | Smooth and polished |
| Best occasion | Casual spring outings | Workdays or special plans |
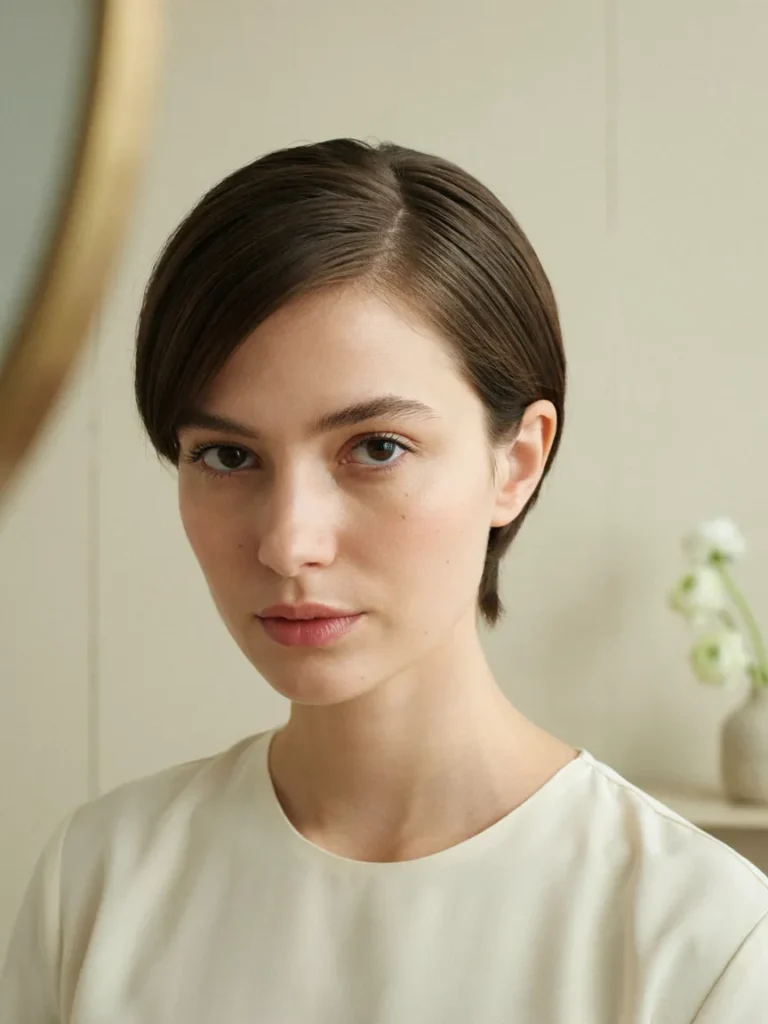
A tapered pixie already has a defined outline, so daily styling can stay simple. Focus on smoothing the sides and directing the top according to your natural part. A tiny amount of smoothing cream can control flyaways without flattening the crown. For the neatest result, ask your stylist to maintain the neckline and side shape regularly.
7. Piecey Fringe Pixie
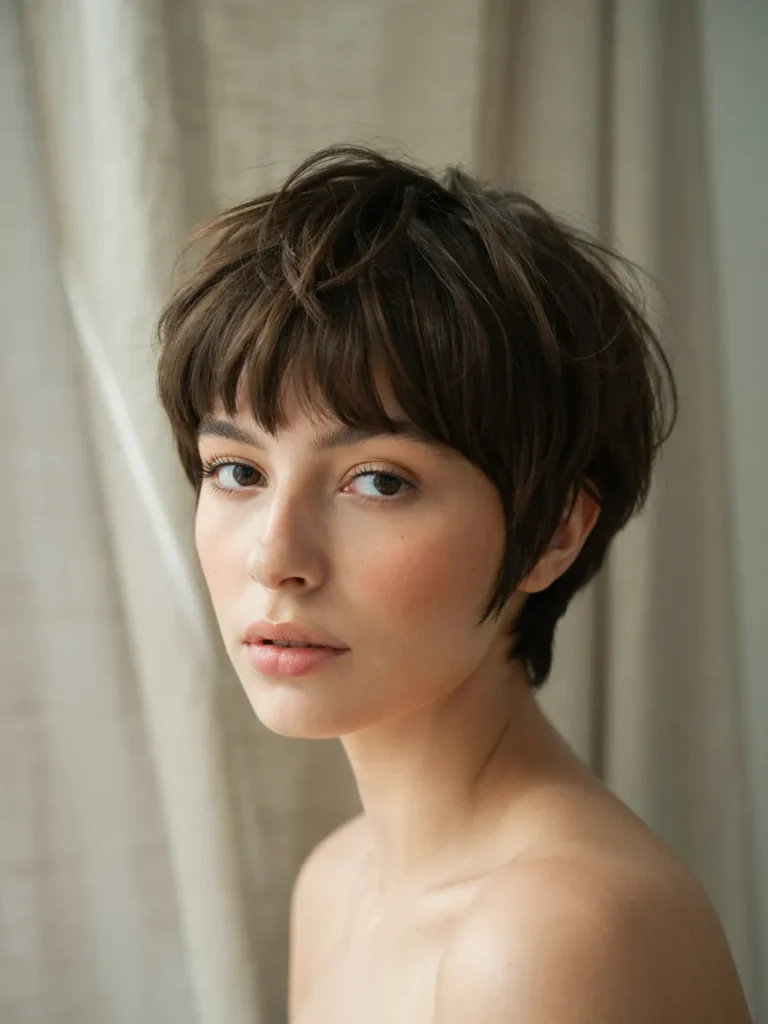
DO
- Apply a pea-sized amount of lightweight texturizing paste to dry fingertips.
- Separate the fringe into three or four soft sections.
- Direct a few strands diagonally across the forehead.
- Keep the crown slightly lifted for natural movement.
DON’T
- Use heavy wax that makes the fringe look greasy.
- Create perfectly identical sections that appear stiff.
- Overload the roots with styling product.
- Flatten the fringe with repeated brushing throughout the day.
A piecey fringe gives a short haircut definition without requiring a full styling session. Focus on the front first, because those strands frame your face and attract the most attention. In my experience, a little separation usually looks more natural than heavily sculpted pieces. Finish with a light mist of flexible-hold hairspray if needed.
8. Air-Dried Wavy Pixie
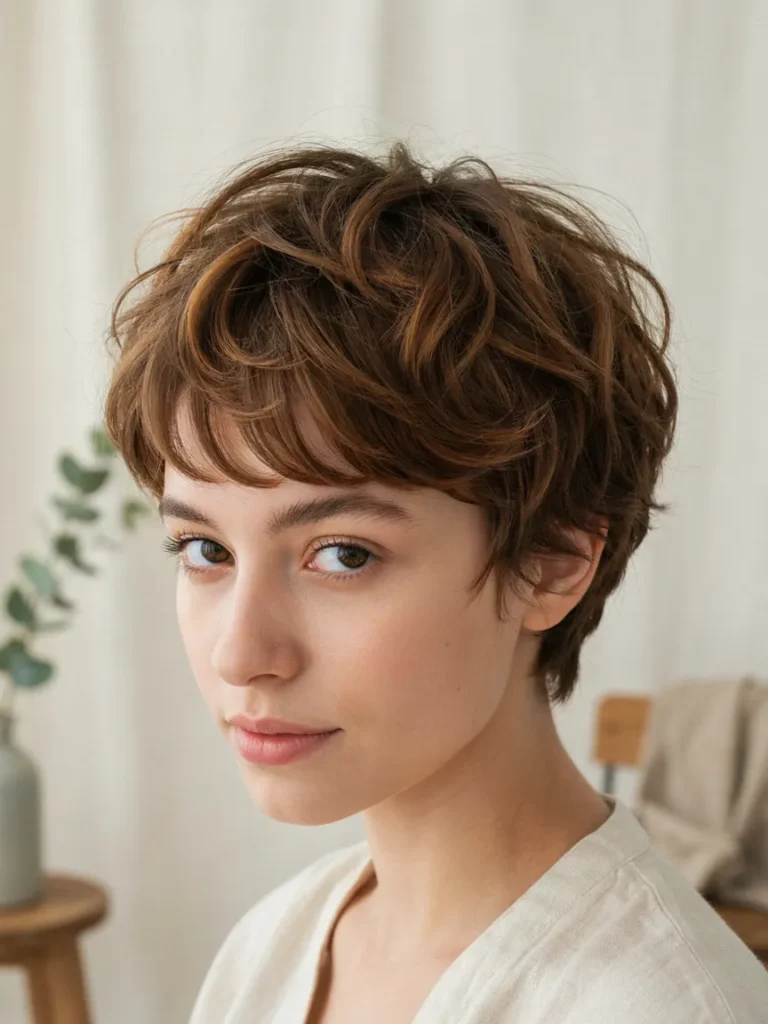
Time: Approximately 3 to 5 minutes of active styling
Skill Level: Beginner-friendly
Best For: Naturally wavy hair
Products: Lightweight leave-in conditioner or wave cream
Result: Soft, relaxed texture with natural movement
A naturally wavy pixie can look fresh with very little effort when you work with your existing texture. After washing, gently squeeze excess water from your hair using a soft microfiber towel. Apply a small amount of wave cream, then scrunch the longer sections with your fingertips instead of combing them straight.
For a quick morning refresh, mist flattened areas with water and reshape the waves individually. Allow your hair to air-dry while you get dressed, or use a diffuser on low heat when time is short. Keep the product light so the waves remain flexible. Your natural pattern provides most of the styling, leaving you with a soft spring finish and minimal fuss.
9. Voluminous Root Pixie
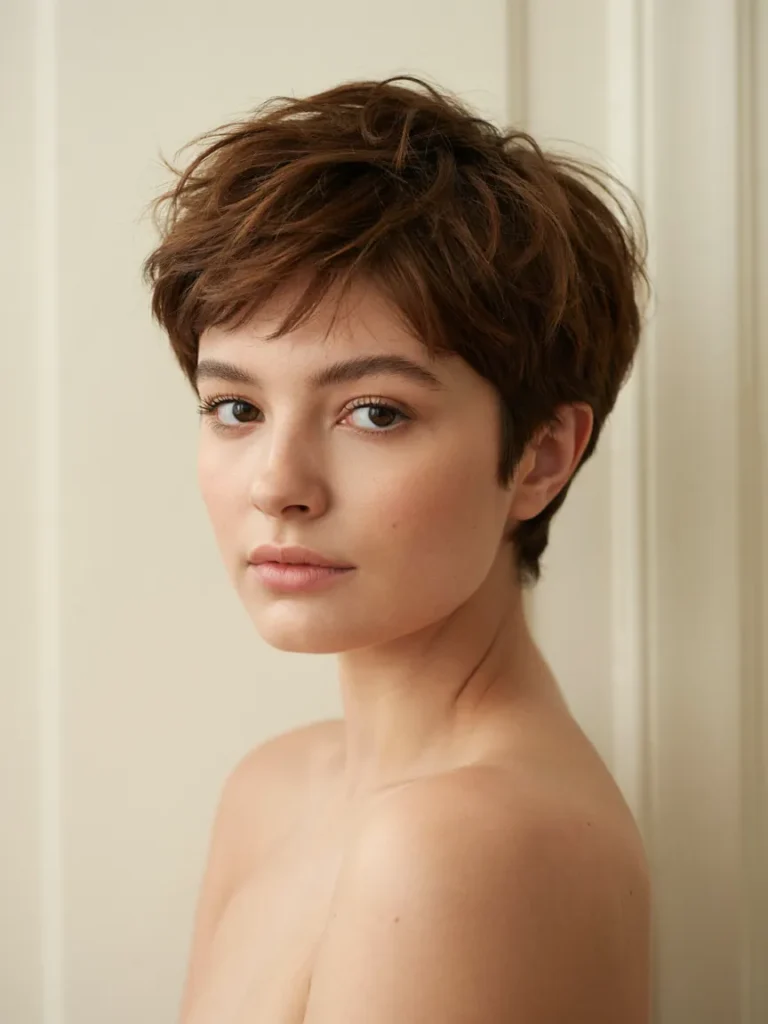
A little lift at the roots can make a short haircut look fuller and more structured in minutes. Begin with slightly damp hair and apply a small amount of volumizing mousse near the crown. Use your fingertips to lift the roots as you direct warm air from a blow-dryer toward them.
Once the roots are dry, let the hair cool briefly before loosening the top with your fingers. This helps preserve movement without making the style look stiff. Avoid applying heavy creams directly to the crown, especially if your hair becomes oily quickly. A few seconds of root-focused styling can give a flat pixie a fresher outline while keeping the rest of your routine simple.
10. Messy Bedhead Pixie
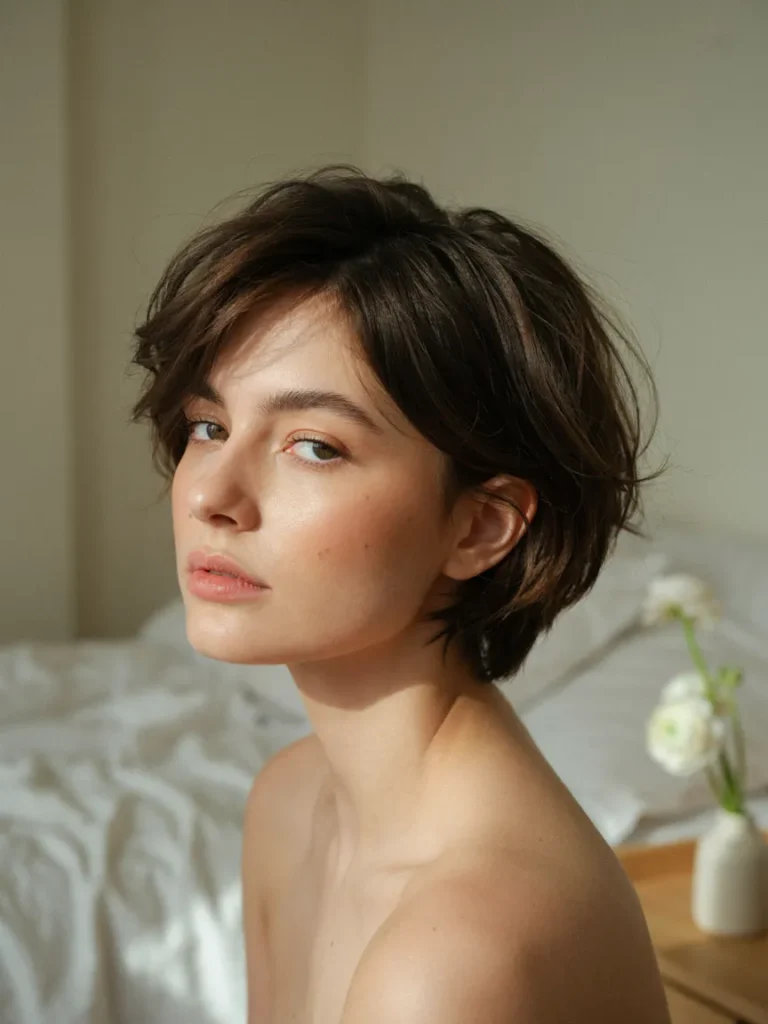
- Start with dry hair or lightly mist flattened sections with water.
- Rub a small amount of lightweight texturizing cream between your palms.
- Ruffle the crown gently with your fingertips to create natural lift.
- Twist a few ends in different directions for a relaxed finish.
- Smooth the sides slightly to keep the overall shape balanced.
The beauty of a messy pixie is its imperfect texture, so you don’t need to make every strand behave. Concentrate on the crown and front layers, where a little movement makes the biggest visual difference. For finer hair, choose a lightweight texturizing spray instead of a rich cream. The result should feel soft, casual, and ready for a busy spring morning.
11. Soft Fringe Pixie
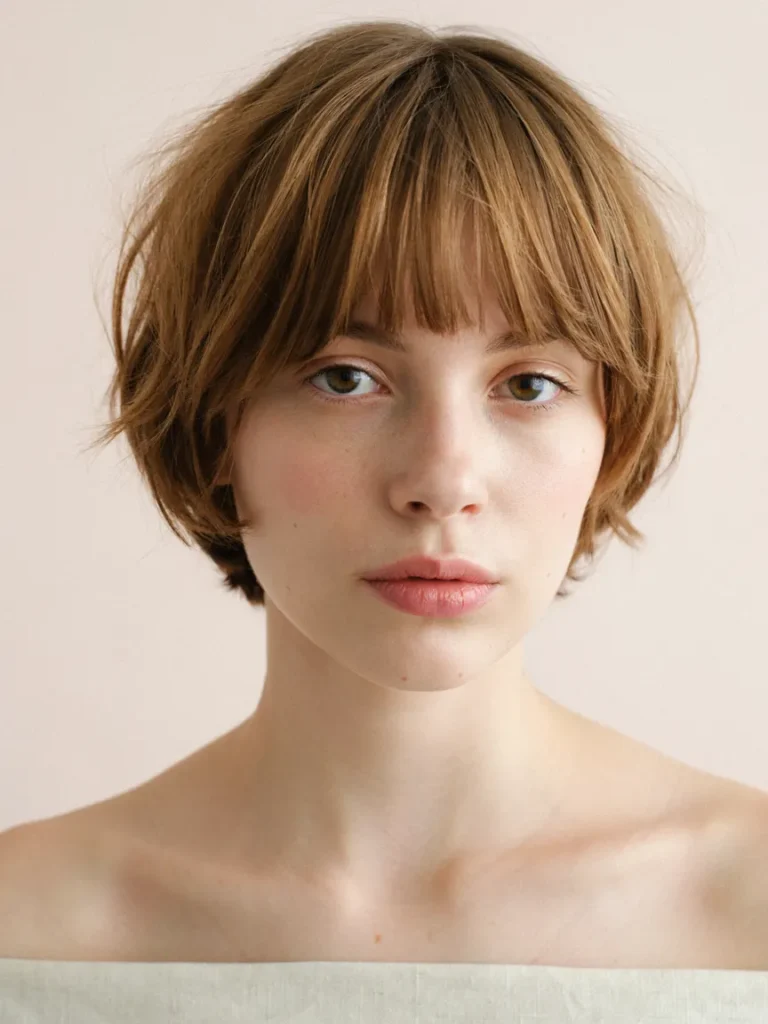
Quick Tip:
Style the fringe before the rest of your hair. Lightly dampen the front section, then blow-dry it from side to side using your fingers or a small brush. This helps prevent the fringe from separating into unwanted gaps.
A soft fringe adds gentle framing without the sharp definition of a blunt bang. Once the front is dry, use a small amount of styling lotion to guide the remaining layers into place. Avoid applying too much product near the forehead, where natural oils can make the hair look flat. If your fringe tends to separate during the day, keep a small comb nearby for a quick adjustment.
12. Grown-Out Pixie Bob
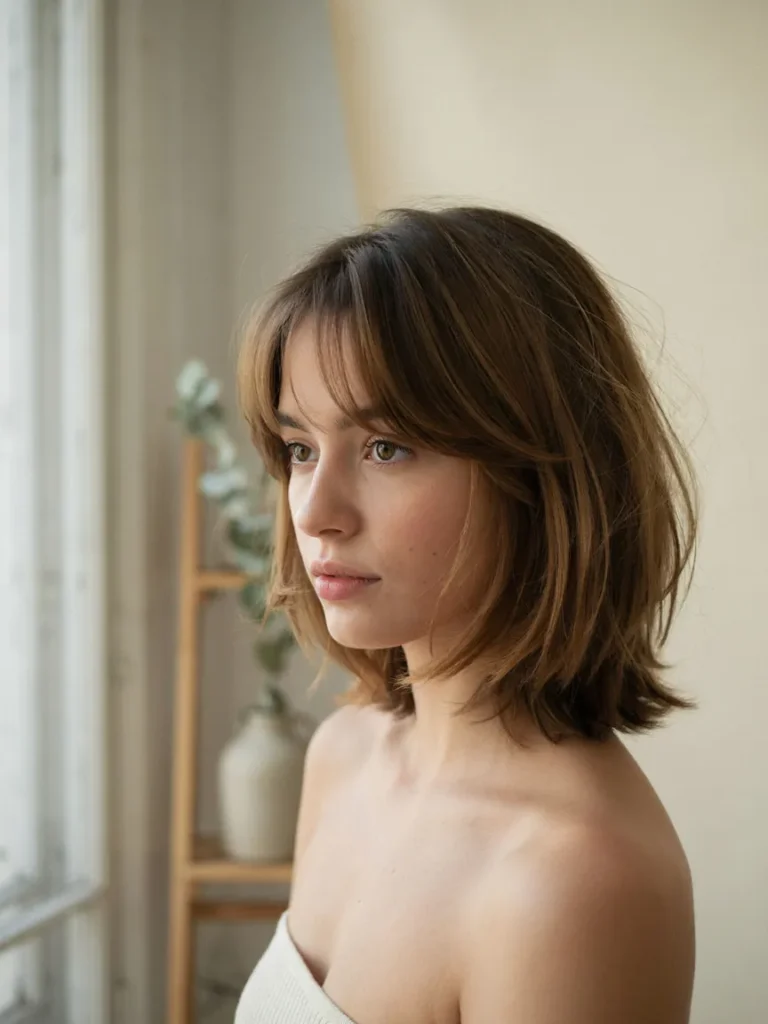
BEFORE: A growing pixie can develop uneven-looking sections as the sides and fringe gain length. The crown may lose its original shape, making daily styling feel more complicated than expected.
AFTER: A simple side part and softly tucked sides create a more intentional silhouette. The longer fringe frames the face, while a little root lift keeps the top from looking flat.
Start by creating your natural part and smoothing the sides with your fingertips. Direct the longer front section across the forehead, then tuck one side behind the ear if the length allows. A lightweight styling cream can control flyaways without hiding the layers. This transitional cut is especially useful if you’re growing out a pixie but still want a polished, five-minute morning routine.
13. Finger-Styled Crop
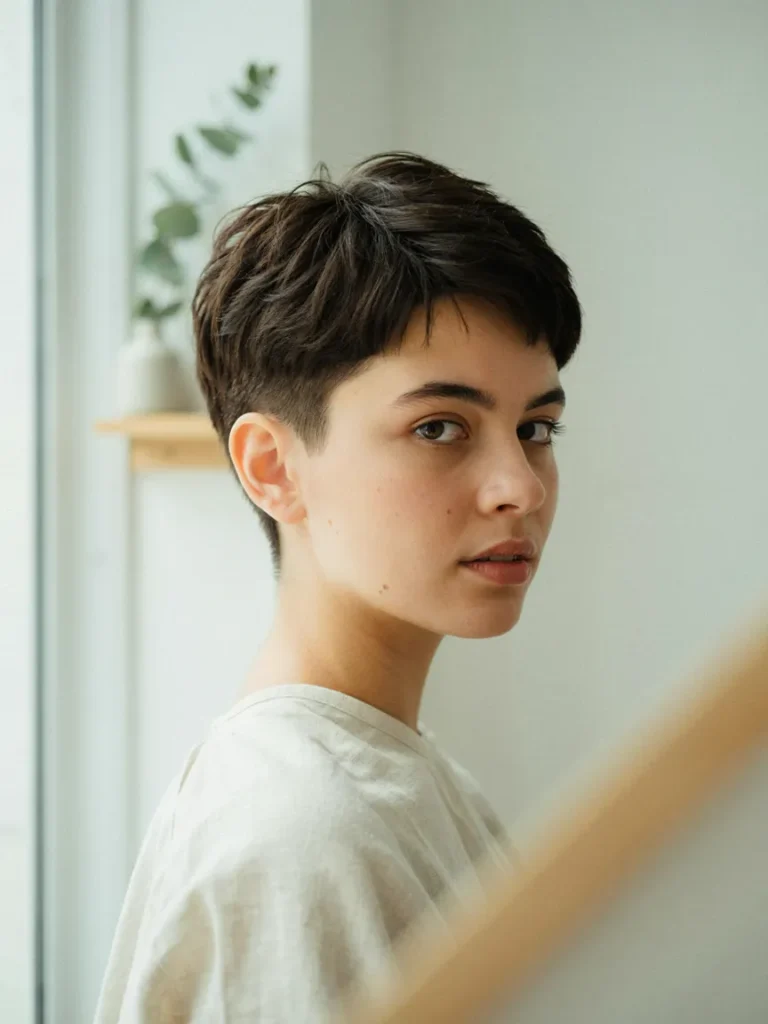
A finger-styled crop proves that a polished short haircut doesn’t need a collection of styling tools. Start with slightly damp hair, distribute a small amount of lightweight styling cream, and use your fingertips to guide the top into place.
- Prepare the hair: Blot away excess water with a soft towel.
- Apply product: Spread a pea-sized amount of styling cream between your palms.
- Shape the crown: Move your fingers backward or diagonally, following the haircut’s natural direction.
- Define the front: Separate a few strands for subtle texture.
- Finish the sides: Smooth down any stray pieces with your palms.
This technique works especially well for short, manageable layers that already have a good shape. If your hair is thick, work in small sections instead of pushing everything into place at once. The finished crop should have natural definition without looking stiff or overly styled.
14. Polished Pixie Quiff
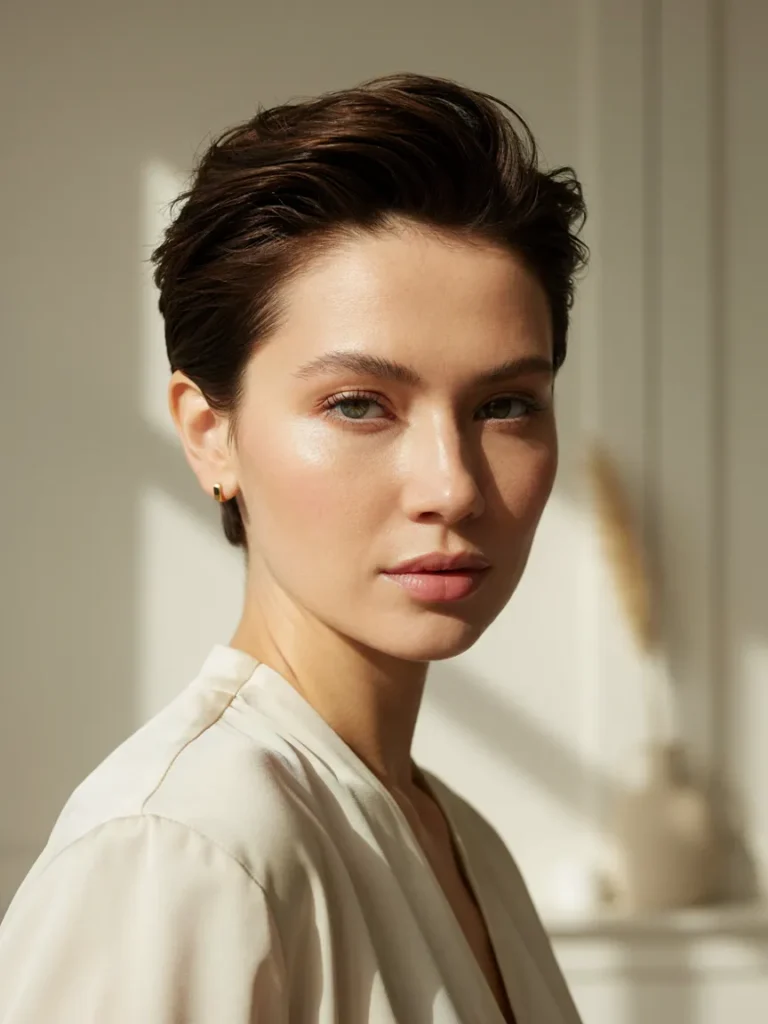
| Styling Detail | Option A: Soft Quiff | Option B: Defined Quiff |
| Product | Lightweight mousse | Small amount of styling paste |
| Front section | Gently lifted | Swept upward and backward |
| Finish | Soft and flexible | More structured |
| Styling tool | Fingers or small brush | Small round brush |
| Best use | Everyday mornings | A more polished occasion |
A pixie quiff adds height at the front while keeping the rest of the haircut neat. For a softer result, lift the front section with your fingers as you blow-dry on low heat. For stronger definition, use a small round brush to guide the hair upward and backward.
Keep the product concentrated near the front rather than coating the entire head. Too much styling paste can weigh down shorter layers and reduce the lift you’re trying to create. A small amount of flexible-hold hairspray can help maintain the shape without making the hair feel rigid.
15. Textured Side Part
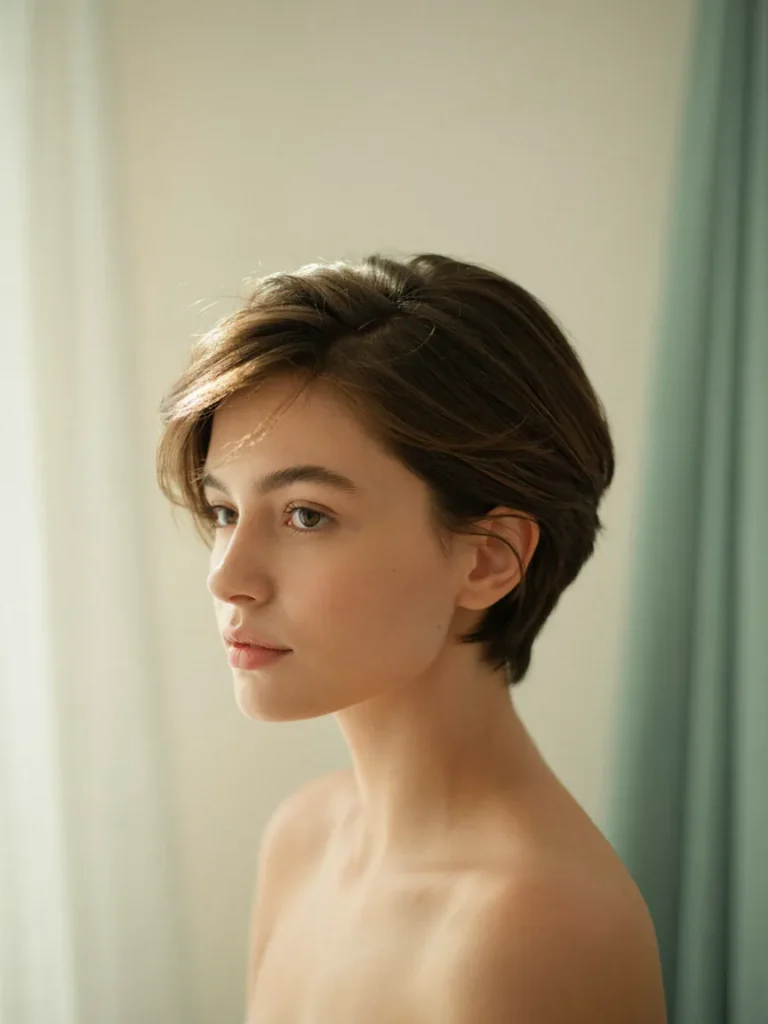
DO
- Create a side part that follows your natural hair growth.
- Lift the roots gently while blow-drying the top.
- Use a small amount of matte cream to separate the ends.
- Keep the sides smooth for a balanced silhouette.
DON’T
- Force a part that repeatedly falls out of place.
- Apply heavy oil directly to the roots.
- Overwork the front until it loses its natural movement.
- Use excessive hairspray that leaves the hair stiff.
A textured side part combines the structure of a neat haircut with the softness of separated layers. It’s especially practical when you want your pixie to look finished without spending several minutes on every section. Adjust the part slightly to find the most comfortable direction, then use your fingers to create subtle definition. The best result feels natural and stays easy to refresh throughout the day.
16. Natural Gray Pixie
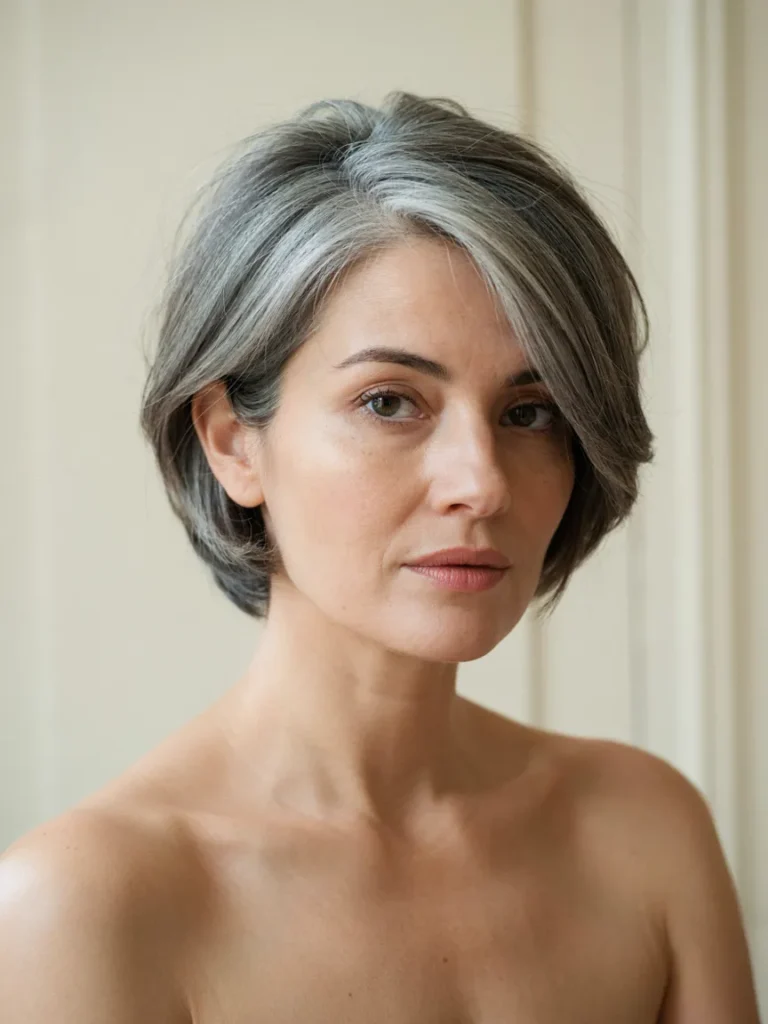
Best For: Natural silver or salt-and-pepper hair
Styling Time: 3 to 5 minutes
Skill Level: Beginner-friendly
Finish: Soft, refined, and lightly textured
Natural gray hair looks especially striking in a short pixie when the layers have room to move. Start by smoothing a lightweight leave-in product through slightly damp hair, then direct the top with your fingers as it dries. A small amount of styling cream can separate individual strands without hiding the beautiful mix of silver and charcoal tones.
For a quick morning refresh, dampen your palms and smooth any flattened areas back into shape. If your silver hair looks dull, consider a purple shampoo occasionally, following the product directions, rather than adding several styling products every day. A well-shaped gray pixie offers a clean, modern finish with very little daily effort.
17. Side-Tucked Pixie
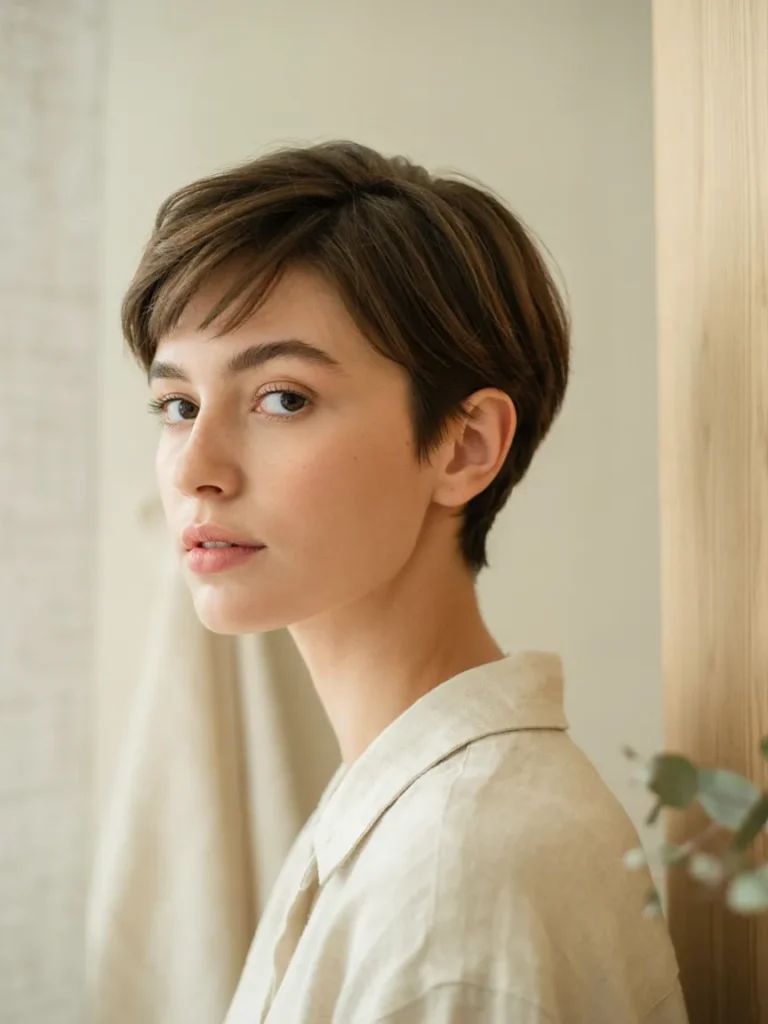
A simple ear tuck can make a short haircut look instantly more deliberate. Begin with your usual part, then guide the longer section behind one ear while allowing the crown to retain a little natural volume.
- Refresh the sides: Smooth a small amount of lightweight cream over any flyaways.
- Set your part: Use your fingers or a comb to establish the preferred direction.
- Tuck one side: Slide the longer section gently behind your ear.
- Lift the crown: Loosen the top with your fingertips so it doesn’t look flat.
- Check the outline: Adjust the fringe to keep the shape balanced.
This style is useful on warmer spring days when you want hair away from your face without adding clips or accessories. If the tucked section keeps slipping out, a discreet bobby pin can help secure it. Keep the opposite side slightly softer for an easy, asymmetrical finish that takes only a few minutes to achieve.
18. Mini Pompadour Pixie
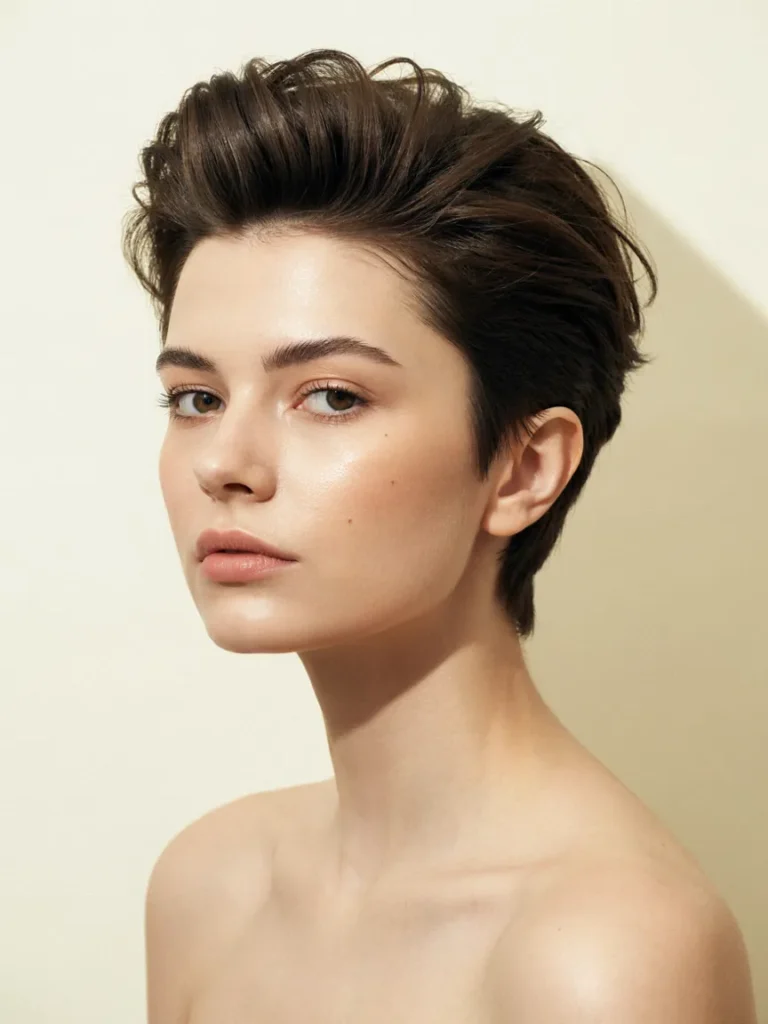
| Styling Detail | Option A: Casual Lift | Option B: Sleek Lift |
| Preparation | Slightly damp hair | Nearly dry hair |
| Product | Volumizing mousse | Lightweight styling paste |
| Front styling | Lift with fingers | Brush upward and backward |
| Overall shape | Soft and airy | Smooth and defined |
| Best occasion | Everyday wear | Polished outings |
A mini pompadour gives a short pixie extra height at the front without requiring a dramatic hairstyle. Apply a little volumizing mousse near the roots, then lift the front section while directing warm air toward it. Let the hair cool briefly before shaping the ends with your fingers.
For a sleeker version, use a small amount of styling paste to guide the front backward while keeping the sides close to the head. Avoid applying too much product, as heavy layers can collapse the volume. This technique works best when the front has enough length to lift and hold its shape comfortably.
19. Soft Shaggy Pixie
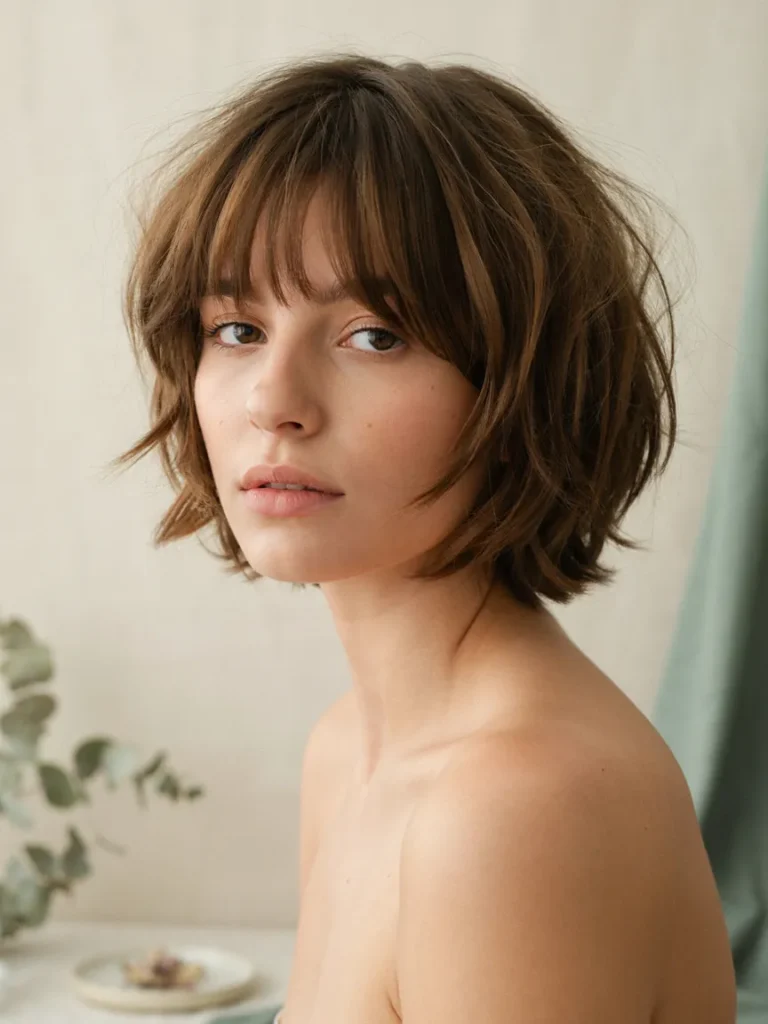
- Start with clean layers: Lightly mist dry hair if sections look flattened.
- Add texture: Work a small amount of lightweight texturizing cream through the ends.
- Lift the crown: Ruffle the roots gently with your fingertips.
- Shape the fringe: Separate the front into soft, irregular pieces.
- Finish the sides: Smooth any bulky sections without flattening the layers.
A shaggy pixie relies on uneven layers and natural movement, making it a practical choice for quick spring styling. Rather than trying to make every strand sit perfectly, concentrate on creating texture around the crown and fringe. Fine hair usually benefits from lightweight products, while thicker hair may need a little extra control. Keep the finish flexible so the haircut retains its relaxed shape throughout the day.
20. Sleek Wet-Look Pixie
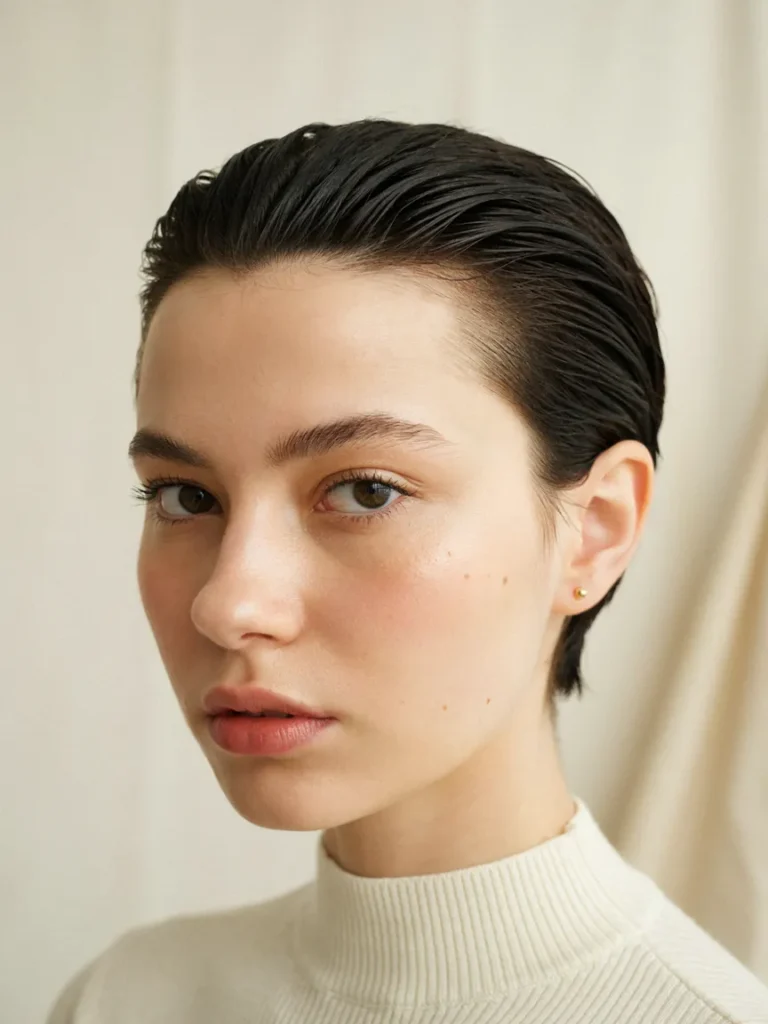
Time: Approximately 3 to 5 minutes
Product: Lightweight styling gel or glossy styling cream
Skill Level: Beginner-friendly
Best For: Straight hair and pixies with longer top layers
Finish: Smooth, defined, and softly glossy
A subtle wet-look finish creates a polished appearance with very little styling time. Start with damp, towel-dried hair and distribute a small amount of lightweight gel between your palms. Smooth the top backward or diagonally, following the shape of your cut, then use your fingers or a fine-tooth comb to refine the direction.
Keep the sides close to the head while allowing a little natural movement at the front. Use less product than you think you need, adding a tiny amount only if certain sections resist shaping. Avoid heavy application near the roots if your hair becomes oily quickly. The result should have a healthy-looking sheen rather than appearing soaked or stiff.
21. Wispy Layered Pixie
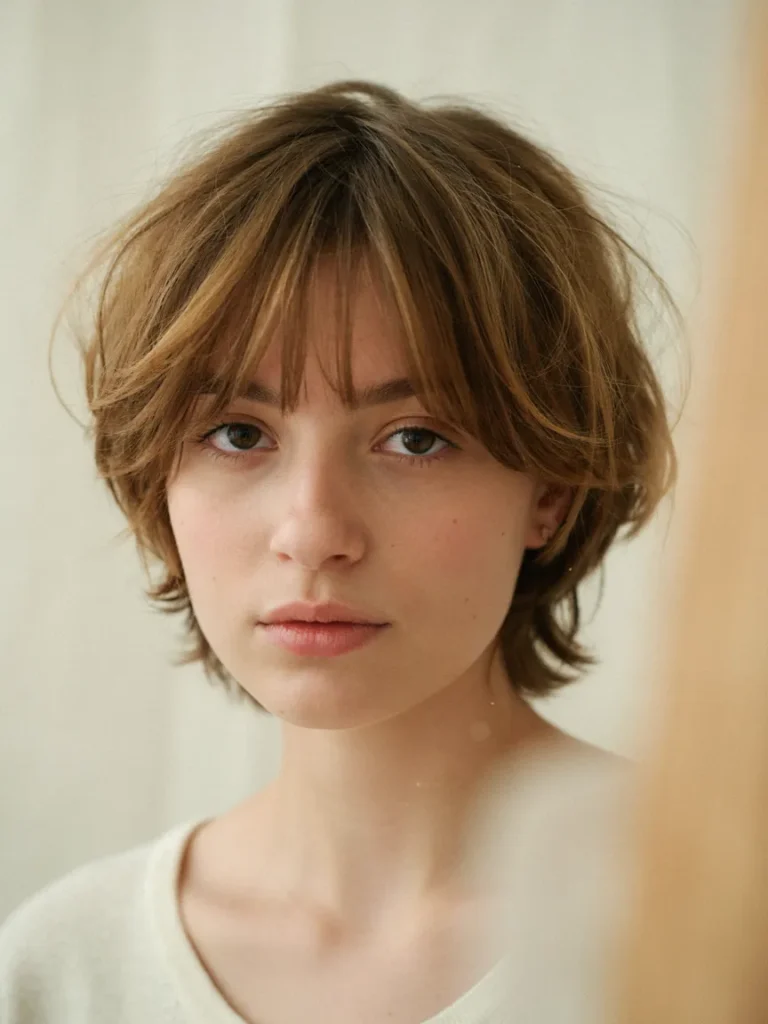
Quick Tip:
Use a lightweight styling lotion rather than a heavy wax to preserve the delicate movement of wispy layers. Apply a tiny amount to slightly damp hair, then guide the fringe and ends into place with your fingertips.
Wispy layers create softness around the forehead, ears, and neckline without requiring elaborate styling. After shaping the front, gently lift the crown and let the shorter pieces fall naturally into position. If the ends look separated or dry, smooth them with clean fingertips instead of adding more product. This approach keeps the haircut light and touchable, making it especially useful for busy mornings when you want a neat finish without losing natural movement.
22. Classic French Pixie
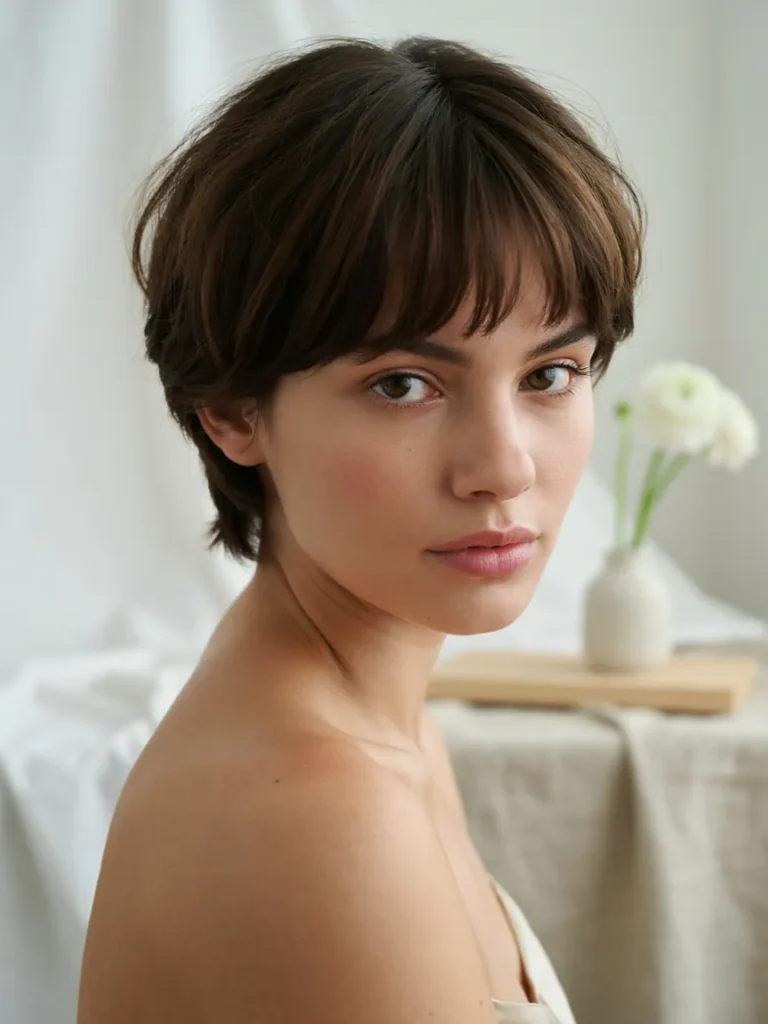
A classic French pixie combines soft structure with a relaxed finish, making it a lovely choice for mornings when you want your hair to look polished quickly. Start by creating a subtle side part and smoothing the longer front section across your forehead with your fingertips.
For extra refinement, use a small amount of lightweight styling cream to control flyaways while preserving the hair’s natural movement. If your hair is straight, a brief blow-dry can help the fringe sit neatly. For slightly wavy hair, reshape the front with damp fingers and allow the texture to settle naturally. The key is keeping the outline tidy without overworking the layers. A well-shaped cut does most of the work, leaving you with an elegant spring hairstyle in around five minutes.
CONCLUSION
A fresh haircut doesn’t have to mean spending extra time in front of the mirror. These 22 short styles offer plenty of inspiration, whether you love soft waves, textured layers, polished fringes, or a classic French-inspired pixie. The best choice is one that suits your hair texture, feels comfortable, and fits your daily routine. Start with one of these Spring Pixie Haircuts and experiment with simple styling techniques until you find your favorite look. Save this article on Pinterest for your next salon visit, try a new style this spring, and share it with a friend who loves easy, beautiful hair. Your next favorite haircut might be just five minutes away!